Some deliveries may take a little longer than usual due to regional shipping conditions.

DOWNLOAD THE APP


Customer Services
Copyright © 2025 Desertcart Holdings Limited
DOWNLOAD THE APP
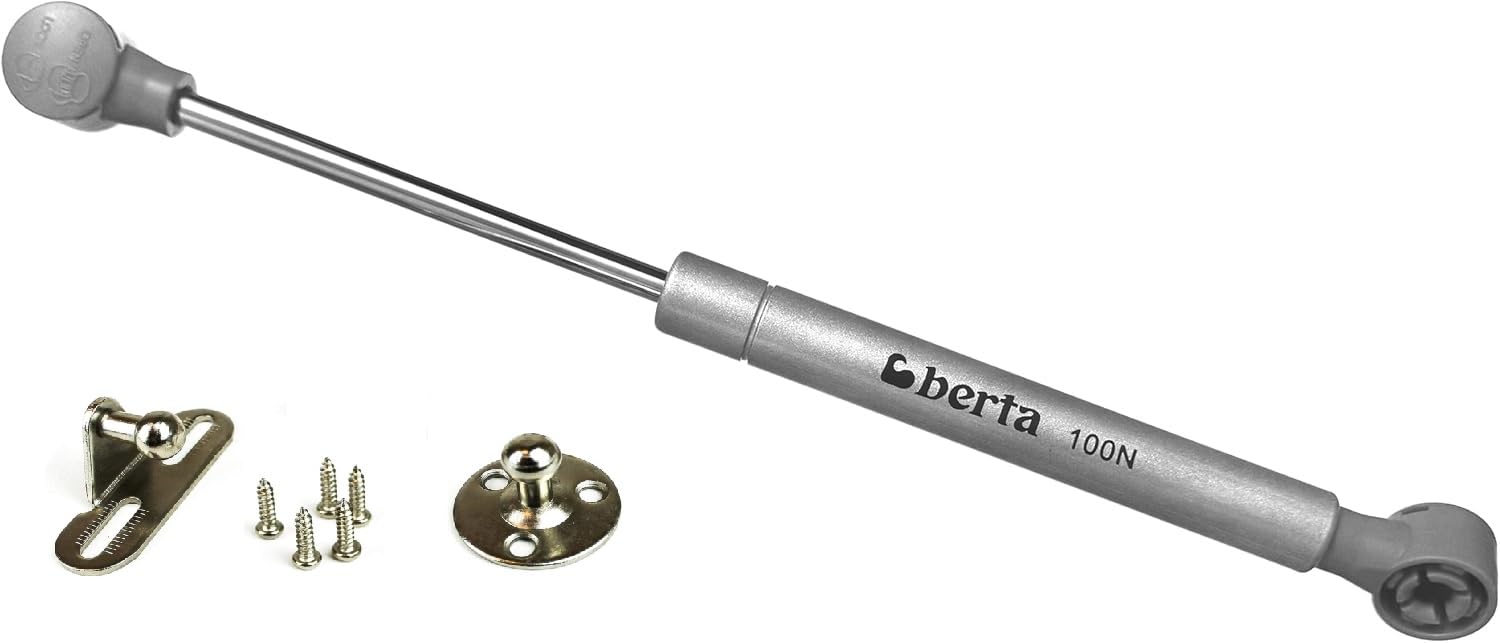
🚪 Elevate your space with silent strength and sleek support!
The Berta 10 Inch 100N Hydraulic Gas Springs provide robust 22 lb load support with smooth, silent soft-open and close action. Crafted from durable alloy steel, these struts come with all necessary brackets and screws for easy installation, perfectly suited for cabinets, furniture, and RV platforms requiring a controlled 90-100° lid lift.
| Material | Alloy Steel |
| Brand | Berta |
| Product Dimensions | 10"L x 0.6"W |
| Finish Type | Unfinished |
| Mounting Type | Door Mount |
| Hole Count | 3 |
| Weight Limit | 10 Kilograms |
| Unit Count | 2 Count |
| Color | Silver |
| Manufacturer | Berta |
| Part Number | Gas Spring |
| Item Weight | 8.4 ounces |
| Item model number | Gas Spring |
| Is Discontinued By Manufacturer | No |
| Size | Silver |
| Style | Modern |
| Finish | Unfinished |
| Item Package Quantity | 2 |
| Number Of Pieces | 2 |
| Maximum Weight Capacity | 10 Kilograms |
| Included Components | Bracket and Screws |
| Batteries Included? | No |
| Batteries Required? | No |
Trustpilot
2 weeks ago
1 month ago