

🏡 Elevate your space with smart style and lasting strength!
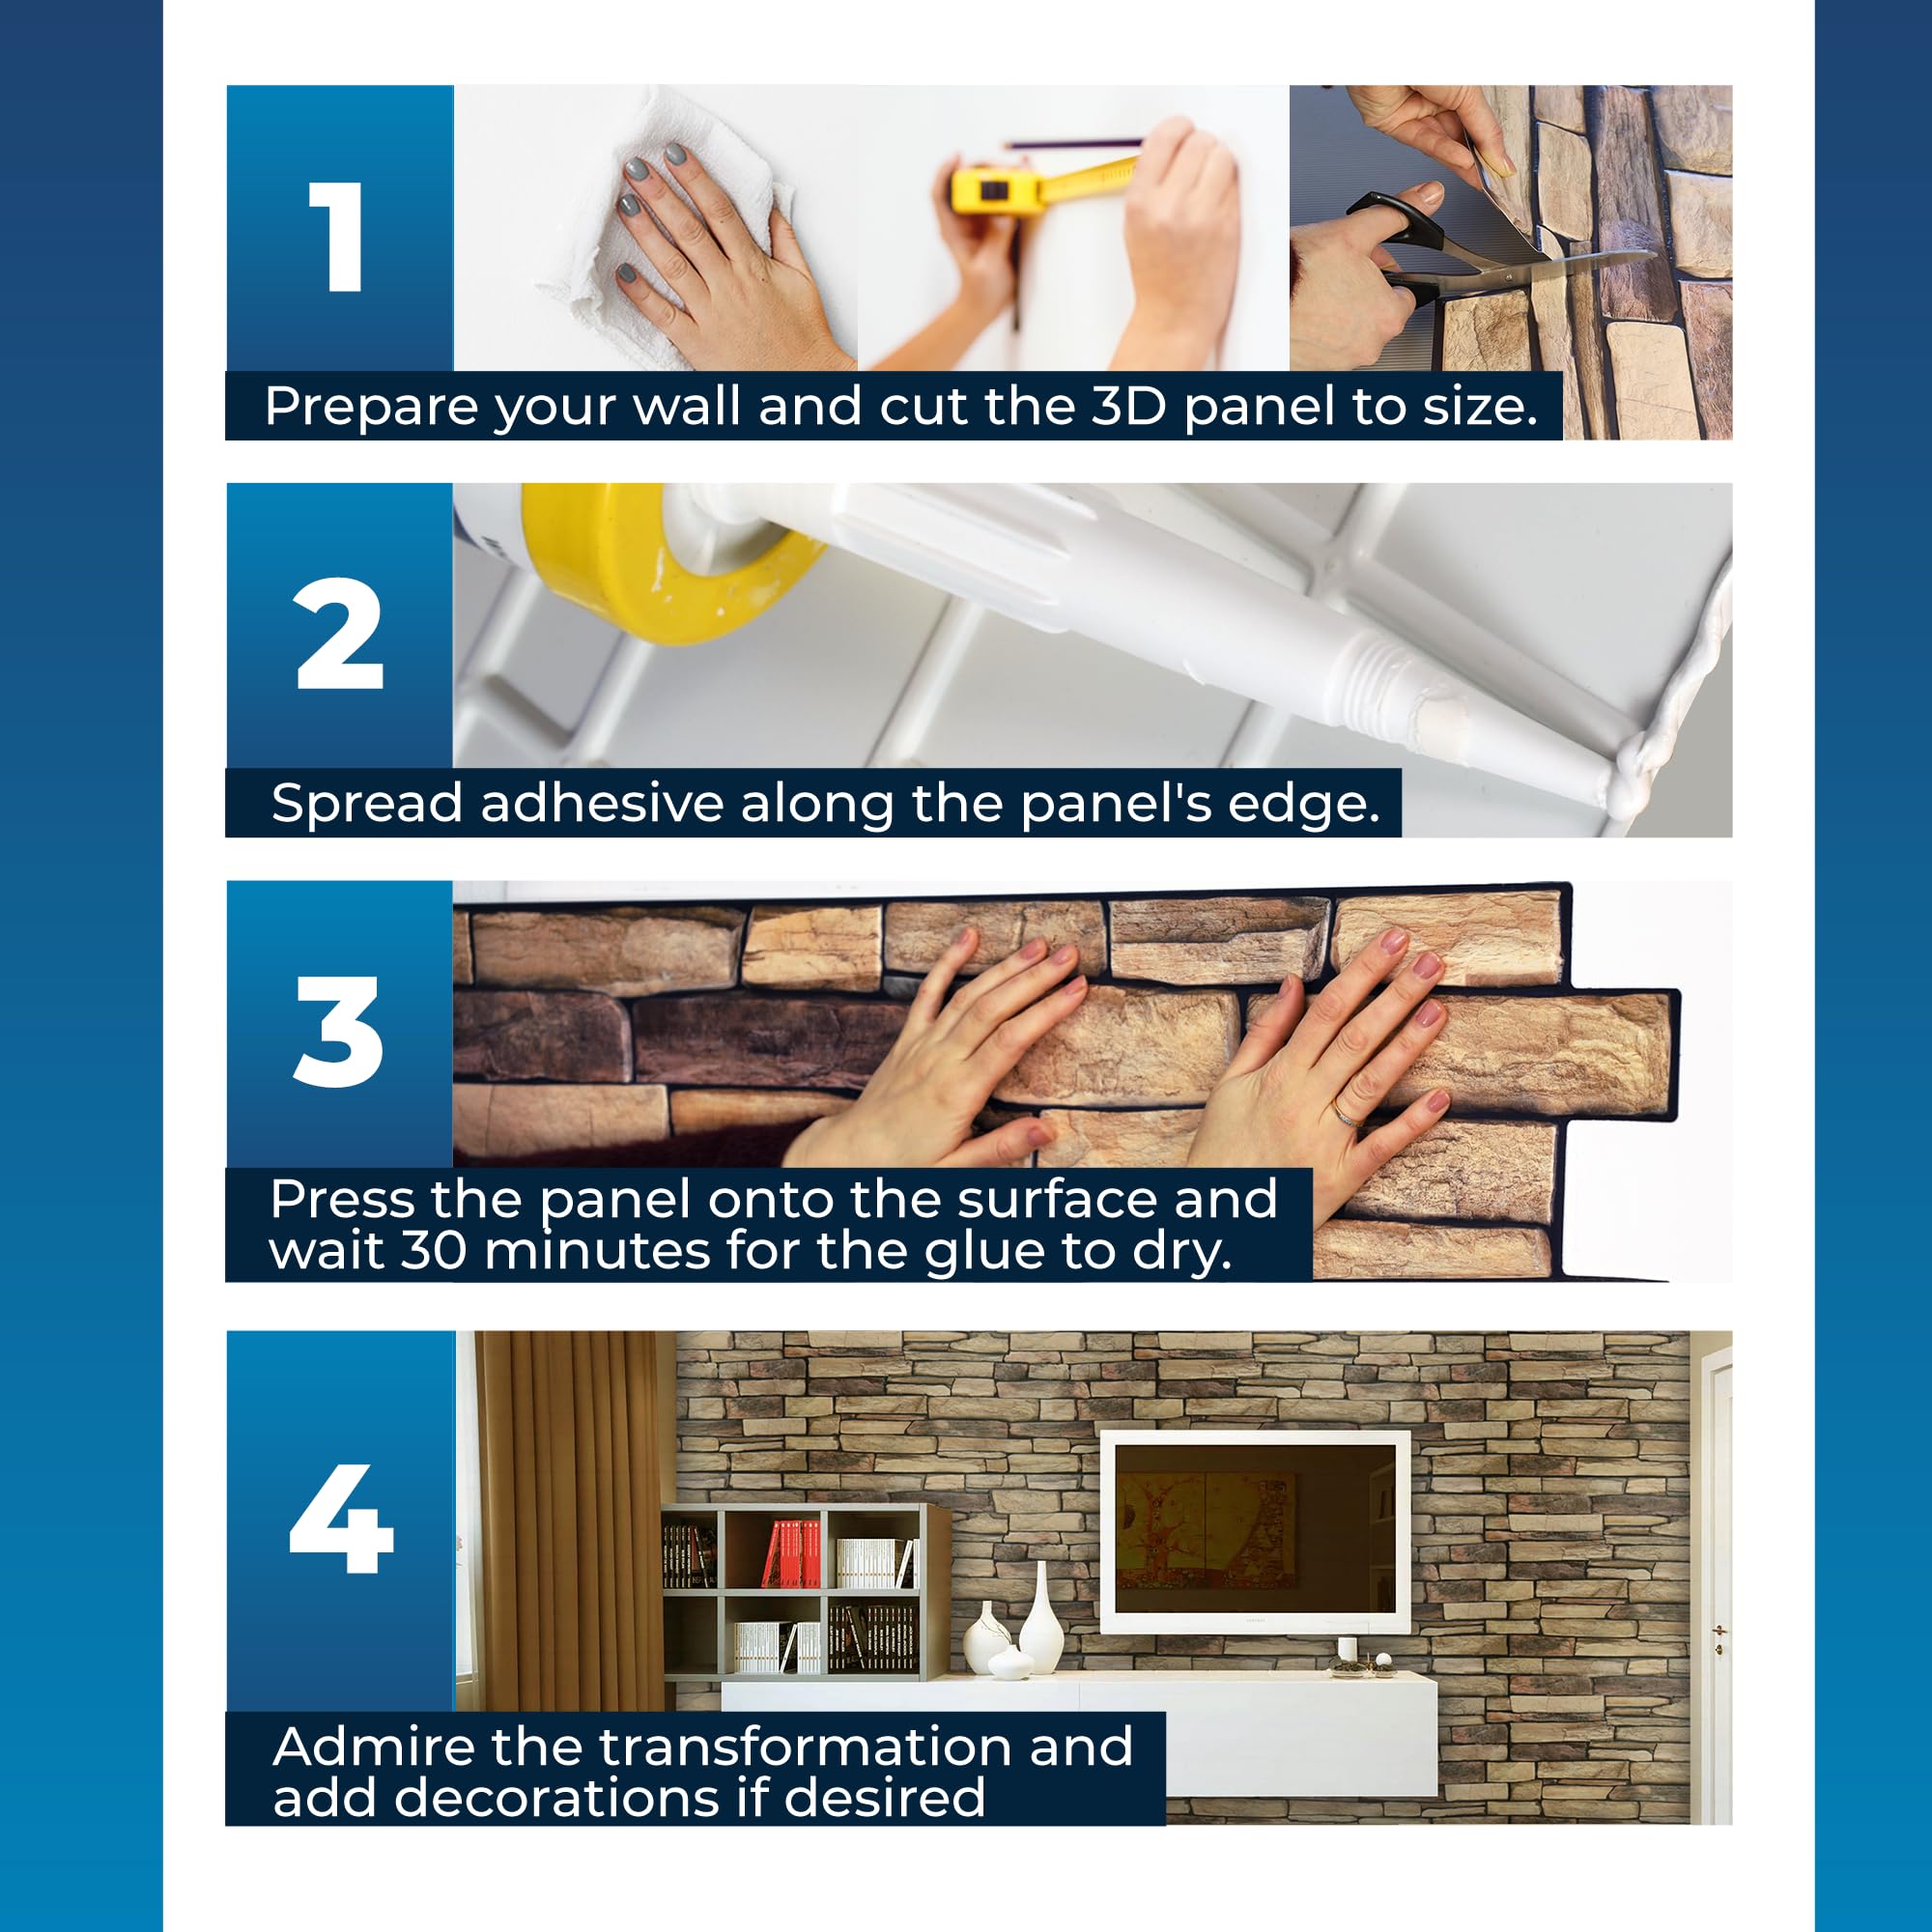
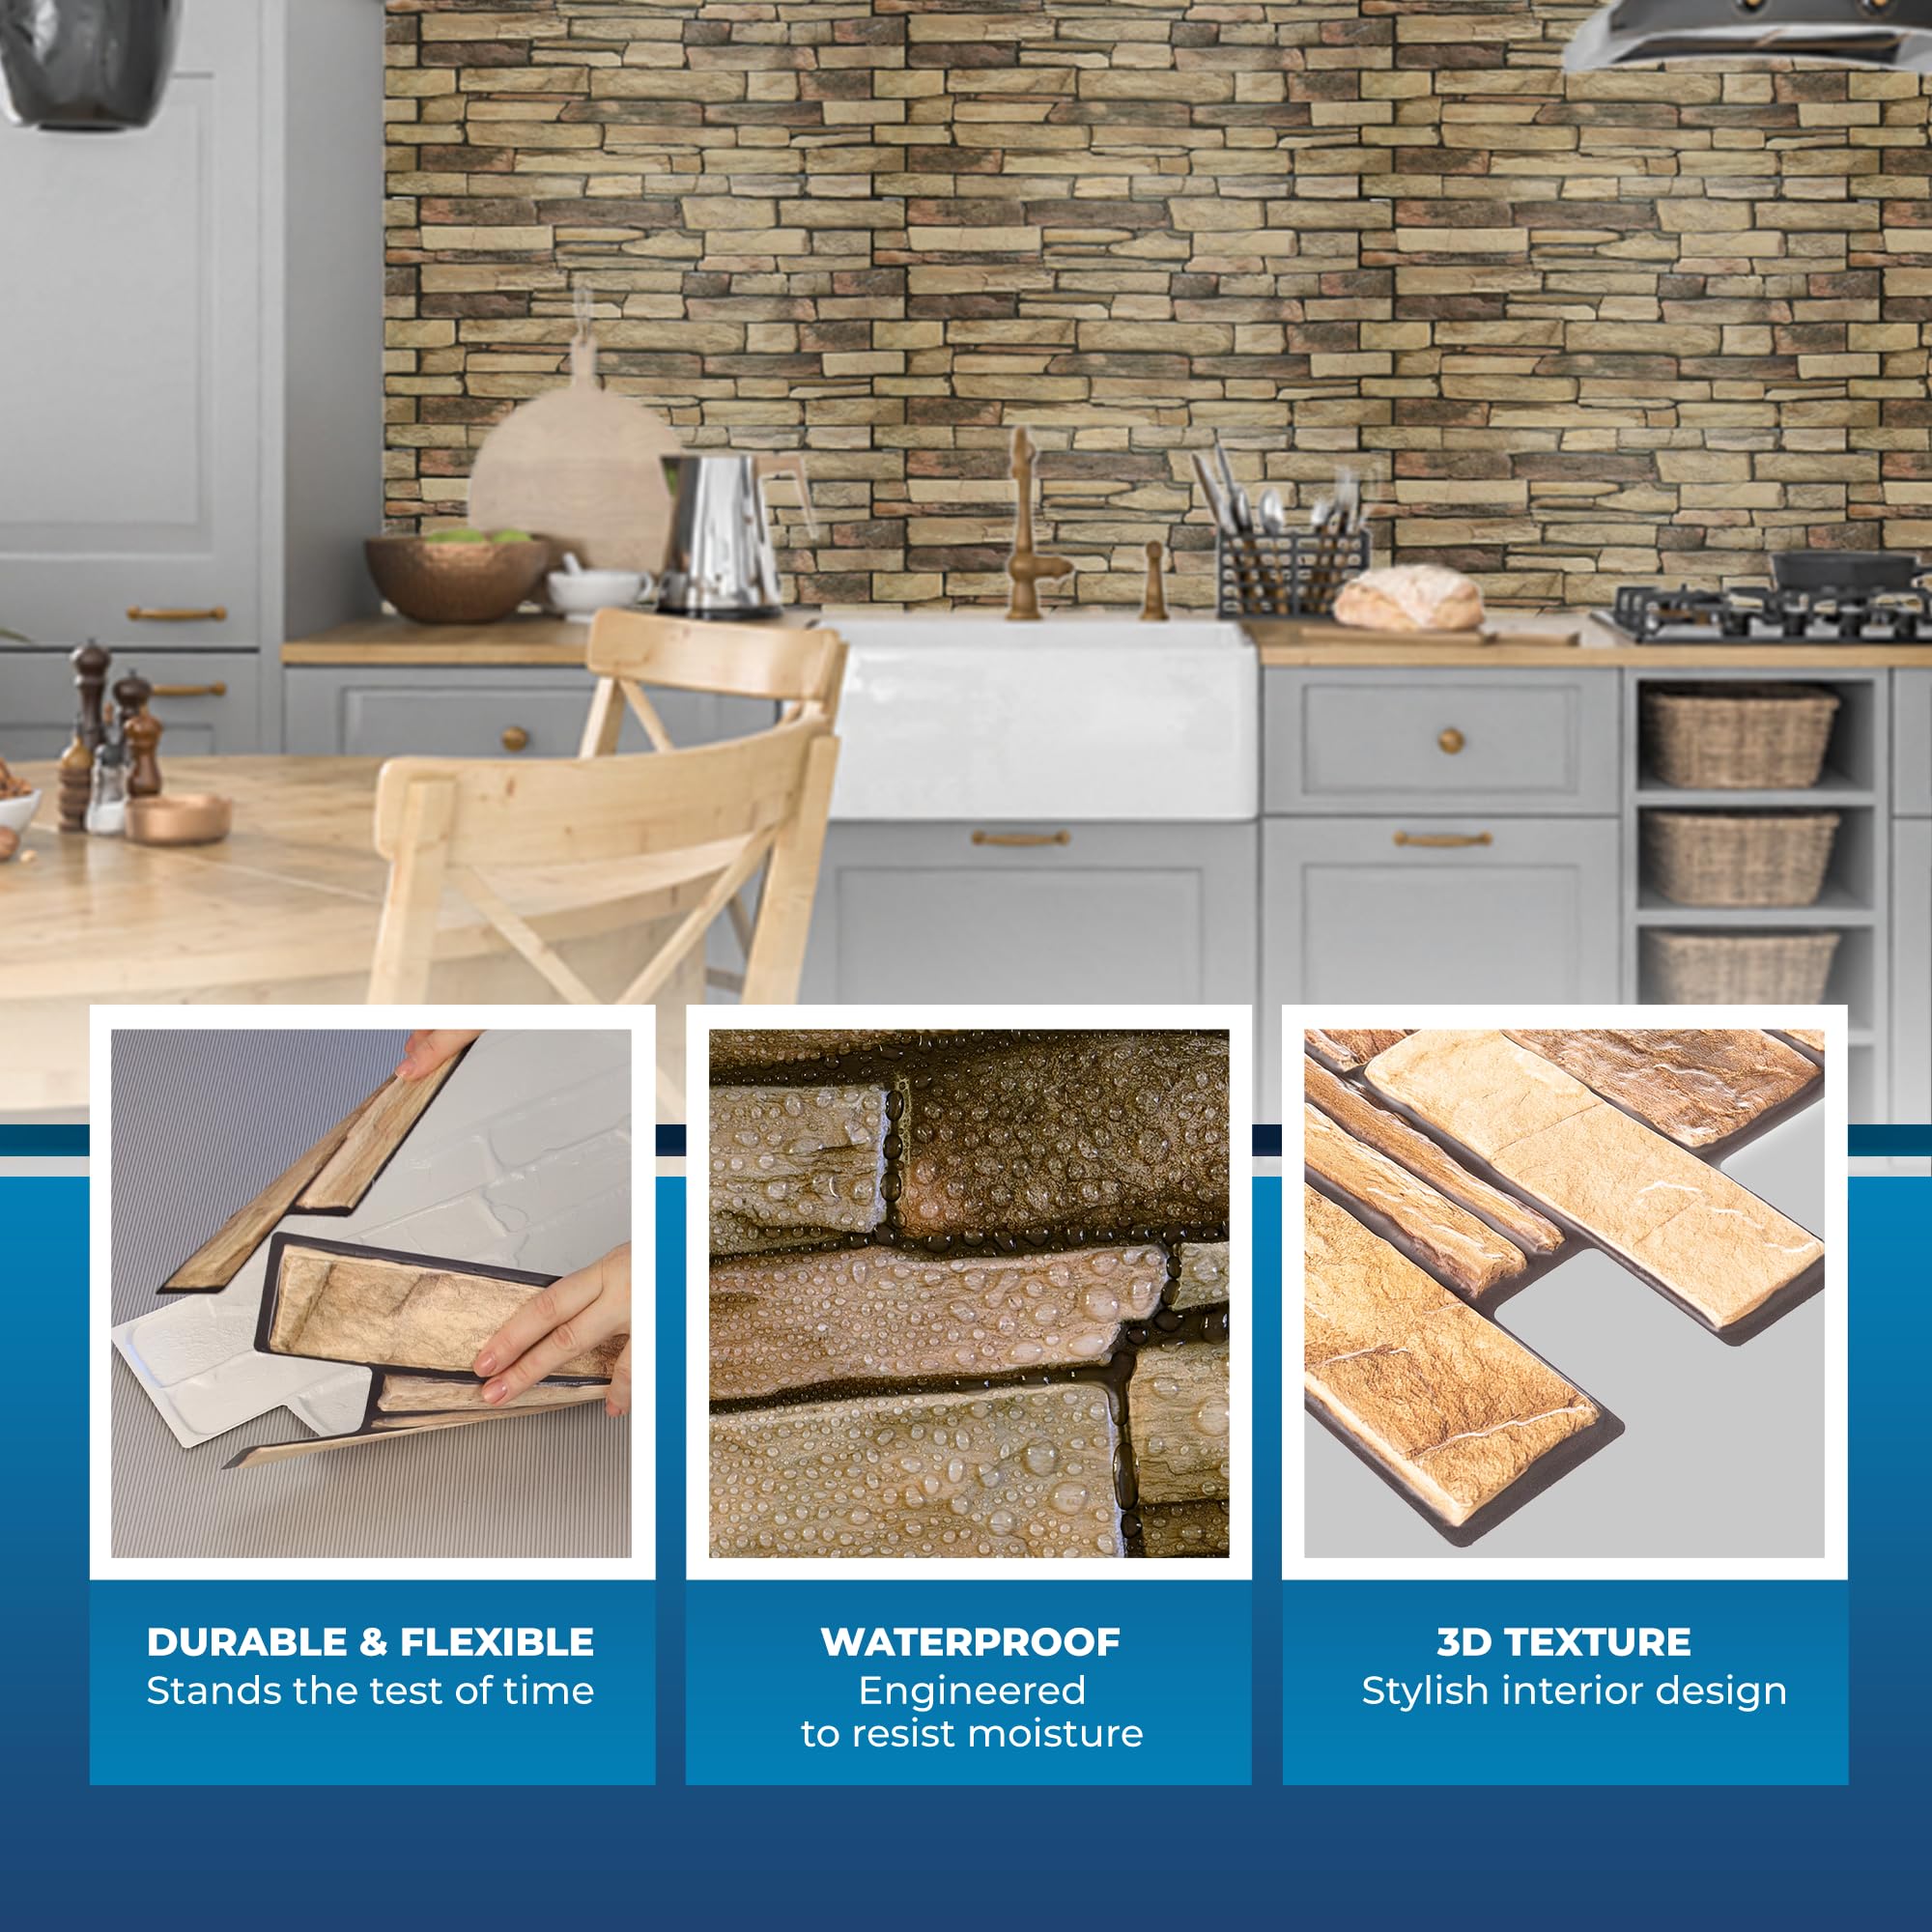
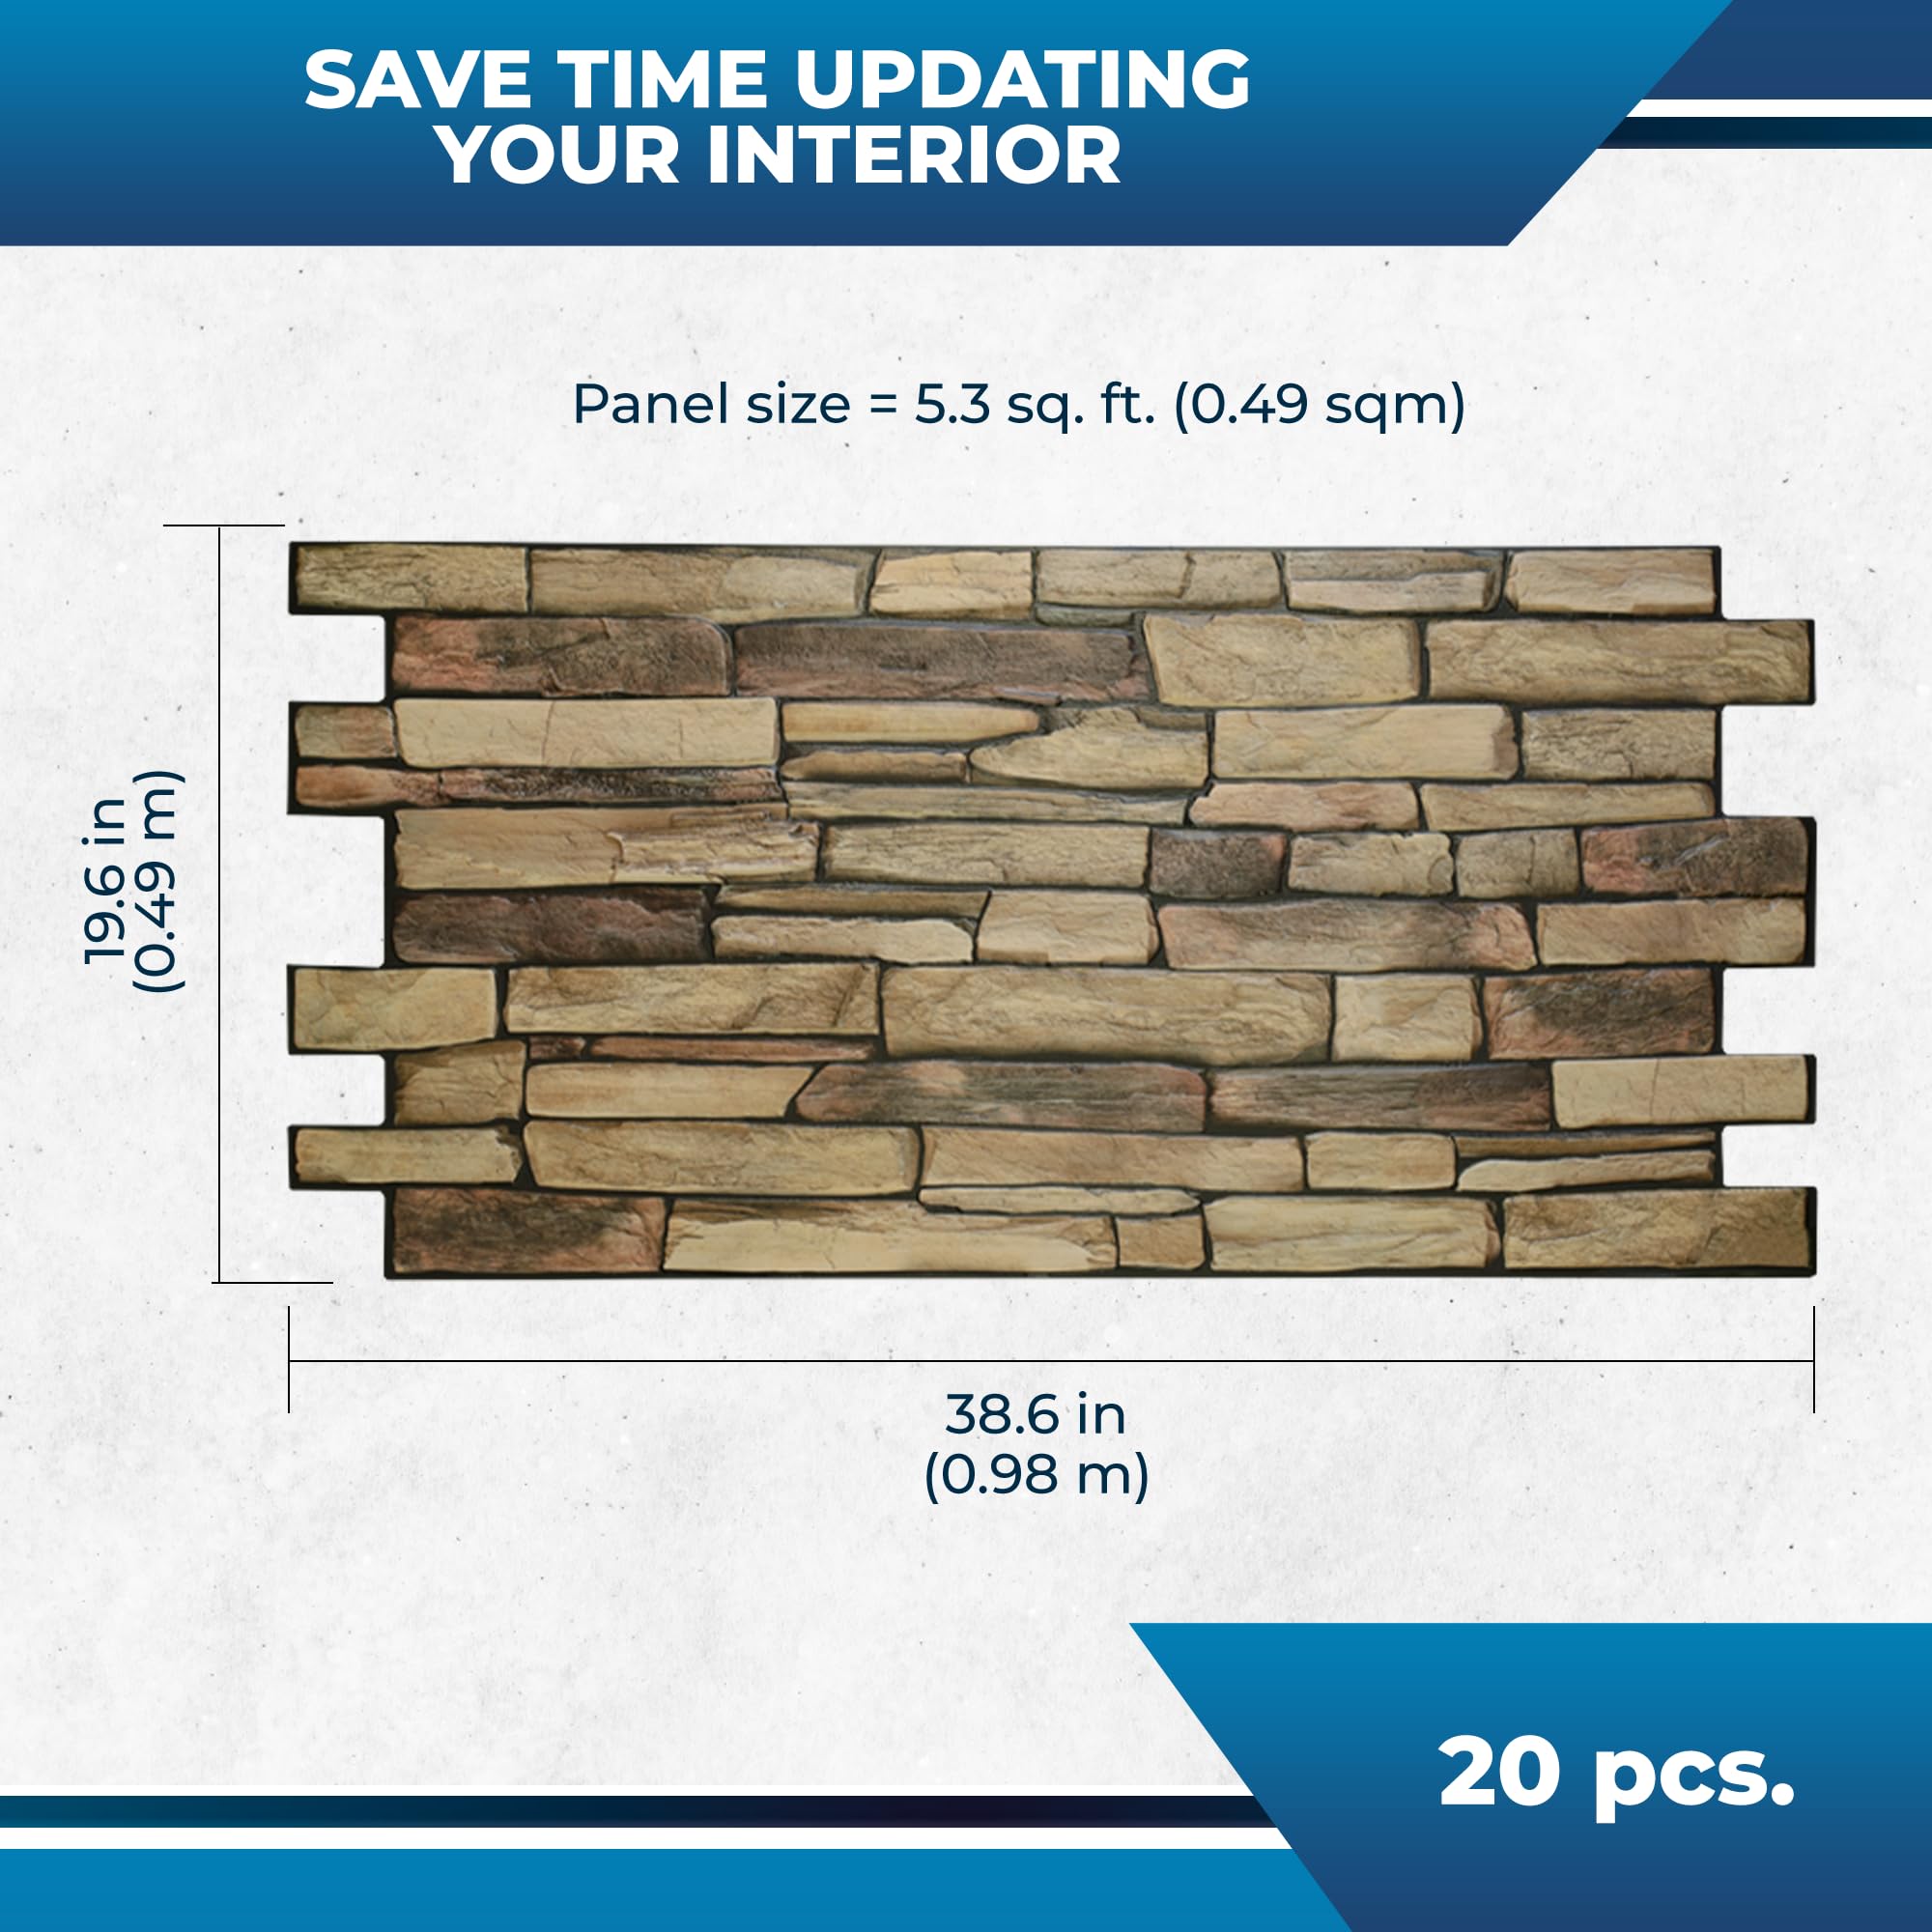
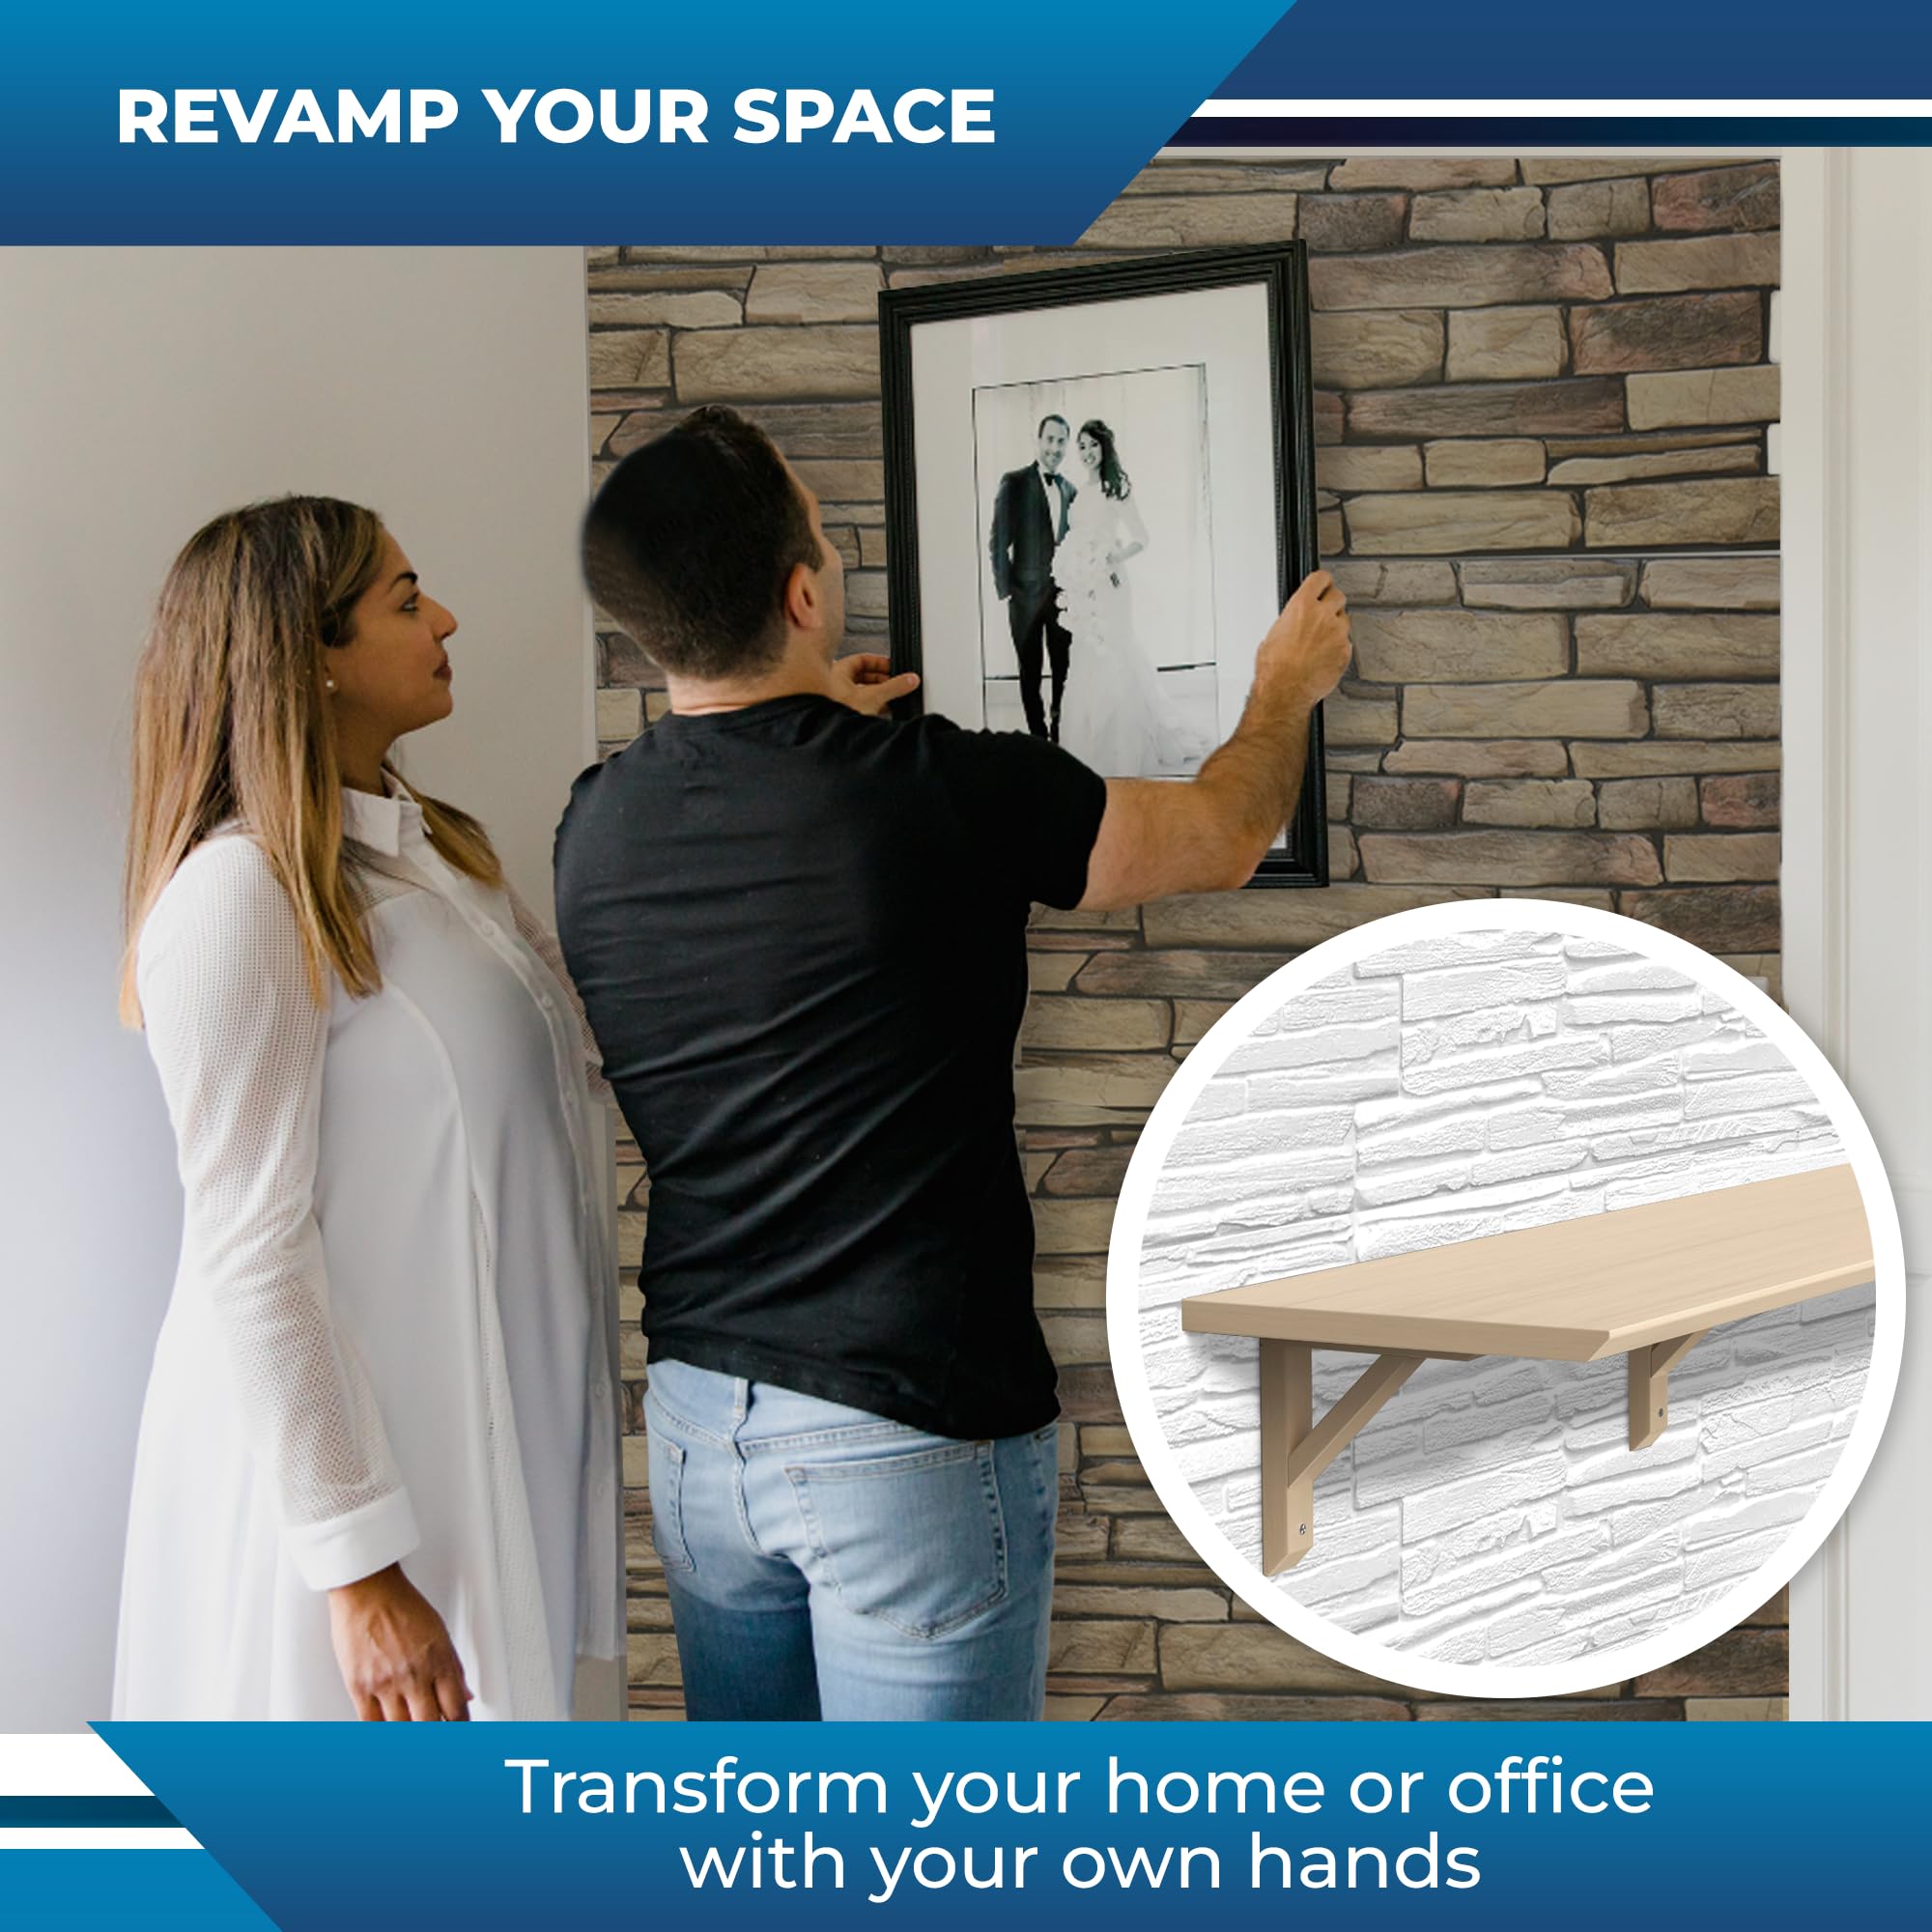
The Smart Profile 3D Wall Panel offers 53 sq ft of premium PVC faux stone wall coverage in a natural slate matte finish. Oversized 38.6" x 19.6" panels reduce seams for a smooth, modern look. Certified to EU CE standards, these panels resist heat, scratches, and moisture—perfect for kitchens, bathrooms, and any interior wall. Designed for flexible DIY installation, they provide a durable, stylish alternative to wallpaper and traditional wall coverings.


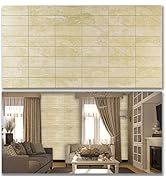


| Brand | SMART PROFILE |
| Material | Polyvinyl Chloride (PVC) |
| Size | 39 inches x 20 inches |
| Color | Natural Slate |
| Finish Type | Matte |
| Style | Modern |
| Installation Type | Glue |
| Product Dimensions | 20"L x 39"W |
| Pattern | Solid |
| Item Weight | 4.5 Pounds |
| Shape | Rectangular |
| Edge Style | Square Edge |
| Unit Count | 53.0 Square Feet |
| Form Factor | Rectangular, Textured, Thin |
| Water Resistance Level | Water Resistant |
| UPC | 693634279722 |
| Manufacturer | Binitec corp |
| Part Number | SP-200 |
| Item Weight | 4.5 pounds |
| Item model number | SP-200 |
| Finish | Matte |
| Item Package Quantity | 10 |
| Number Of Pieces | 10 |
| Coverage | 53 square feet |
| Batteries Included? | No |
| Batteries Required? | No |
M**.
UPDATE regarding customers service after second (mismatching) order.
UPDATE February 16m 2924: After finally being able to reach the seller BINITEC of the second order I placed, it was determined that (for unknown reasons) my original order was placed with "BINTEC" (missing the middle "I") and it appears the original supplier (without the middle letter 'I" in the name) has disappeared from Amazon. The default "buy again" button takes you directly to BINITEC and their product is NOT the same as what I ordered from Bintec. Its all very weird. Suffice it to say, the kind folks at BINITEC have been wonderful about helping me sort this issue out and it was they, in fact, who after looking at my invoices realized the now missing seller (bintec) and this fully explains why the products didn't match. I will be refunded for the wrong product purchased due to the redirect at the "buy it again" button on Amazon and have found a completely new supplier that I HOPE is going to send the correct matching product. That said.... BINITEC out of Clearwater Florida has been a fantastic help in sorting this out even though I am returning their product and not purchasing another from them (because it doesn't match what I already have). I highly recommend these folks to all if they have what you are looking for. ********************************** UPDATE February 14, 2024: Holy cow paddies!!! Since placing my original order and installing all of the pieces, I found myself short and needed to order another. It arrived on February 3 and today I was going to finish my wall but that's not going to happen. The panels were cheap and flimsy to begin with but look nice once installed despite the crappy weird obvious "lines" between panels but this reordered package surpasses even those issues as the quality of the new panels are even more cheap and flimsy than the original, the color between the stones is different and they are a different SIZE so nothing matches up!!!! What a mess!!! I'm in the middle of a wall! What am I supposed to do now??? I've written to the manufacturer to see what they say and will update when I get an answer.... IF I get an answer. I am beside myself and extremely disappointed. I do NOT recommend this product at all. ******************************** While they look good once installed, I find there is a lot of trim work to be done to each and every panel and that the seams (top and bottom) are much wider and stick out like a sore thumb on the wall. So, those had to be trimmed too and now there are gaps between the panels where I tried to overlap the bottom and top edges. Still trying to figure out how to fix that.
R**L
Very realistic looking faux stone
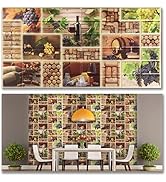
We had always wanted some stone around our fireplace and found this on Amazon. I was a little nervous when I saw how thin the product was however I must say that I’m very pleased with how it turned out. I found that it was easier to staple it to the wall rather than use adhesive. I put the staples in the grout lines. I then took a black sharpie to blend in the staples. They still shine a little so I’m planning on touching up with some black paint. One piece of advice I would give is to trim one side of the panels so it overlaps correctly. If you don’t you will have a double wide grout joint and your seams will be very apparent. Also, stager your joints. I also installed every other row upside down so there would be no repeated pattern.
A**W
Love hate relationship with these
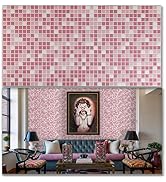
I bought the color classic slate and I loved the color but when I started to try to but these up, I hated it . Not the color but the way the panels fit together . Thank god I bought over my needed amount because we tried to cut the ends to blend the panels together and it no longer fit together in the seams / there was huge gaps . Then we tried to cut them square and it looked like hard abrupt pieces put together so I wasted like 3-4 panels and that’s A LOT for the price of these. The classic slate is not regular uniform blocks like the silver slate pattern , these are mixed stones so it’s hard. These need to be priced lower in my opinion (which classic option is cheaper than the other options) but because of the size of them , I can understand why they are that price . I was unhappy because I had to put white spaced out looking panels on my wall. My husband started pasting them with the gorilla construction adhesive and I immediately wanted to take it down (picture attached) but my mother told me to buy grey caulk and fill in the spaces so it doesn’t look like panels on a wall and it worked! Some problems I had in addition to the installation: The panels wouldn’t sit flat all the time , probably because I had to cut some due to a inlet of my wall instead of the gorilla adhesive , I’d buy liquid nails instead because corners are still lifting at spaces Caulking took me forever … Installation ~7 hours with 2 people Once you cut the panels , edges are SHARP so I do have a cut finger from caulking spaces etc (not their fault) All in all, I now love the look of the way the panels look on my wall! I get SO many compliments ! My painter , electrician , handyman have all been in awe and wanting to touch the wall. It looks like real brick! It would have been a $1k+ job for real brick. My mom hired someone to do it in her previous house and it was a $1400 job Buy caulk ! Fill the bricks , makes it 10x more real Yes I would buy this products again . I needed 30 panels for a 10x15ft wall.
A**A
CHEAP CHEAP CHEAP
This is not what I was expecting. We did not use this because it's literally crap. It can rip easily and there's no way to properly line up the pieces without gaps and uneven lines. My husband looked at this stuff and laughed and then we went to Home Depot and got tile for our fireplace. The reviews were very deceiving and props to those who made it work but I guarantee, that in person, even those projects look cheap.
A**S
So much Better !
First. OMG! I couldn't possibly love this more. When it first came in I was super skeptical. I knew it said thin, and it was a glue on. When I saw it, felt it, I was so worried it would look cheap and just horrible. I came home to find my wonderful husband working on the bathroom and I was in complete shock. It was so beautiful. I cannot express how awesome this looks and the wow factor it has. We used clear gorilla adhesive to apply to the wall. The only issue I have is the back. It is great for applying to uneven walls, just as the description says, and the reason is because this had a 3D style cut, meaning the back is not flat, there's not really a backing so to speak, and it is difficult to apply glue. You have to apply glue on the seam area, top and bottom and if there is an even strip somewhere in the middle that is raised evenly with the outer seams. If not, and you apply glue on the inner backing of this, you'll have to literally press in the "brick" shape to the wall, which will probably show and look like you have smashed "bricks" dead give away that it's fake. Other than that part, I have zero complaints at this time. I just hope it holds up to the bathroom environment, especially due to how little the area is that you have to apply the glue. We went with a darker paint color on the walls for contrast and will be lightening up the floors next. I have so many other ideas now for using this kind of material thru out the house.
V**.
Not that easy.
The video and many customer views indicate that the panels are easy to install. I disagree with these reviews. First, the included instructions were rudimentary at best. The instructions state that if you have questions you can contact them. WRONG!! No phone number are website address is given. For installation you must be very careful about how you plan the work. And yes you have to have a plan. You Must use the recommended adhesive. Either Locite PL 8X premium adhesive or gorilla glue, and buy a lot. More than you think you need. You’ll need it. Installation is easy on a totally flat wall, but once you encounter corners it’s a whole new ball game. DO NOT install/Glue the panels on the wall then try to bend the panels around the wall corner. I found the best thing to do is to measure and mark where the corner line runs on the back of the panel. Then bend it at your mark/line before you install the panel. If necessary use a hair dryer or heat gun to slightly soften the panel at the corner crease to help shaping the corner bend. Also, put a bead of adhesive on both sides of the corner of the wall. The panels have a black border around each of them. When you install them the joints where the panels interlock have a very visible larger then normal seam between each panel. The only fix is to trim/cutoff the black borders from one of the panels you are joining. Lastly, I’m not sure if all the panels have a unique separate stone pattern, but but watchful as to not create a noticeable pattern of the stones on the complete wall. If possible layout out your panels on the floor, if possible, and inspect how the panels will look when they are installed. Upon completing the my project I have found that you must do the following: Use a blow dryer to slightly heat the panel when you are installing around a corner. It makes the plastic soft and very meldiable. And when cold is rigid again. Use WELDEOOD CONTACT GLUE. I tried all the rest including flexseal, contact glue is the best. Trim the 1/4” borders of panels where they interlock
A**R
Easy to install
UPDATE: one year later and still looks as good as day one. No cracks or holes and still has a strong bond to the ceramic tiles with the Gorilla Glue Max Construction adhesive.I love, love , love this product. JUNE 23, 2023 I am a DIY person with little or no help and it was very easy for me to install. It is textured like stone but thin and easy to cut. Also, very easy to clean. The guy who refinished my tub took a second look and had to feel it and ask what it was made of. He was impressed. I used the Gorilla Glue Max Construction Adhesive it called for and installed directly over old broken ugly ceramic tiles on the wall with no issues.
M**E
Just what I was looking for..
Love the way this made my wall look.It does take some adhesive to make it stay up good and you have to have patience, but was worth it to me.
Trustpilot
2 months ago
1 day ago


