We remain fully operational. Our teams are working around the clock to ensure your deliveries continue safely.

DOWNLOAD THE APP


Customer Services
Copyright © 2025 Desertcart Holdings Limited
DOWNLOAD THE APP
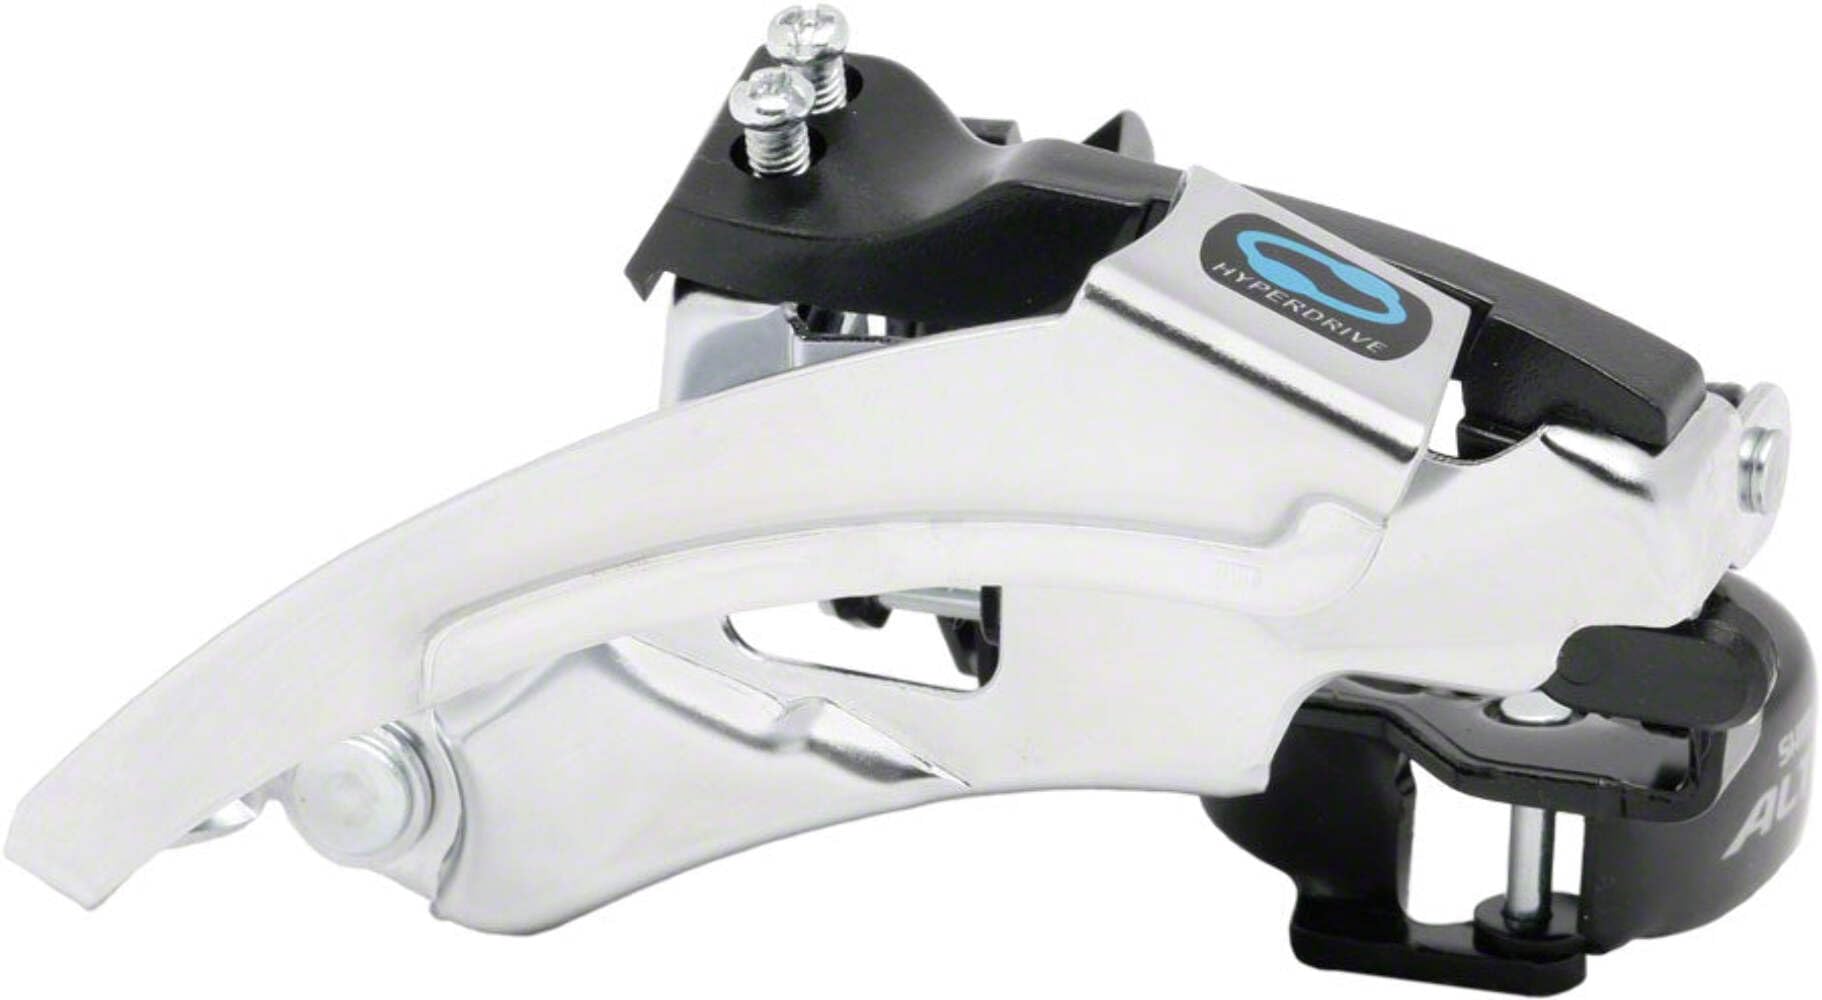
🚴♂️ Shift Up Your Ride Game with Shimano Altus Precision!
The Shimano FD-M310 Altus Front Derailleur is a lightweight, durable alloy steel component designed for 3x7 and 3x8 speed drivetrains. It fits seat tubes between 28.6 and 34.9 mm and supports both top and bottom cable routing, offering versatile installation. With included shims for smaller tubes, it ensures a precise, clean fit and smooth, reliable front shifting performance—ideal for upgrading your bike’s drivetrain with professional-grade quality.
| ASIN | B001ORZF94 |
| Batteries Included? | No |
| Color | Black/Silver |
| Customer Reviews | 4.6 4.6 out of 5 stars (652) |
| Date First Available | 6 February 2020 |
| Department | Men's |
| Global Trade Identification Number | 00689228222427 |
| Height | 2.8 inches |
| Is Discontinued By Manufacturer | No |
| Item model number | EFDM310X6 |
| Length | 5.8 inches |
| Manufacturer | Altus |
| Material Type | Alloy Steel |
| Number of Items | 1 |
| Product Dimensions | 17.15 x 10.16 x 9.53 cm; 249.48 g |
| Size | 28.6-34.9-mm 3x7/8 Speed Low-Clamp |
| Sport | Cycling |
| UPC | 689228222427 |
| Weight | 0.55 Pounds |
| Width | 4.9 inches |
T**D
This was installed on an old bicycle and works well on a front crank with 28 - 38 - 48 teeth.. I work on lots of bikes and recently installed a Shimano ALIVIO front derailleur on another bike.. Comparing the two I can't see a difference between the AULTUS and the ALIVIO though I think one cost a little less than the other..My bike tube was small so I had to use the thin shims.. They come with shims of different thicknesses. Those fit into the holding bracket and due to the way the bracket are built the shims aren't ugly..They are a little tricky to hold in place while you install the Aultus.. I found it's best to lay by bike on the side which makes it easier...If you buy one of the small cheap poly tarps and lay the bike on the tarp on the left side you can work on the bike outdoors and not fear loosing parts or tools. I sit on the tarp while I work..I have bike work stands but most often I love to work on the tarp out doors for installing parts then set the bike up for adjustments..You will need a chain break tool to install this because you MUST open the chain insert it through the cage and reconnect. Do not get a cheap tool IF you expect to open the chain more than a couple of times with it..Most don't work well for very long..The 4 dollar chain break tool at Wallyworld worked for me about 4 times before the push pin bent. A bent push pin means a damaged chain side plate is about to happen..If you have an old chain left over keep it, or parts of it, and you will have a few side plates handy..Once in a while you may mess up a side plate using even good tools, (see my othe reviews for good chain tools). If the link pin goes back in crooked and dings the hole in the side plate DO NOT use that chain with the damaged side plate. It may break going up a hill with you standing on the peddles. If that happens I HOPE you are wearing a helmet.I hope you wear a helmet at all times anyway...To install this unit find an ole wire coat hanger or a piece of wire that you can use to tie the chain into a loop. Cut it 8 to 10 inches long and bend the ends into hooks. Lay it aside to use later..Before you start working shift to the small gear up front and the smallest gear on the rear so the chain is at it's loosest..Lay the bike on it's side then drop the chain OFF the small gear and let it lay on the bike bottom bracket. Pull the chain into a loop, it will have tension from the Rear Derailleur, make sure the loop of loose chain is located at the front of the bike around the front Derailleur. It must be loose at the front Derailleur. Using shoe laces, string, or a short wire tie the chain so the loop will allow you to break the chain releasing the cage of the Derailleur. The chain pin may not allow you to pull the chain through the Deraileur so make sure the pin side of the chain is near the back side of the F Derailleur closer to the back tire.. Slid the chain out of the old Derailleur and remove the derailleur. Thread the chain through the new F Derailleur making sure it's lined up so the Drailleur is facing the right direction and not upside down..temporarly attach the derailleur to the bike so the chain to thread through the cage then gently work the chain FORWARD until the break ( tied part ) is at the bottom of the bike near the crank but not exactly under it. TO pull the chain forward I gently roll the rear wheel by hand while pulling on the chain or I remove the chain (by hand) off the rear gear and work it forward that way..This works if the bike is laying on it's side. Do not put the chain on front gears yet let it slip forward. When the open but still connected disconnected part of the chain is at the bottom of the bike chain ring HOOK one end of your wire hook into one side of the chain and use pliers to slightly bend it some more so it don't slip out..PULL a loop in the chain and hook other end. You should have a big loop of chain with the Tied part in the center of the big loose loop..Cut the shoe string and remove it or untie the chain at the break....The wire hooks should be holding the chain forming a loop that you can work with..If you pull that loop toward you it will be easy access to reconnect the chain..IF the link pin is sticking out from the bottom of the chain and hard to line up with your chain tool pin you may be able to use big pliers on the pin head and push it back into the chain staring it that way. It will pop in almost all way to the side plate.. Easy trick, smile..Once the pin is in the chain use chain tool to set the pin properly into the side plate..Carefully pus pin one tiny little bit TO far through side plate on your side of chain. Just a tiny little bit to far.. NOW use the chain tool on your side of the chain to loosen the link by pushing the pin back in just a tiny little bit. On some chains the pin sits flush with the side plate. If yours sticks out some make sure it's sticking out the same amount on both side plates. IF you have never used a chain tool before go to U tube and learn how to use it to loosen a tight chain link after the chain has been assembled..MAKE sure you can see the side plate that the pin must go back into and work it slowly in making sure the chain link pin is going STRAIGHT through the side plate hole. IF you damage a side plate you need to remove it and put another side plate on the chain. YES you can use side plates off of different brands of chains, and even old worn out chains as long as the LINK PIN HOLE is the same size around and the chain is of the same size and type. Side plates seldom if ever stretch....Most side link pin holes are the same size but some may differ. You can use a flaired side plate(some chains have curved side plates for smoother shifting) on one side and one flat side plate on the other side of the chain. It will work. Side plates seldom wear out so I use what is on hand and yes I make mistakes too..Chain side plates can be damaged quiet easily if you get in a hurry. IF you accidently push the chain pin ALL way OUT of your chain..Do not panic.. Chain Pins can be reinserted using BIG water Pump type of Pliers and maybe other pliers to push them in far enough to get them started again. If you have trouble keeping the pin lined up in the hole of the side plate use needle nose plires to hold them in place while you put force on them with the big pliers. Fingers don't work well and get mashed...Practice this on an old chain and your life will be happier in the future..For more help email me at chiefredelk at gmail dot com.....Good luck, YOU can do this you know you can.. Be Blessed, Chief
T**D
What a great value! I needed to replace a Truvativ crankset on a 2007 Giant Yukon. The Truvativ has a proprietary "powerspline", which is subject to wear. So I replaced it with a SR Suntour XR-T Crankset 48/38/28t and new Vuelto BB. Good combo, and gave me the chainline right at about 48mm. The existing front derailleur would not work with this gearing, since it's mounted behind the BB, so I replaced it with this post-mount derailleur. Nice part! An incredible value at this price, and it worked perfectly with this setup. I had to go through several adjustments getting the derailleur adjusted just right vertically and horizontally, but it's got all the play I needed for a perfect match. Very happy with the outcome. I get higher speeds with the bike, this derailleur provides nice, smooth shifting once installed and adjusted properly.
R**B
My shimano altus front derailleur is awesome and will always purchase again from Amazon and shimano the shimano front altus derailleur makes my bike look super sleek and stylish also a very satisfied happy 😊 satisfied Amazon and shimano altus customer! Rob
S**C
An older relative of mine had a Next Power Climber, couldn't stand how it shifted and asked me if I could tune it. Unfortunately, no matter what I did with the stock derailleurs and shifters on the Next, it wouldn't shift consistently. I swapped out the rear derailleur for an old Tourney I had laying around, put Microshift grip shifters on it and got the rear shifting working perfectly. But the 3 speed front chain wheel was still a train wreck and my relative wasn't going to spend anymore money on the bike. I did a little research and found that this Altus should work on the 2003 21 speed GT Palomar that I was restoring and that it should be an upgrade to the stock Tourney that was on the bike. So, the Next got the Tourney from the GT and my GT got this Altus. Win/win. My relatives Next now hits all 18 gears perfectly and I've got a heavier built, better shifting front derailleur on my GT. The first picture is the stock Tourney TY-32 and KMC Z chain. The second picture is the Altus and X8.99 chain. As you can see the Tourney is noticeably longer and slimmer. The Altus is thicker, and has a sturdier feel. The Altus arrives in the stock Shimano box, with spacers for 31.6 and 28.6 installations. Mine was a 28.6 and the installation and set up was easy. Will your bicycle suddenly become a fast shifting, performance machine? No. Will you notice a difference? I did. This Altus has been a noticeable upgrade from the stock Tourney. My GT has Microshift shifters and the Altus hits the front chain wheel gears more smoothly than the Tourney did. It will also shift easily the first to the third chain ring in one twist of the grip shift. Like all derailleurs, it doesn't like to be under full load when changing gears, but performs better than the Tourney under a light load. When I made the derailleur swap, I also went from the stock Z to a KMC 8.99 chain which made an unexpected improvement in the drive train and shifting on my GT as well. I never figured a chain would be a big deal, but this one is noticeably smoother shifting. If you've never changed a derailleur or adjusted one, do a search and watch one of the many videos. Park Tool has an excellent video about front and rear derailleurs. That video helped me dial in these two bikes so they ride better than when they were new. Hope this helps and ride safe.
E**I
With 11-speed now the standard for enthusiast level components, 7/8-speed components are now relegated to the low-end MTB and comfort bike market. This Altus (FD-M310) derailleur shares basic design and some small parts with Shimano’s Tourney (FD-TX800) models. If paired with Shimano MTB shifters, these lower-end derailleurs all shift smoothly and reliably when new. However, to reduce costs, formed sheet steel is used in place of cast aluminum, resulting less reliable shifting as the components get older. As a replacement part, this Altus derailleur shifts more reliably than Chinese-built competitors from MicroShift and SunRace. The derailleur I received came with shims for 31.8mm and 28.6mm seat tubes. Like all Shimano top-swing derailleurs, the FD-M310 can be used in a top-pull (cable routed from the top) or bottom-pull (cable routed under the bottom bracket) configuration. The FD-M310 is designed for use with MTB triple cranksets with 44/32/22T or 48/36/26T chain-rings and is not designed for use with road shifters. Many reviewers state that you can mix-and-match 8-speed and 9-speed components, or MTB and road components. While it may be possible (and this definitely depends on frame geometry and other components), there really is no guarantee. And these Frankenstein set-ups will require constant attention and adjustment. If you're looking for a more durable and reliable front derailleur, I'd suggest a Deore 9-speed front derailleur (FD-M590) and 9-speed chain – shifting will be slightly sluggish, but will work reliably in an otherwise 8-speed drive-train. As a replacement part, the FD-M310 is the best currently produced 7/8-speed front derailleur.
Trustpilot
1 week ago
1 month ago