


🌿 Stick on style, peel off regret—your wall’s new best friend!
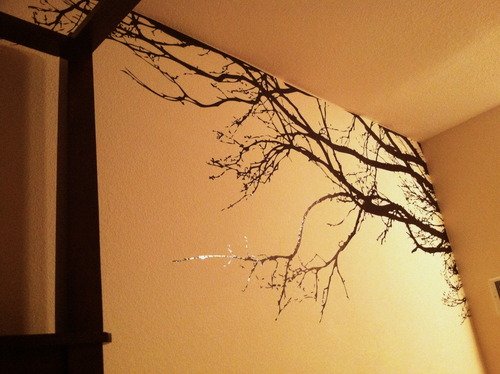
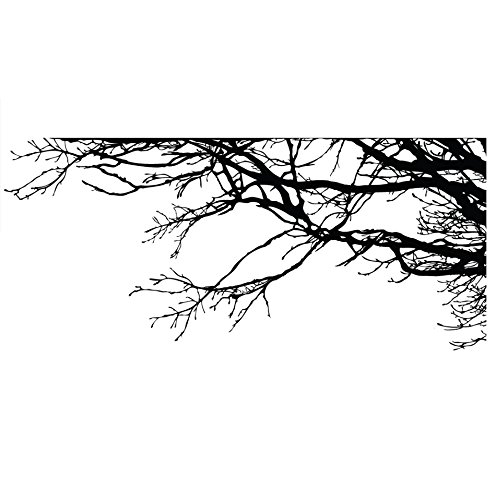
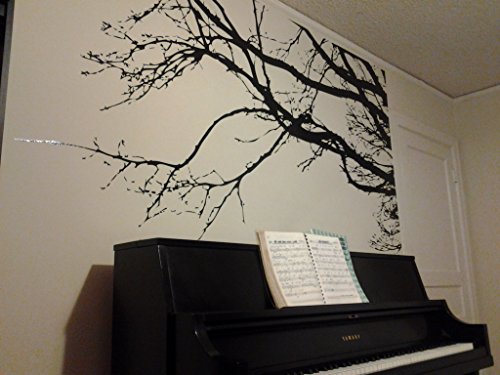
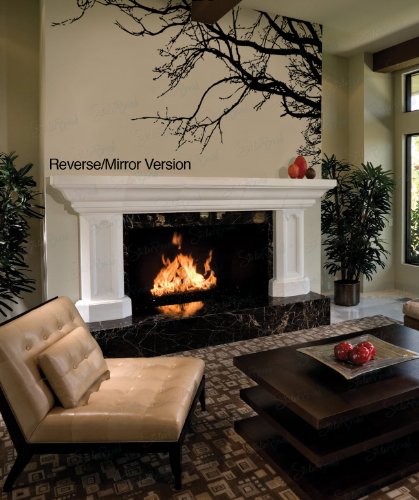
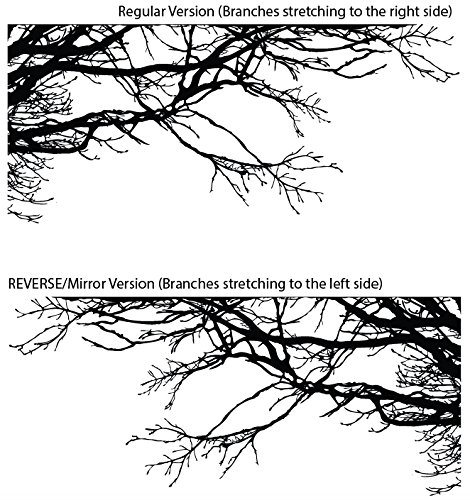
The Stickerbrand Large Tree Wall Decal is a 44 by 100 inch semi-gloss black vinyl wall sticker designed for indoor use. It offers a removable, no-paint alternative to traditional wall art, ideal for renters and anyone seeking a bold, contemporary tree branch design. Lightweight and easy to apply, it transforms blank walls into statement pieces with minimal effort and zero damage.


| ASIN | B00ZJG1EHS |
| Best Sellers Rank | #517,245 in Tools & Home Improvement ( See Top 100 in Tools & Home Improvement ) #10,199 in Wall Stickers & Murals #165,439 in Home Décor Accents |
| Brand | Stickerbrand |
| Cartoon Character | Bubble |
| Color | (44in X 100in) Black (Right to Left) |
| Customer Reviews | 4.3 4.3 out of 5 stars (679) |
| Date First Available | June 12, 2015 |
| Finish Type | Semi Gloss |
| Indoor/Outdoor Usage | Indoor |
| Is Discontinued By Manufacturer | No |
| Item Form | Tree |
| Item Weight | 1.25 pounds |
| Item dimensions L x W x H | 1.7 x 1.7 x 19.9 inches |
| Item model number | 444m-Blk-Reverse |
| Manufacturer | Stickerbrand |
| Number of Items | 1 |
| Number of Pieces | 1 |
| Pattern | tree |
| Product Dimensions | 1.7 x 1.7 x 19.9 inches |
| Recommended Uses For Product | Wall |
| Reusability | Single Use |
| Special Feature | Removable |
| Style | Contemporary |
| Theme | Tree |
| UPC | 799872773531 |
S**S
Great Product, Will Definately buy More Designs!
I ordered this product because I wanted something relatively inexpensive that would jazz up the blank wall behind the tv. I rent, so the fact that this decal is removable (not reusable) was a security-deposit-friendly feature! The decal was ordered on 6/21, and it arrived via US mail on 6/23 in an architect-tube type of box. It was rolled nicely - not too tight and not too loose -and basic instructions were included. I first unrolled the decal and used a credit card to completely rub over the entire design. The top layer looks like wax paper; as I rubbed it the design visibly `darkened' behind the wax paper. I figured this would make it easier to peel the design off of the sticky backing in one large piece, as opposed to bits & pieces sticking to the wax paper part. Next I cut out the unattached branches portion - these go elsewhere, so be sure you cut those out before you unpeel the decal from the sticky backing. I ended up with three pieces: one giant piece, which for the left-to-right option ended up being the tree's largest part; one medium piece that went underneath the giant part; and one small piece that could probably be placed anywhere but I decided to place it just as the seller's photo shows it. Then it was time to apply it to the wall! I pressed it onto the wall, starting at the top left corner. I then smoothed it from top to bottom and then left to right as I applied it...a second person to hold the roll is most helpful! Then I rubbed to entire design again with a credit card, from left to right and top to bottom. This was to get out any small creases and/or air bubbles. Finally I peeled off the sticky backing...it was really sticky so it came off slowly, which is good because if a tiny part of the design sticks to it then I just grabbed the credit card and smoothed it over again. All I can say is WOW! This product has a huge impact on our wall AND the entire room. We have a 60 or so inch flat screen with LED lights set up behind it. So the tree looks especially cool when the LED lights are cycling through their colors. It's nice to have red lights on the tree wall during scary movies! I highly recommend you purchase this product; I am so glad that I did! Please also see the images that I've added to the product photos.
B**Y
Only the vinyl image and sticky enough to stay put
Just the cut-outs!! No clear vinyl in between. I cut the branches down to make it easier to put up and filled in two small gaps with other branches to get it to align. Overall much easier and less time-consuming than I thought and it stuck to my textured wall very well. The most tedious part was cutting the outline of the tree from the huge sheets, but the time was worth it and gave me better results. The tree looks amazing in my off-centered wall.
J**N
Fanastic Product, Presentation needs improvement. Here's some tips
First of all, the product itself is incredible. I anticipated it being a little bit bigger, but the dimensions they give are in fact correct I just misjudged. The decal looks incredible, is extremely durable, and even with an imperfect installation, from anywhere further than 5 feet it looks flawless. Do buy. What does need improvement is the way it is presented to you. By that I mean it lays on a couple pieces of wax paper as one would expect. But with a decal of this size and nature, you need all the help you can get from the manufacturer. For one, mine was neither centered on the paper nor had even edges. Not to mention is many places there was over an inch of excess paper from the decal. Considering you have to install this by lining it up perfectly against two sides, that creates a huge problem. What I did and what you will need to do is get a ruler or a laser level and draw a line all the way down and cut the paper yourself. I recommend leaving as little space as possible on the edges. If you are comfortable cutting it within a millimeter of the decal, do it, otherwise trying to line it up on the wall is a nightmare. This is a simple fix that the manufacturer should take care of for the customers, but I digress. Don't bother taping it to the wall to see if you like the placement as the instructions suggest, trust me, it will take many many attempts to get it perfect. When you stick it to the wall, I lined it up flush with the vertical side, but gave myself just about half an inch of a gap from the ceiling. You should do the same, it helps with application, and it actually looks better with the slightest of gaps. instincts will tell you to start from the left and work to the right. This was impossible for us, as every time we would get about halfway across we would notice it was dipping or raising noticeably. After 45 minutes trying this, I decided to focus on lining it up with the ceiling and working downwards, again leaving about a half an inch. This worked the best for me, and then i simply shaved a few millimeters off the side that touches the other wall using a razor. Just the way I did it but it made it much easier. You truly do need two people for this, which in my opinion made it more difficult to line up correctly because you cannot control their hands but you need someone to help you hold it up. You really need a laser level to avoid about an hour of frustration but I did not have one and trial and error worked great. My biggest compliment to this piece, durability. I applied portions and then ripped it back off the wall DOZENS of times when I realized it was becoming crooked. You could never tell the difference. It is still just as sticky, the only difference was I had to go a little slower on those areas when I was pulling off the top paper after the decal was on the wall. Make sure you go very very slow with this part, as every single branch needs an extra second to make sure it's not being pulled up with the paper. The decal comes in four or five parts, I can't remember, but truly I think they could cut the biggest piece in half as well. It is not hard to line up the pieces and no one would be able to tell where the seams are. Be patient, be prepared for a cleanup, and don't give up. I have no arts and crafts talent and I put this up in about an hour and a half and it looks perfect. There are no bubbles but there are a few creases, but again from a few feet back you could never tell. If you get a few creases when putting it on, so be it. Better that them peel it all back off an re apply just to get another crease. . I promise it won't matter. Hope some of this helps, and hopefully the manufacturers will take a little more time cutting yours out so you can get some more straight lines.
N**Y
Pleased with the Purchase
I bought this decal for my unborn baby boy's nursery. I love it! The room is painted a grayish blue and I chose a white tree in contrast. I have the crib sitting along the wall under the tree...kind of sweet and whimsical without being cartoon-y or too cutesy. It is very clean, crisp, and modern looking...will work well as my son ages, too. The application was fairly simple and the instructions they sent were clear and comprehensive. It came in 5-6 separate pieces and I was able to complete the project in under 2 hours, taking my time as well as a break or two (from climbing the ladder and sitting/reaching awkwardly...I was 5 months pregnant). My mom was there as an extra pair of hands below when removing the backing. I did have a little trouble keeping it aligned along the top (wall to ceiling) and the side (wall corner) but I easily trimmed the misaligned side and will fill in the gaps up top with white paint if it bothers me, too much (but it hasn't yet...and I'm pretty deep in the nesting stage). It has a little bit of a sheen to it so at some angles, it certainly looks like a sticker. However, it adhered well and is a quality, professional-looking graphic. Stickerbrand customer service was prompt in responding to/confirming my color request and with shipping.
Trustpilot
3 days ago
2 weeks ago


