
DOWNLOAD THE APP


Customer Services
Copyright © 2025 Desertcart Holdings Limited
DOWNLOAD THE APP

✨ Elevate your craft with crystal-clear perfection! 💎
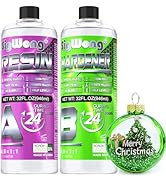
SigWong Epoxy Resin 32oz Kit offers a professional-grade, self-leveling, crystal-clear formula with a 1:1 mix ratio and 40-minute working time. Designed to resist yellowing and bubbles, it’s perfect for artists and crafters creating jewelry, river tables, and more. The kit includes resin, hardener, gloves, and instructions, ensuring a safe, easy, and flawless finish every time.


| ASIN | B084PZG6HK |
| Age Range (Description) | Adult |
| Art Craft Kit Type | resin art |
| Best Sellers Rank | #143,251 in Arts, Crafts & Sewing ( See Top 100 in Arts, Crafts & Sewing ) #981 in Sculpture Molding & Casting Products |
| Brand | SigWong |
| Color | Clear |
| Customer Reviews | 4.5 4.5 out of 5 stars (8,163) |
| Date First Available | February 11, 2020 |
| Included Components | disposable gloves |
| Item Weight | 0.035 ounces |
| Item model number | ER-32 |
| Manufacturer | SigWong |
| Material | Epoxy Resin |
| Number of Pieces | 2 |
| Package Dimensions | 8.03 x 5.28 x 2.64 inches |
| Paint Type | Resin |
| Seasons | All Seasons |
| Set Name | SigWong Art Resin Kit |
| Size | Epoxy Resin Kit 32oz |
| Special Feature | Self Leveling |
| Style | Professional |
| UPC | 824918049445 |
S**N
Hardly any fumes, dries clear, little bubbles!
I'm a first time resin crafter and when I decided to jump into the hobby, I found this stuff. I am so glad I did! Making small things was easy, but as I made bigger things, I made quite a few rookie mistakes. Some things I would recommend if you are getting into this and buying it for the first time; 1. use a scale (kitchen scale works fine) to measure your resin. Using cups left some of the items still bendy. Once I started using a scale, everything has been smooth sailing since. 2. Use a little more hardener than the resin. even an ounce can make a difference. 3. Mix slow, Pour slow. Let it sit if you have a lot of bubbles for a minute or two. 4. If your item is a box with a lid, pour a little, run a toothpick through the edges. Make sure no bubbles are there, then continue to pour more. 5. Use 1 cup for resin, 1 cup for hardener to measure and then mix them into a bigger cup. Once it's done mixing (3-5 minutes depending on how much you have), then you can add your colorants, mix those in well. Again, let it sit a minute or two afterwards. 6. Make sure you are using a LEVEL surface for your molds. 7. Allow it proper time to dry. Not everything will be dry in a few hours. Some will take up to 2 days to fully harden, depending on how thick the item is. Testing it for tackyness helps before demolding. 8. Make sure it's in a non humid room. The more moisture you have in the room you're doing it, the more it will REMAIN tacky. 9. Make sure the room is at least 72F and keep it away from air conditioners and heaters. Varying temperatures can cause a lot of headaches when your making your items. 10. Make sure you are taking all precautions. If the smell bothers you, an N95 mask is your friend. Wear gloves (not latex!!), wear an apron to keep your clothing SAFE from spills, do not use in a carpeted room and always keep your area CLEAN, so no dust or other particles (dog hair/cat hair) gets in it. I highly recommend getting a silicone mat. 11. Baby wipes. They are miracle cleaners when it comes to wiping things down. 12. Keep your molds in air tight bags, keep your resin in a dark and dry space. Make sure it's closed tightly as well, so it doesn't dry up. 13. When making a DEEP resin item, pour in LAYERS. Wait 20 minutes or so before the next layer and use a heat gun to pop bubbles between layers. This is especially important if you don't want colors to MIX. 14. Heat gun. They're inexpensive and work MAGIC when it comes to popping bubbles on the surface. Finally, have fun!! Resin crafting can be a LOT of fun. I've made so many items for friends and family and they LOVE it and I have so many projects I want to do yet! So don't be afraid to experiment! While this is an expensive hobby to get into, once you're in the hang of it, it's a true blast. I hope this helps someone! <3
E**L
Perfect for a Beginner
I have been wanting to delve into the world of epoxy resin as I am a woodworker and interested in combining the two mediums. Getting started is an intimidating process because of the choices., If you have done your homework then you are aware (or should be) of all the things that can go wrong. There is proper mixing ratios, environment, bubbles, etc., etc, etc. Frankly I was scared to start, but it was a lot easier than I anticipated. READ THE DIRECTIONS and you will not go wrong. My first molding test turned out cloudy, but by my own fault. Make sure that the resin and hardener are at least room temperature when you mix. I now give mine a hot water bath for 10 minutes prior to mixing. The other thing to be cognizant of is making sure your mold is also warm, I use a heat gun to warm it up. Also be sure that if you are using a silicone mold that it is a glossy mold. If the mold has a flat/matte finish, your resin will come out the same. Last but not least, be sure to heat the bubbles out of your pour, I use a heat gun. Let the resin work its magic in a temperature controlled environment (I found 78F ideal) for about 24 hours, depending on the thickness of your pour. I did a 4 inch wide circle about 1/2" thick and following my previous precautions this epoxy (2nd attempt) came out like glass....exactly as I hoped for. As with any new venture there will be a learning curve. I unfortunately like to know the pitfalls before I dive in which delays my project start most of the time. Cleaning the cups is easy, wipe them out with a dry paper towel before the epoxy dries and then use a paper towel containing 91% rubbing alcohol to finish the job. Like brand new. You may want to but some extra mixing sticks or invest in some silicone mixing sticks. Overall I rate this an excellent product and if I get through this first batch, I will definitely reorder. Would highly recommend to my friends & family!!!
B**E
Excellent resin!
So far this is one of my favorite resins and I have already ordered 2 more sets of parts A & B. It is easy to work with, easy to release the bubbles and release from the mold after curing, and gives me a little more working time than most of the other resins I have tried. Even an extra 5 minutes is a big deal when you're wanting to pour that one last piece or two. It takes a little longer to fully harden than my other resins, but when it does, it's fully hardened and not flexible. The one thing I don't like about the product is the bottles. Because they are square and surface on the top is kind of wide but the cap neck is very short, it is just too easy while pouring for some of the resin to hit the edge of the bottle while being poured. I mean, you really have to be careful. If the cap neck was even 1/2" - 1" longer/higher, it would make the pouring so much easier and eliminate the pouring issue. I am not going to ding them on this however, because the resin itself has been go great to work with and phenomenal results. I only do smaller crafts like jewelry and home decor, nothing big like table tops, etc., and this is 1 of only 2 resin brands so far for me that have really stood out above the rest with regard to workability, performance, and final cured results. Highly recommend!
K**N
Nice beginners product
Good product for first time user had a few bubble issues maybe user error but over all nice starting product for beginners I have a piece I made a few years ago and it still looks good
Trustpilot
2 weeks ago
2 weeks ago