
Desert Online General Trading LLC
Dubai, United Arab Emirates
Desert Online General Trading LLC
Dubai, United Arab Emirates
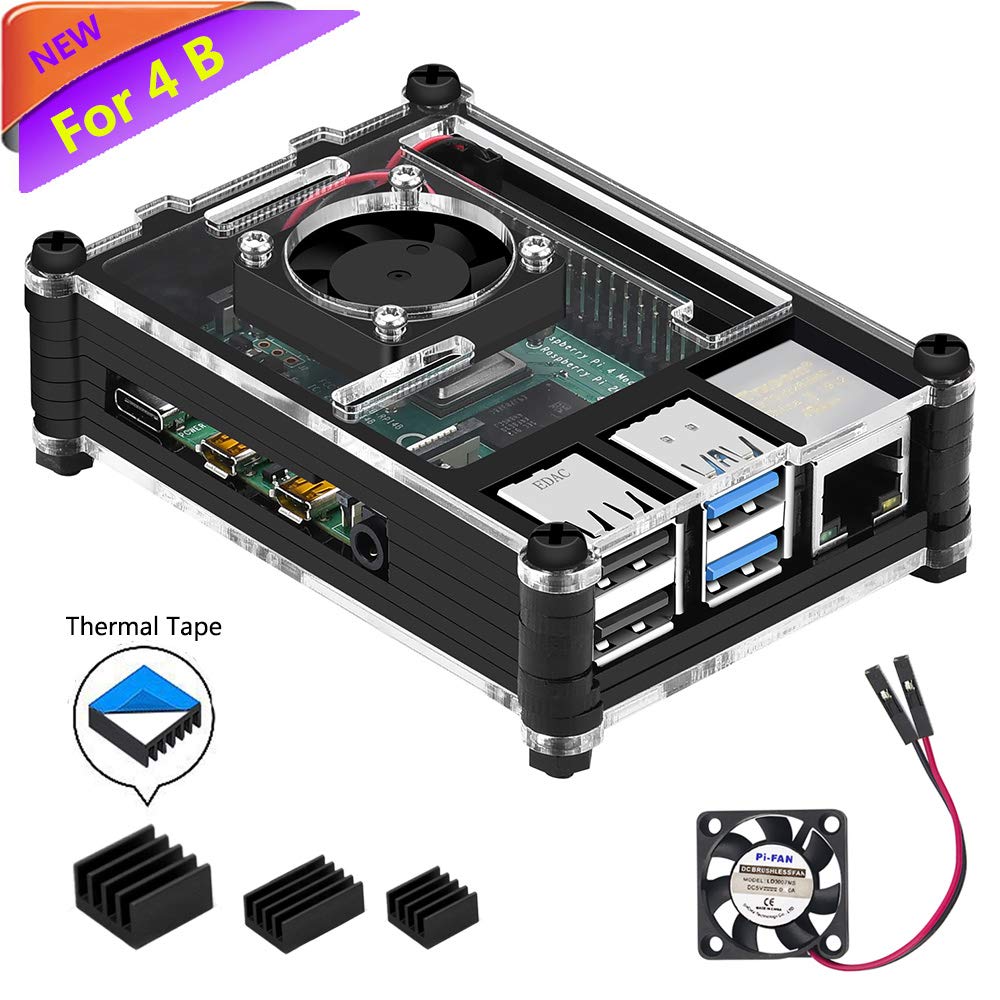
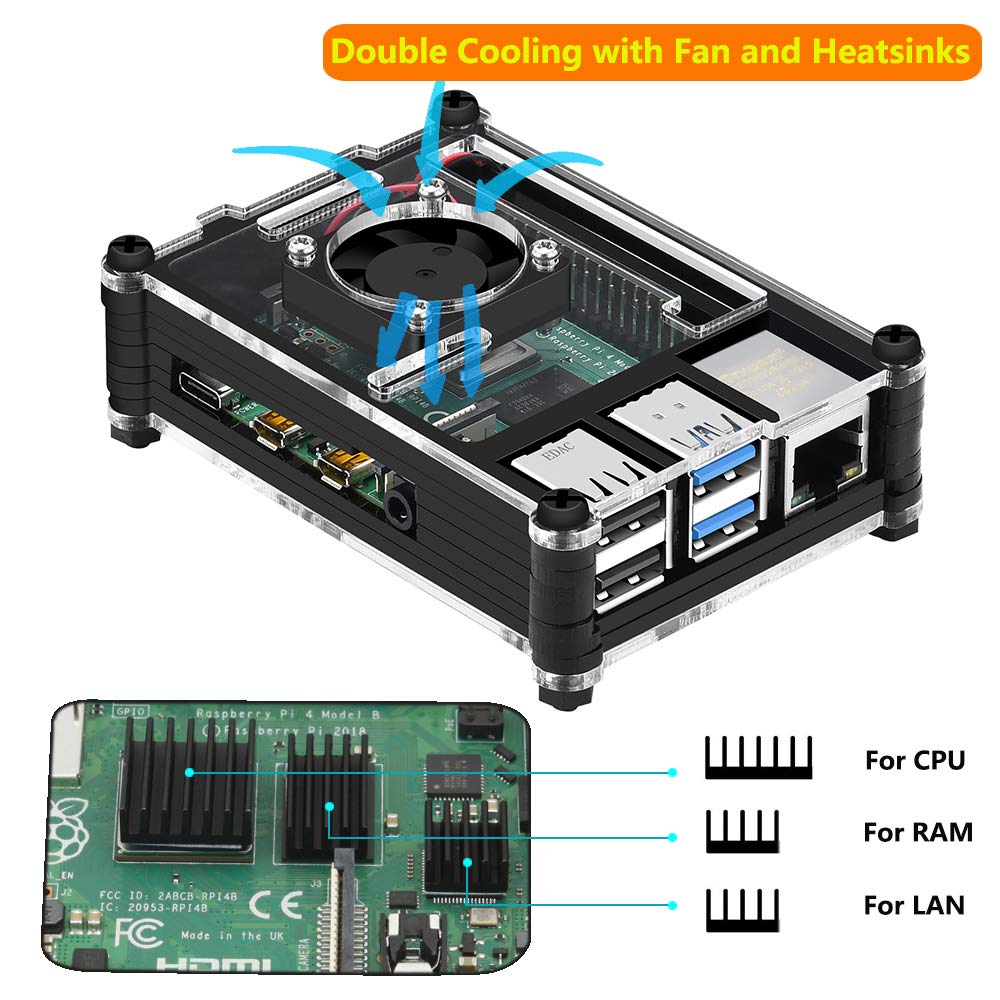


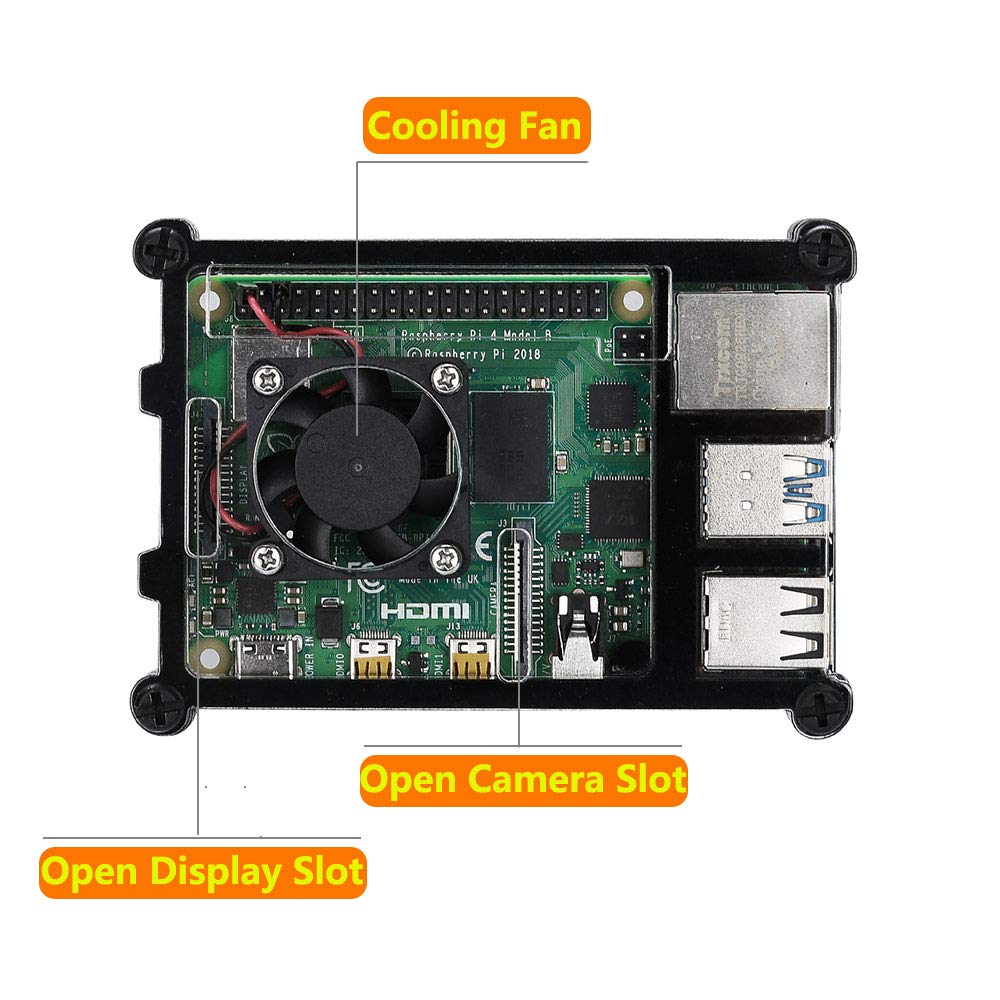


Full description not available
J**M
I love this case!
I love this case! With the fan running on 3.3V, the CPU clock at 1.4 GHz, and CPU utilization at 100%, my Pi 3 Model B+ core temperature peaks out at 55.8 deg. C with ambient temperature about 22 deg. C. Fan noise is inaudible at 2 ft.Assembly instructions are not provided. Here are a few tips:o Be sure to keep the layers in order.o The clear top and bottom covers have a protective film on the outside surface. Remove it before assembly.o Assemble from the bottom up. Use the corner screws to align the layers.o The Pi sits on top of the first black layer.o Install the heat sinks after two black layers have been stacked above the Pi.o Install the fan with the label down and the wires exiting away from the USB connectors
M**T
Great case for engineers and tinkerers.
**This case absolutely fits the new Pi3B+.I am quite pleased with this case. Keep the Amazon product page up while assembling since the product pictures contain important information about the fan and provide a good reference for what goes where. If you are looking for a simple snap together case, this product is not what you are looking for. This is a _layered_ case, which means the layers you see in the pictures are NOT glued together. (see my pics). iUniker has other cases that snap together easily.Product Quality:This is not made of flimsy material. It is made of medium density plastic that is quite durable. All the parts needed to assemble are included and are of good quality as well.Pros:1. This case is well manufactured. I like the new screws over the previous bolt/nut combo. As you are preparing to assemble, a very small drop of glue on the countersunk nut to secure it to the clear acrylic layer will make assembly much easier.2. The fan can be run in quiet mode or full power mode.3. The notches around the SDCard slot are recessed a little so big fingers can get in there easily.4. The case is layered but the layers are not glued together. If you have a custom Pi hats or accessories that don't fit in a standard case, this case gives you the opportunity to modify the layers you need to make a custom case without it looking like you took after it with a chainsaw.Cons:1. Assembly can be difficult if you approach it haphazardly. The layers can easily get out of order and flipped opposite directions. Before I did anything, I took a black sharpie (so it hides well) and drew a diagonal line along the side to mark each layer.. (see pic 1). This marking allows you to line up the layers properly and will clean off with little effort.Conclusion:Buy this case with confidence. If you are looking for a case with modularity and easy of customization, look no further.Optional advice:1. Once you get the case perfect, a small dab of glue at each corner between the layers will make the case permanent. HOWEVER, I would recommend to NOT glue between black layers 2 and 3 counting from the bottom. This will allow you to take the Pi out as needed. In essence, glue the bottom two layers together and the rest of the other layers together.
J**A
Nice little case for the Pi
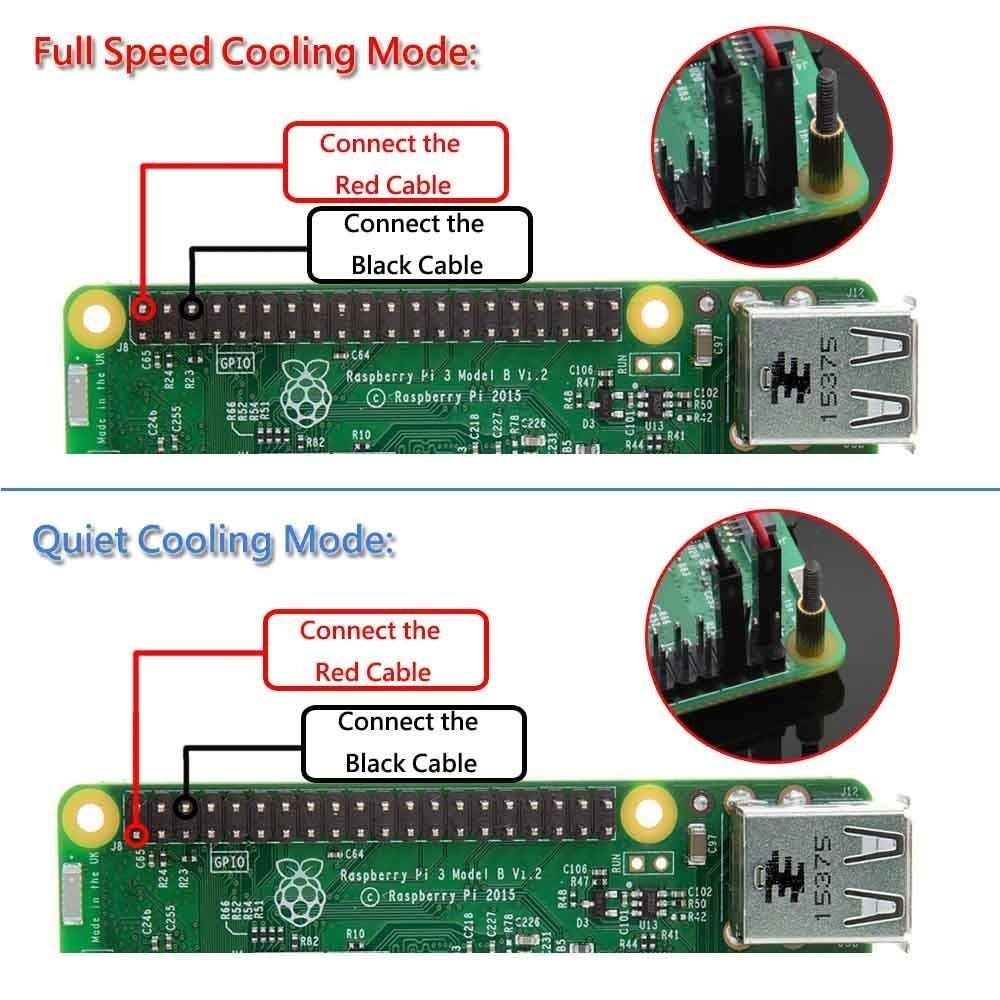
Nice little case for the Pi. As the ad says, it includes all the hardware, heat sinks, fan, rubber pads, and some instructions. This is actually 11 pieces of cut plastic (2 clear/9 Black) when stacked create the box. I like the idea, the pi fits nicely, and the cuts in the box match exceedingly well. I had to spend a little time figuring out what goes where—the pieces got knocked over. It would have been easier if the pieces were numbered.I removed one star off because the instructions do not tell you what pins to plug the fan, so I had to look that up (red wire to #4/black wire to #6). However, that did not stop me from recommending this to a friend. In a side note, I ordered Friday, arrived Saturday!
C**I
Waste of money due to a core design flaw!
I got the case today, assembled it exactly per instructions, went to plug everything in and... USB-C power wouldn't fit. Then tried the 2 HDMI ports, and same thing. All the USB-C, micro-HDMI, and 3.5mm audio ports IN THE PRODUCT PICTURE show them sitting flush to the side of the case. However, in the ASSEMBLED CASE the USB-C, the 2 x Micro-HDMI ports, and the 3.5mm audio port are about 5-6 mm from the side wall. This means that any cable I've tried for either power or HDMI port will not fit due to their plastic moulding. Now, instead of taking time to setup my Raspberry Pi, I'll spend the next hour seeking another case from a manufacturer whose testing methodology is not just to cross their fingers and hope it all works out.
S**R
Not bad for $, but tricky to assemble - keep a screw in place!
As many have noted, this case is not solid but rather comes in several layers that have been laser cut from acrylic. Getting the layers mixed up is very easy, so >>>-HINT!!!; leave one screw in place when you put the pi in the case and simply swivel the layers out of the way that aren't needed. To put the top with the fan in place you will need to completely remove the top, but again leaving screws in place while you work will keep things lined up and in order.Also the fan connects to the GPIO pins, 5v and ground. Look for an image of the pin functions online as the instructions don't tell you what pins to use - the guide with the Pi that came with the CanaKit had the pins defined.Apart from that it's ok. It isn't clean-looking due to the layers and obvious printing imperfections, but if you don't care then don't let it bother you. If you want a pretty case you aren't going to get one for this price, especially with a fan. But it is functional and the homemade look actually fits well with it being clear. No obstructions to any ports.
Trustpilot
2 weeks ago
1 week ago