🌟 Cool Down, Power Up! Unleash the potential of your CPU cooler.
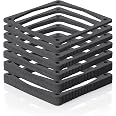
The Noctua NA-FD1 Fan Duct Kit enhances the cooling performance of NH-L9i and NH-L9a series CPU coolers by bridging the gap between the fan and case panels, allowing for fresh air intake. Its modular design features adjustable EVA foam spacers, ensuring compatibility with popular SFF cases, and is backed by a 6-year warranty for reliable quality.
Number of Batteries | 12V batteries required. |
Compatible Devices | Desktop |
Number of Channels | 8 |
Special Features | Fresh Air Intake |
Item Weight | 54 Grams |
Item Dimensions D x W x H | 4.72"D x 1.88"W x 3.89"H |
Color | Black |
A**N
it works reducing temp 12 degrees f, not ready for 25mm fan
A lot of extra tubes come with this, so my first thought is that I can use it for two computers, but it only comes with 4 of the thumb screw things that you push the pipes down over, so once you've installed one, the lack of more thumb screw things means all the extra foam and pipe you still have are useless. I bet Noctua would send me more if I asked.Also, the screws you get are not compatible with the 25mm NFA9x25 fan that the nhl9i cooler itself is ready for, even including screws with it for that.To clarify, the nhl9i comes with longer screws that you can utilize if you want to swap the NFA9x15 fan that comes with it for a better NFA9x25, provided you have the clearance for it and have purchased said fan separately. These screws however, just like the ones that come on the preinstalled NFA9x15, are not the thumb screw type and won't work for a way to hold the pipes in this duct kit. The duct kit comes with 4 screws, one for each corner. You are to replace the preinstalled screws on the NFA9x15 with these. Once screws are installed, they protrude above the frame of the fan slightly, and the pipes in this kit slide down over those and friction holds them there. So what I have been trying to say is the longer version of the thumb screws for NFA9x25 are not included in this kit, so you'd probably have to ask Noctua for those.Now, once the pipes are installed, you shove the foam pieces down over the pipes, with the pipes coming up through the matching holes on each foam piece. Make sure the thickest piece is the one that ends up on top.From what I can figure, they normally recommend you stick a tooth pick through the grill over the fan and touch one corner of the fan and then mark the toothpick for the height, and then use that to determine the height your foam pieces must achieve. However, Inwin Chopin Max case has holes too small for that, so I put the thickest piece on the fan and just piled the biggest pieces remaining on top of that and carefully laid the side panel in place until I could feel that I had to press down slightly to make it touch against the case the way it will have to be when properly installed. Then, I sat the stack of foam I ended up with to one side and I pressed 4 straws down, one on each thumb screw. Now take the thinnest of the foam pieces I ended up setting aside earlier and press it down on the pipes all the way down till it's against the fan. Now take the next thinnest piece and depress it until it lays against the first piece. Rense and repeat until all pieces are installed. Now, in theory, you can just press down on the top piece and cut the pipe with scissors. I didn't like the chance of cutting the foam though, so I removed the top piece and cut the tube off protruding just a bit, maybe a little more than a quarter of an inch, above the next foam piece that was still installed. My scissors cut the pipes easily. Once cut, I put the top, thickest, foam piece back on. Always make sure the thickest foam piece that is in the kit is on top. The reason for this is added durability plus it lets you cut the pipes a fair bit short but the foam piece will still be held in place. This is so that you can know the hard plastic pipes won't be pressing against the side panel once the soft foam has compressed a little.Now to geek out with this. As it turns out, I built two Chopin Max computers at the same time. Intel 12400, Noctua NHL9i-17xx, AsRock b660m-ITX AC, 32gb Teamgroup G-Force Vulcan, 1tb wd blue sn580. I bought duct kits for both but chose to install only one first. After completing the builds, I did burn-in tests on both machines. AT first, I was kind of disappointed to find the temp hovering at 154f on both computers while running the CPUZ stress test, exactly the same temp, 154.8f.But then I happened to notice the fan on the ducted one was running at 2270rpm, and the one on the unducted system was running at its max 2550rpm. Once I used Fan Ctrl to force the fans to both run at 80 percent capacity, the unducted system proceeded to gradually warm up until it was at about 170f, where the ducted one stayed right around 158f.To be sure, I ran the same test again once the duct kit was installed on the second system, both now ducted, and they were within a degree of each other's temp.
G**2
5 degrees cooler as advertised!
I was debating whether this would actually make a difference, but after installing and testing it, I was honestly surprised. I have the R5 7600X, and before, my CPU was averaging around 70°C during gaming and CPU-intensive tasks. After installing this, the average temperature dropped by 4–5°C.It’s not a massive difference, but for what it is, that’s pretty good in my opinion. If you have the space, I’d definitely recommend going with a bigger cooler if you’re aiming for significantly lower temperatures.Installation was pretty straightforward. I recommend laying your case on its side and stacking a couple of the ducts on top of the cooler. Then, close the lid to check if it fits, removing or adding ducts as needed.
V**H
Pretty easy mod for a decent change in performance
Reduced the temps of my system by a couple degrees, pretty worth it for a pretty simple mod. I would say slightly overpriced for what it is, but no real complaints here.
T**R
Could use more screws, works good.
I am using these spacers in a custom build. I've replaced the fan on the Noctua NH-L9i for a 25mm deep fan and ran into an issue installing the spacer tubes. I ended up re-using the fan screws from the heat-sink and put a spacer between the bottom of the fan and heatsink to make up the space. At the front of the fan I improvised and used rubber mounts backwards to hold the other spacer into place. This product works great at removing buffeting sounds from the fan and help direct cooling. Would like to see more options for peg-screws, or at least taller ones included.
A**N
Smart cooling solution for space constrained cases
Very effective in my Node 202 case build— reduced peak gaming CPU temps by nearly 10° (from ~90 → ~80°C). Very easy installation, fit is very customizable and not permanent.
A**N
This actually works.
I added the fan Duct kit. It's amazing what these little ducts can do. I mean my rig was thermal throttling, and these tiny ITX cases are infamous for poor heat dissipation. I put this in my Fractal Node 202 case, and my i7 6700K went from 35-45C to about 27-35C idle and no more than 80C under heavy load.I can't sing Noctua's praise enough. I've cheaped out on small itx build CPU fans, but this is well worth the expense. I took the Silverlake or whatever one back I had initially bought.These guys know what the heck they are doing.
A**R
Noticeable drop in temperature
I built a mini server inside a Jonsbo N1 Mini-ITX computer case. Awesome case but since it's so compact there is only enough room for one case fan in addition to the CPU cooler fan. I have a Noctua NH-L9i cpu cooler installed that, while normally a great cooler, wasn't cutting it in this ultra compact case. I wasn't happy with the higher temps so I opted to try this fan duct kit. After installing this duct kit on the CPU cooler I noticed an immediate 10C+ drop in CPU temperature.
R**L
Turbulence Noise Redundant
The Included Pegs don’t fit with other cpu coolers with metal clip ons which I’m assuming only Noctua coolers don’t use for their functionality. You have to rely on 3D printed parts or cutting the plastic straws to get it right. Fairly disappointing considering these extra steps but otherwise works great
Trustpilot
1 month ago
2 weeks ago