Desert Online General Trading LLC
Dubai, United Arab Emirates
Desert Online General Trading LLC
Dubai, United Arab Emirates


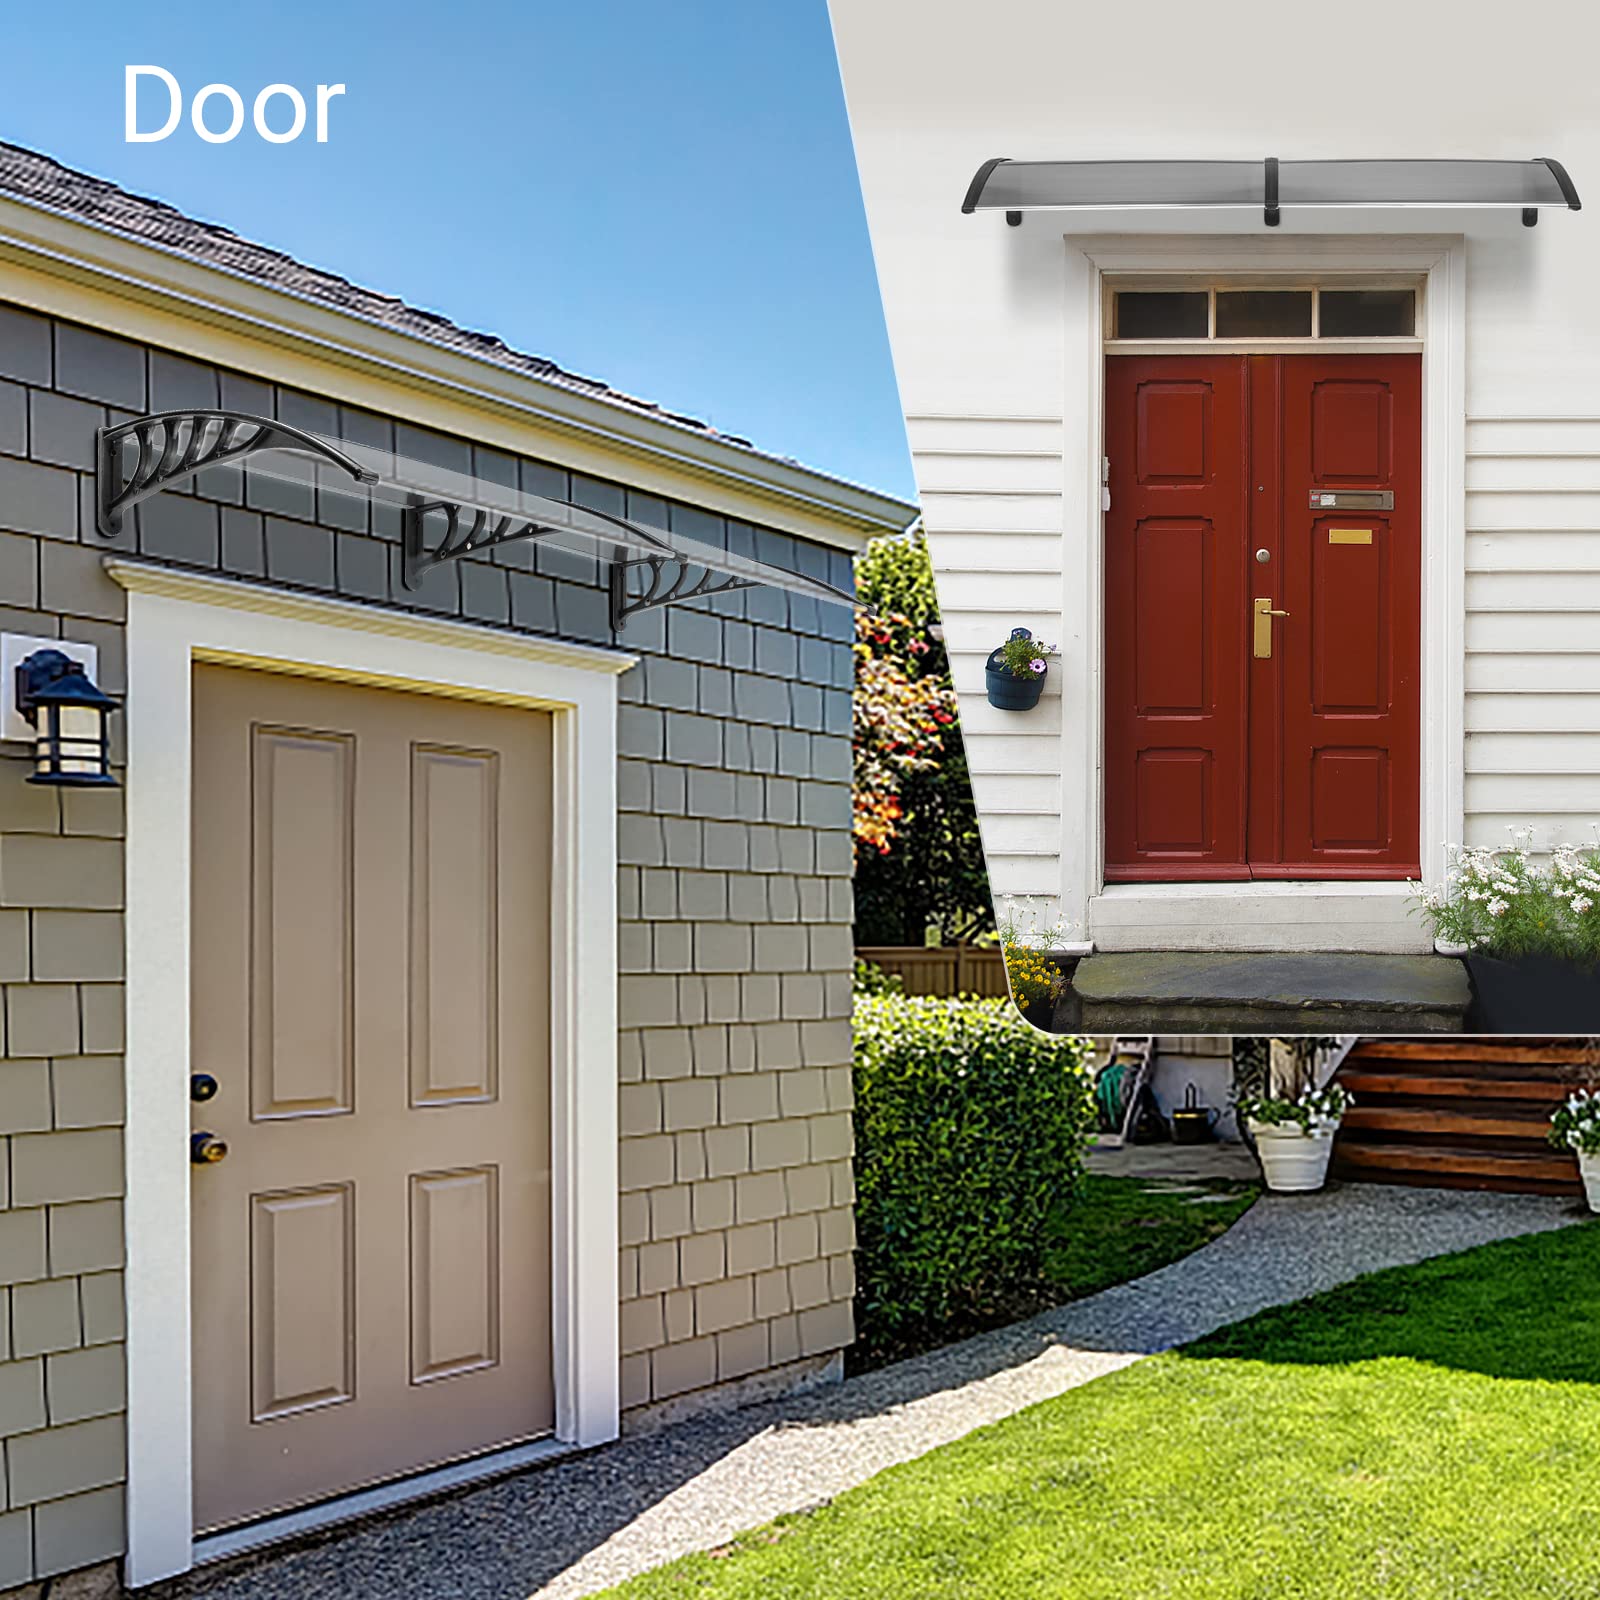
🏡 Transform Your Entryway with Style and Protection!
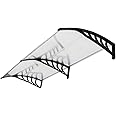
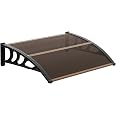
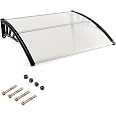
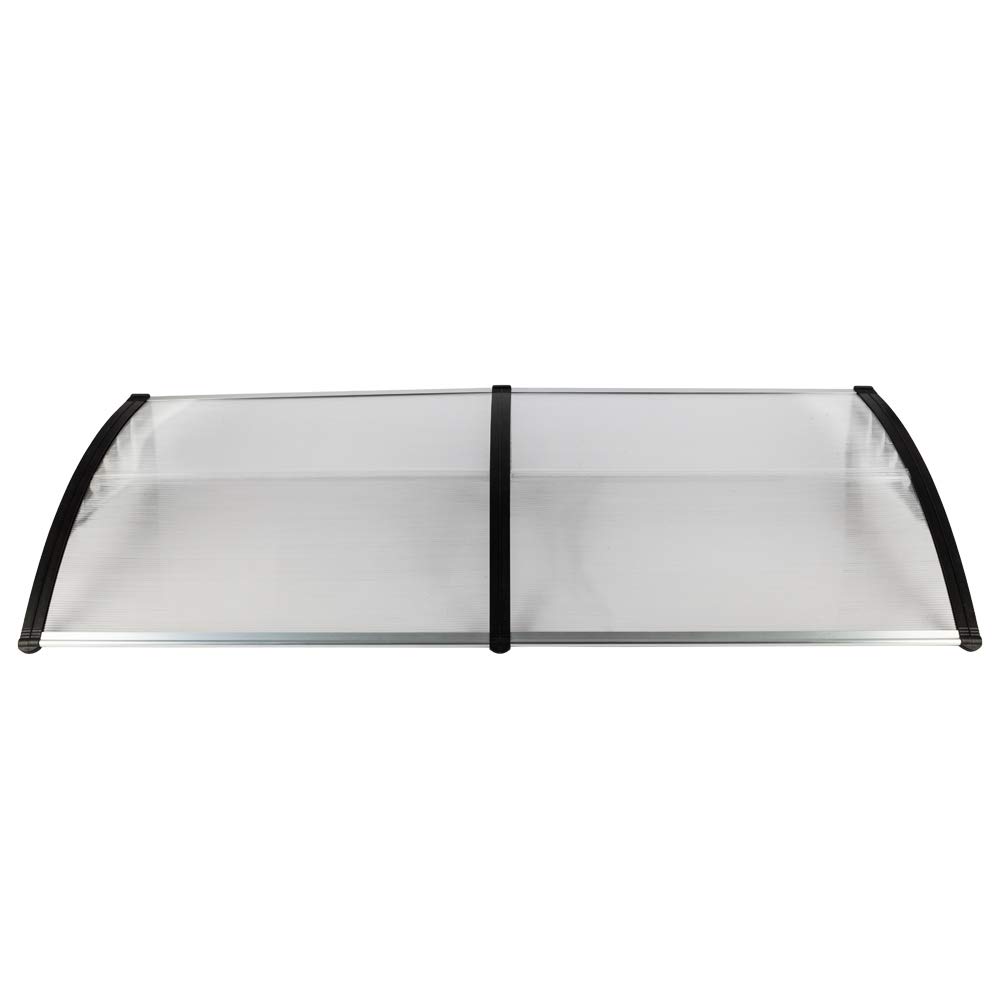
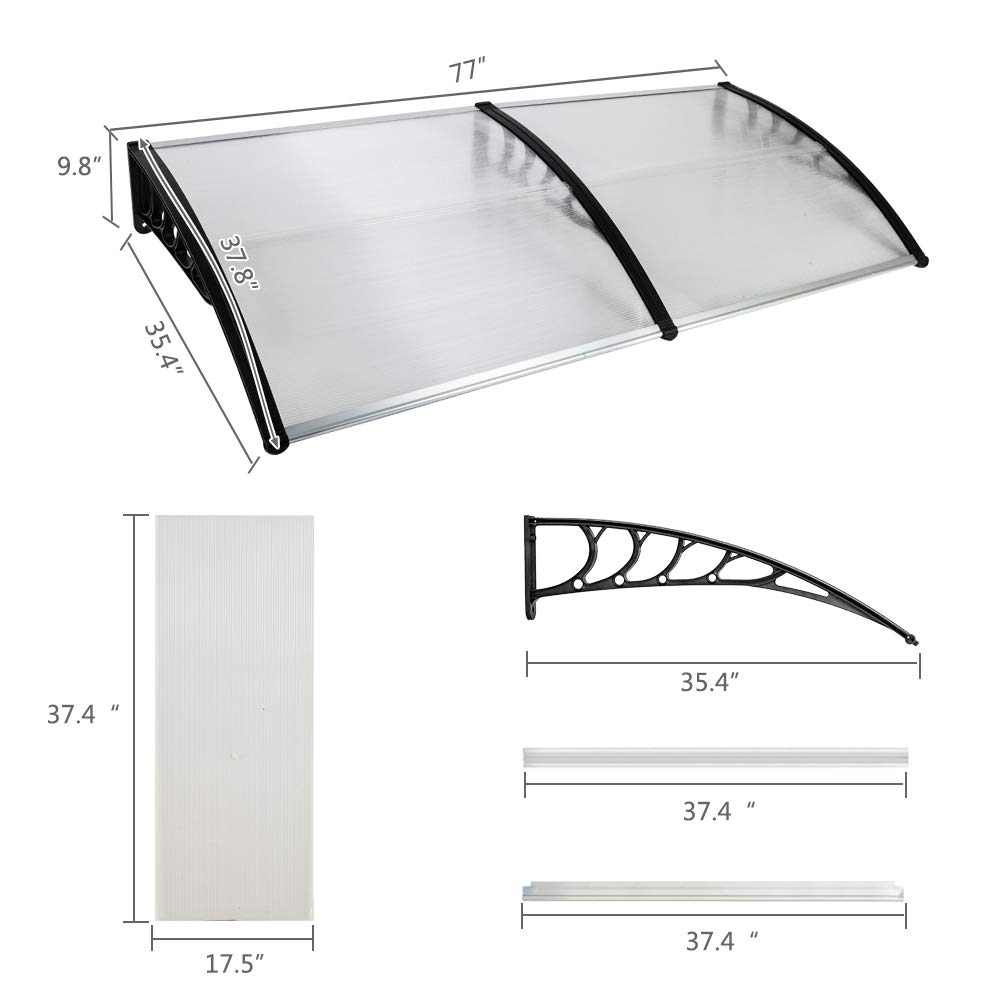
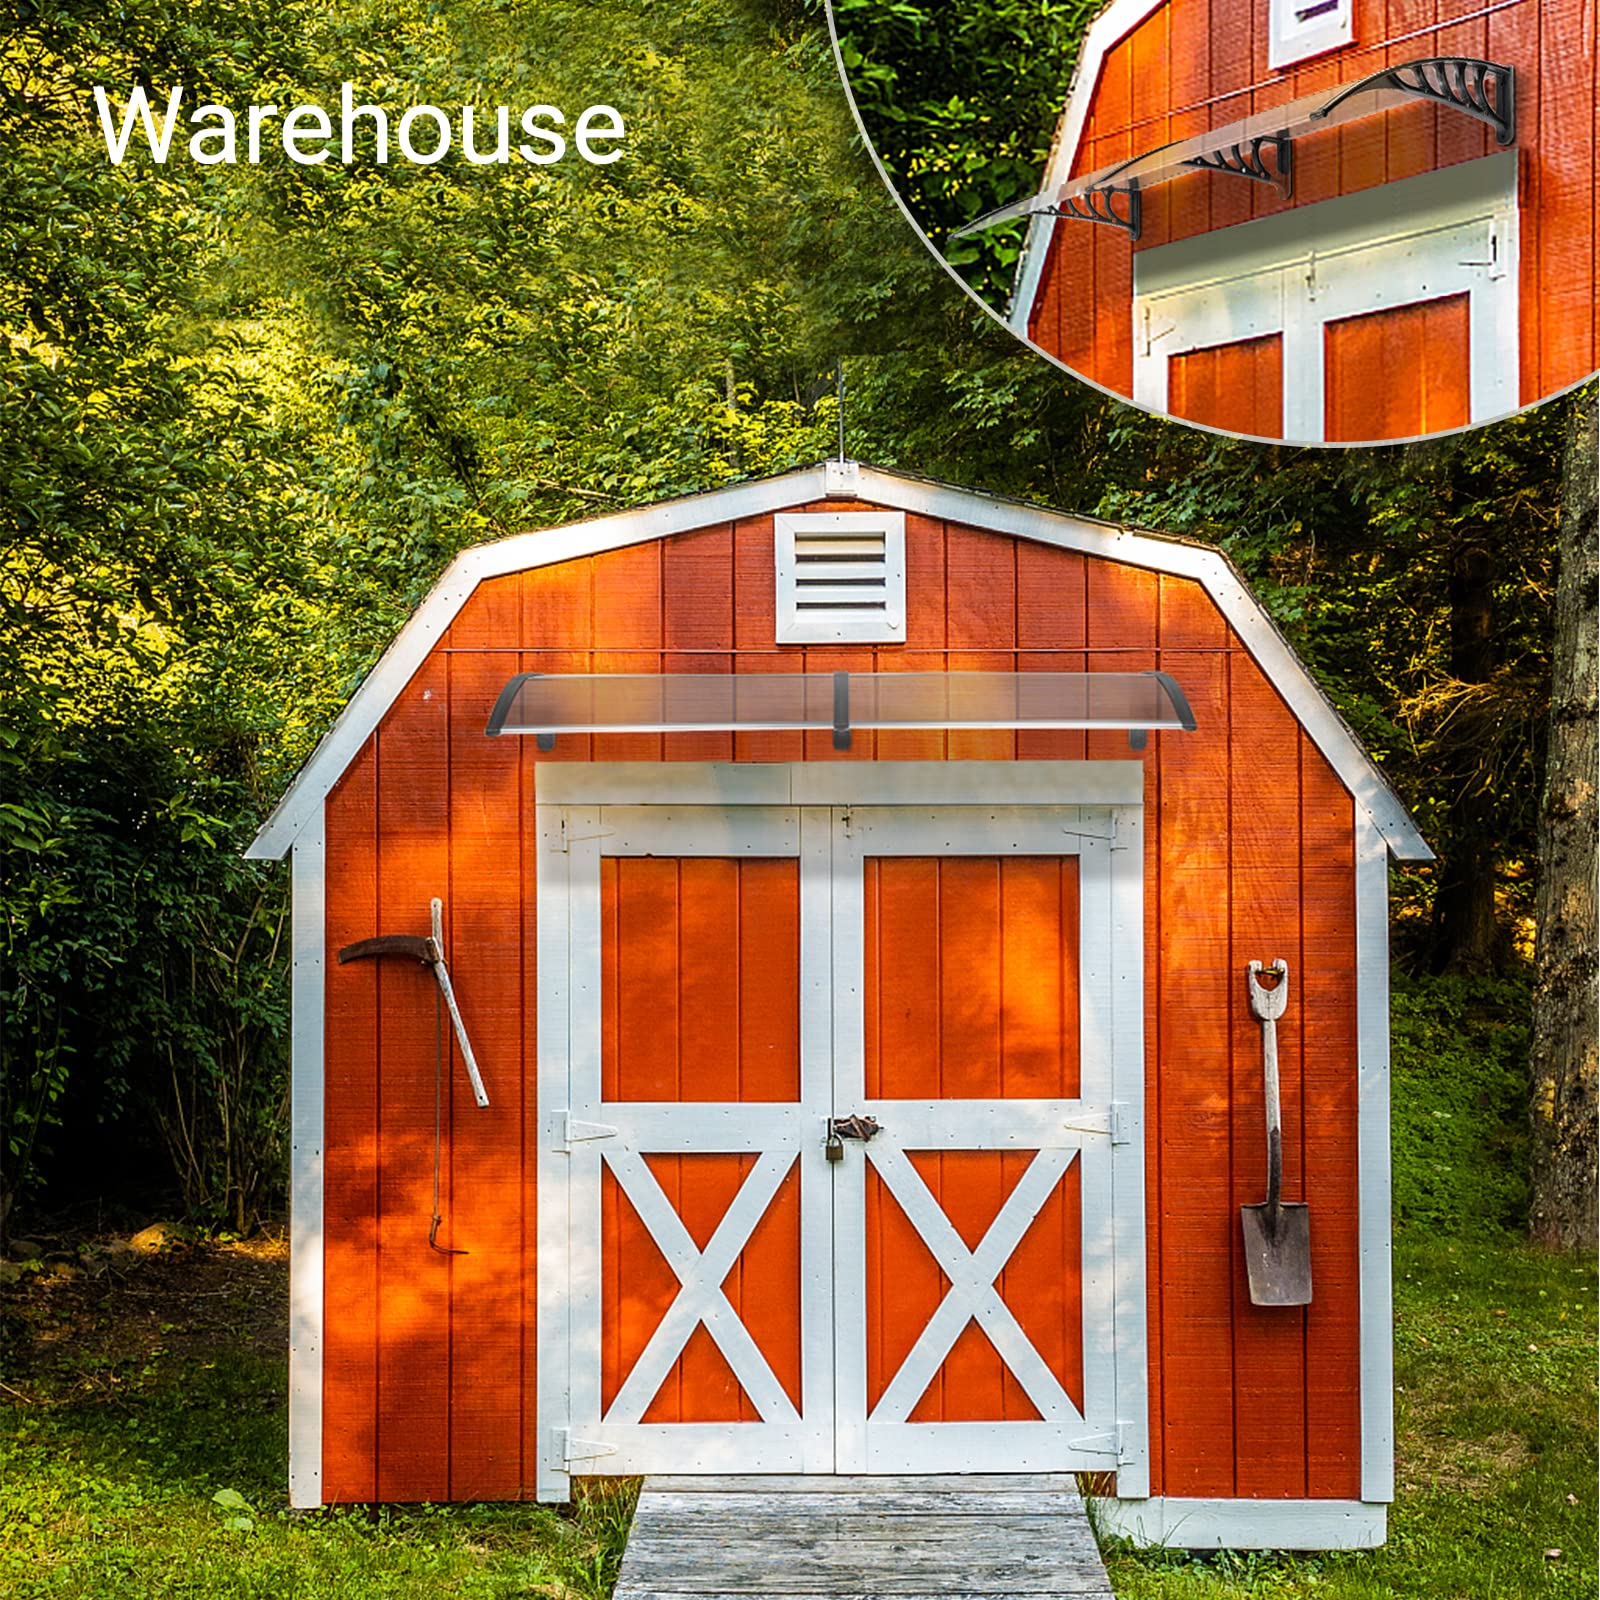
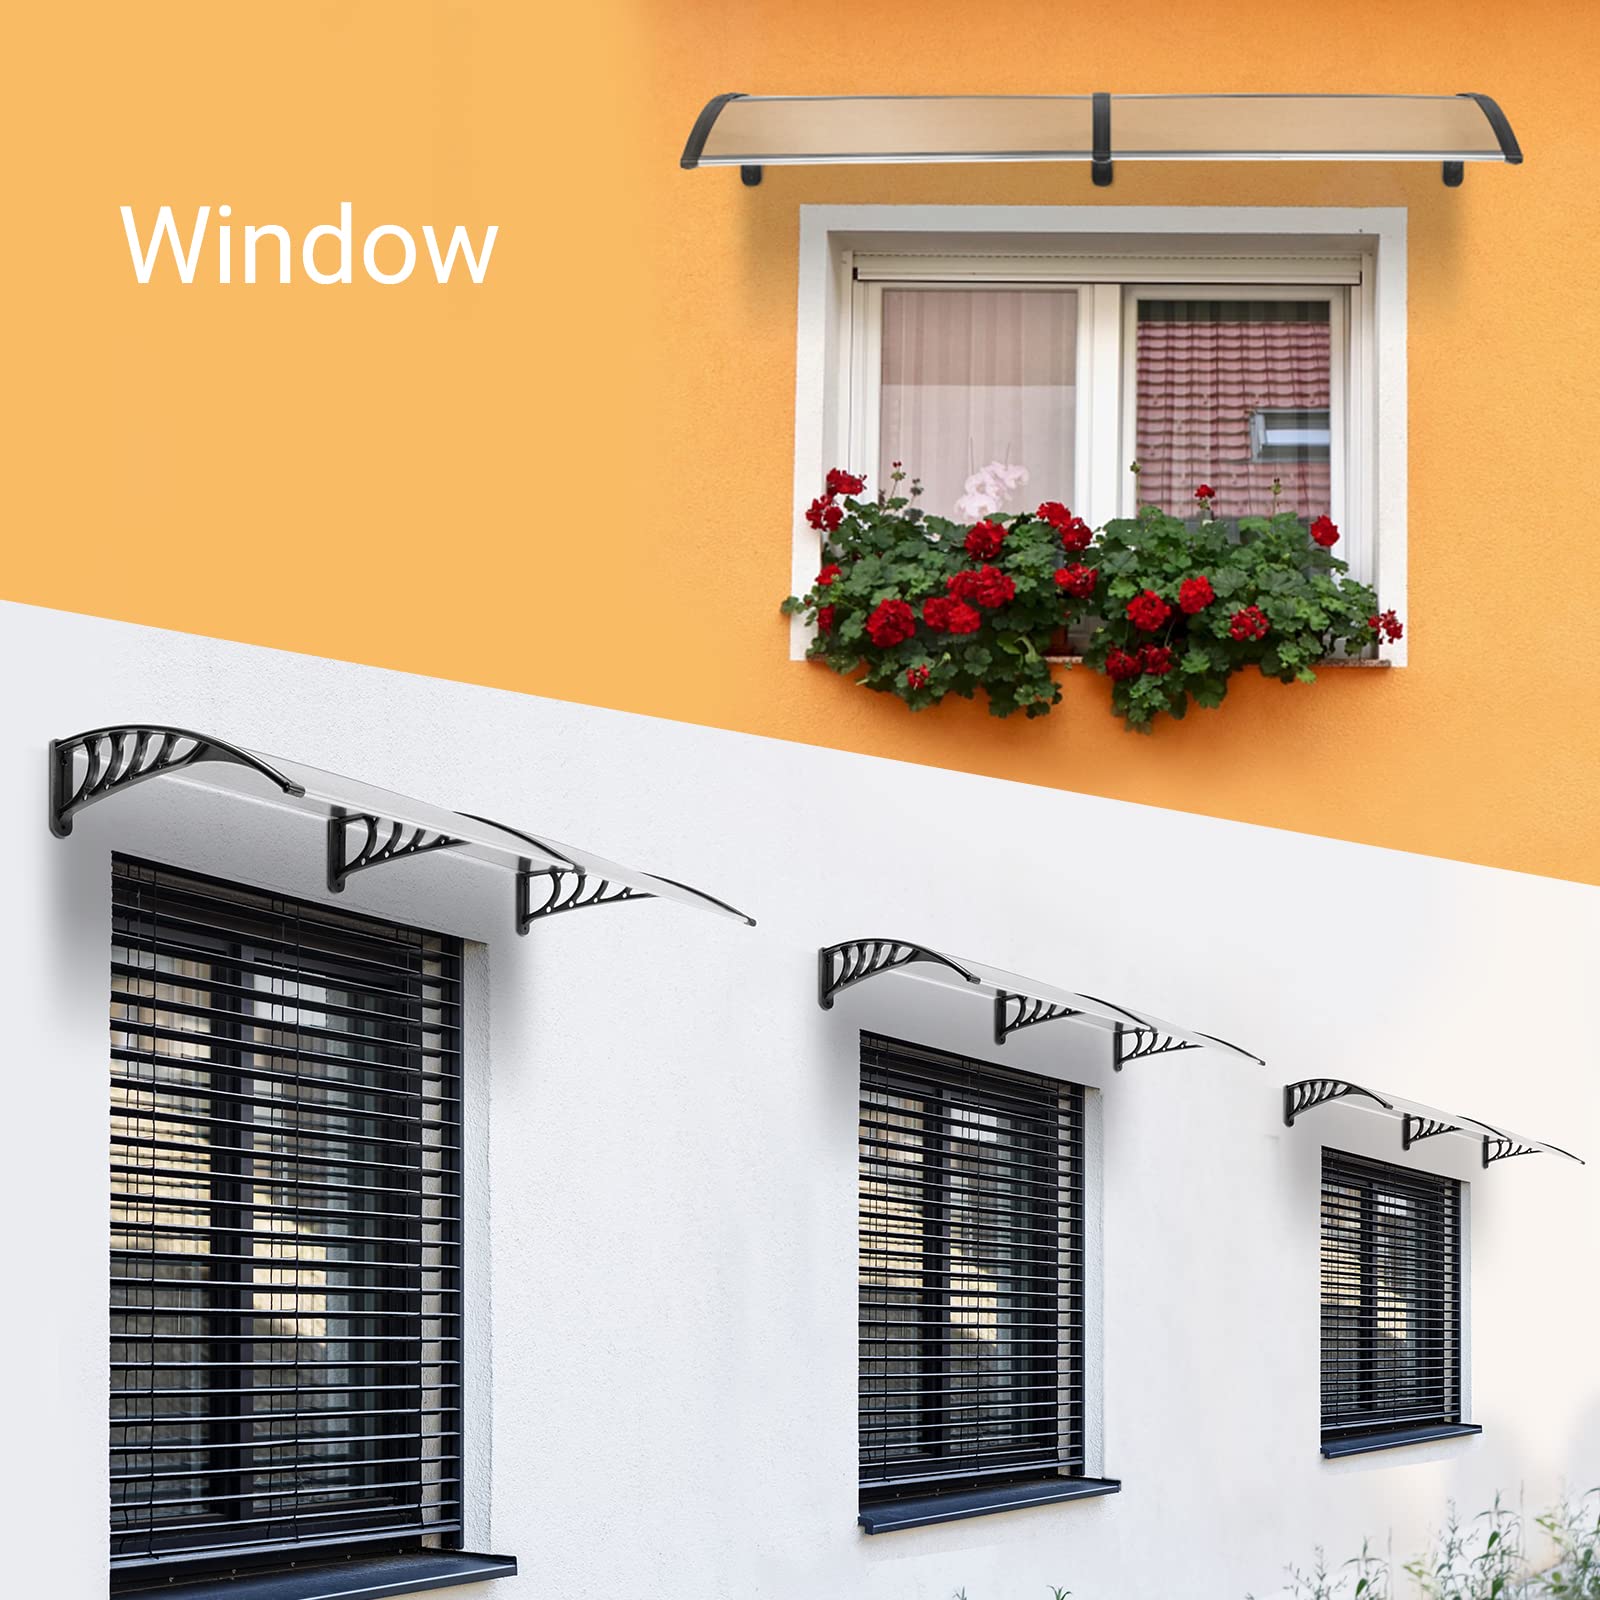
The Outvita Window Awning Door Canopy measures 77"x35.4" and features a robust polycarbonate cover supported by a durable aluminum frame. Designed for easy assembly, it provides reliable protection against rain, snow, and harmful UV rays, making it an ideal addition to any home or business entrance.


| Item Dimensions D x W x H | 35.4"D x 77"W x 9.8"H |
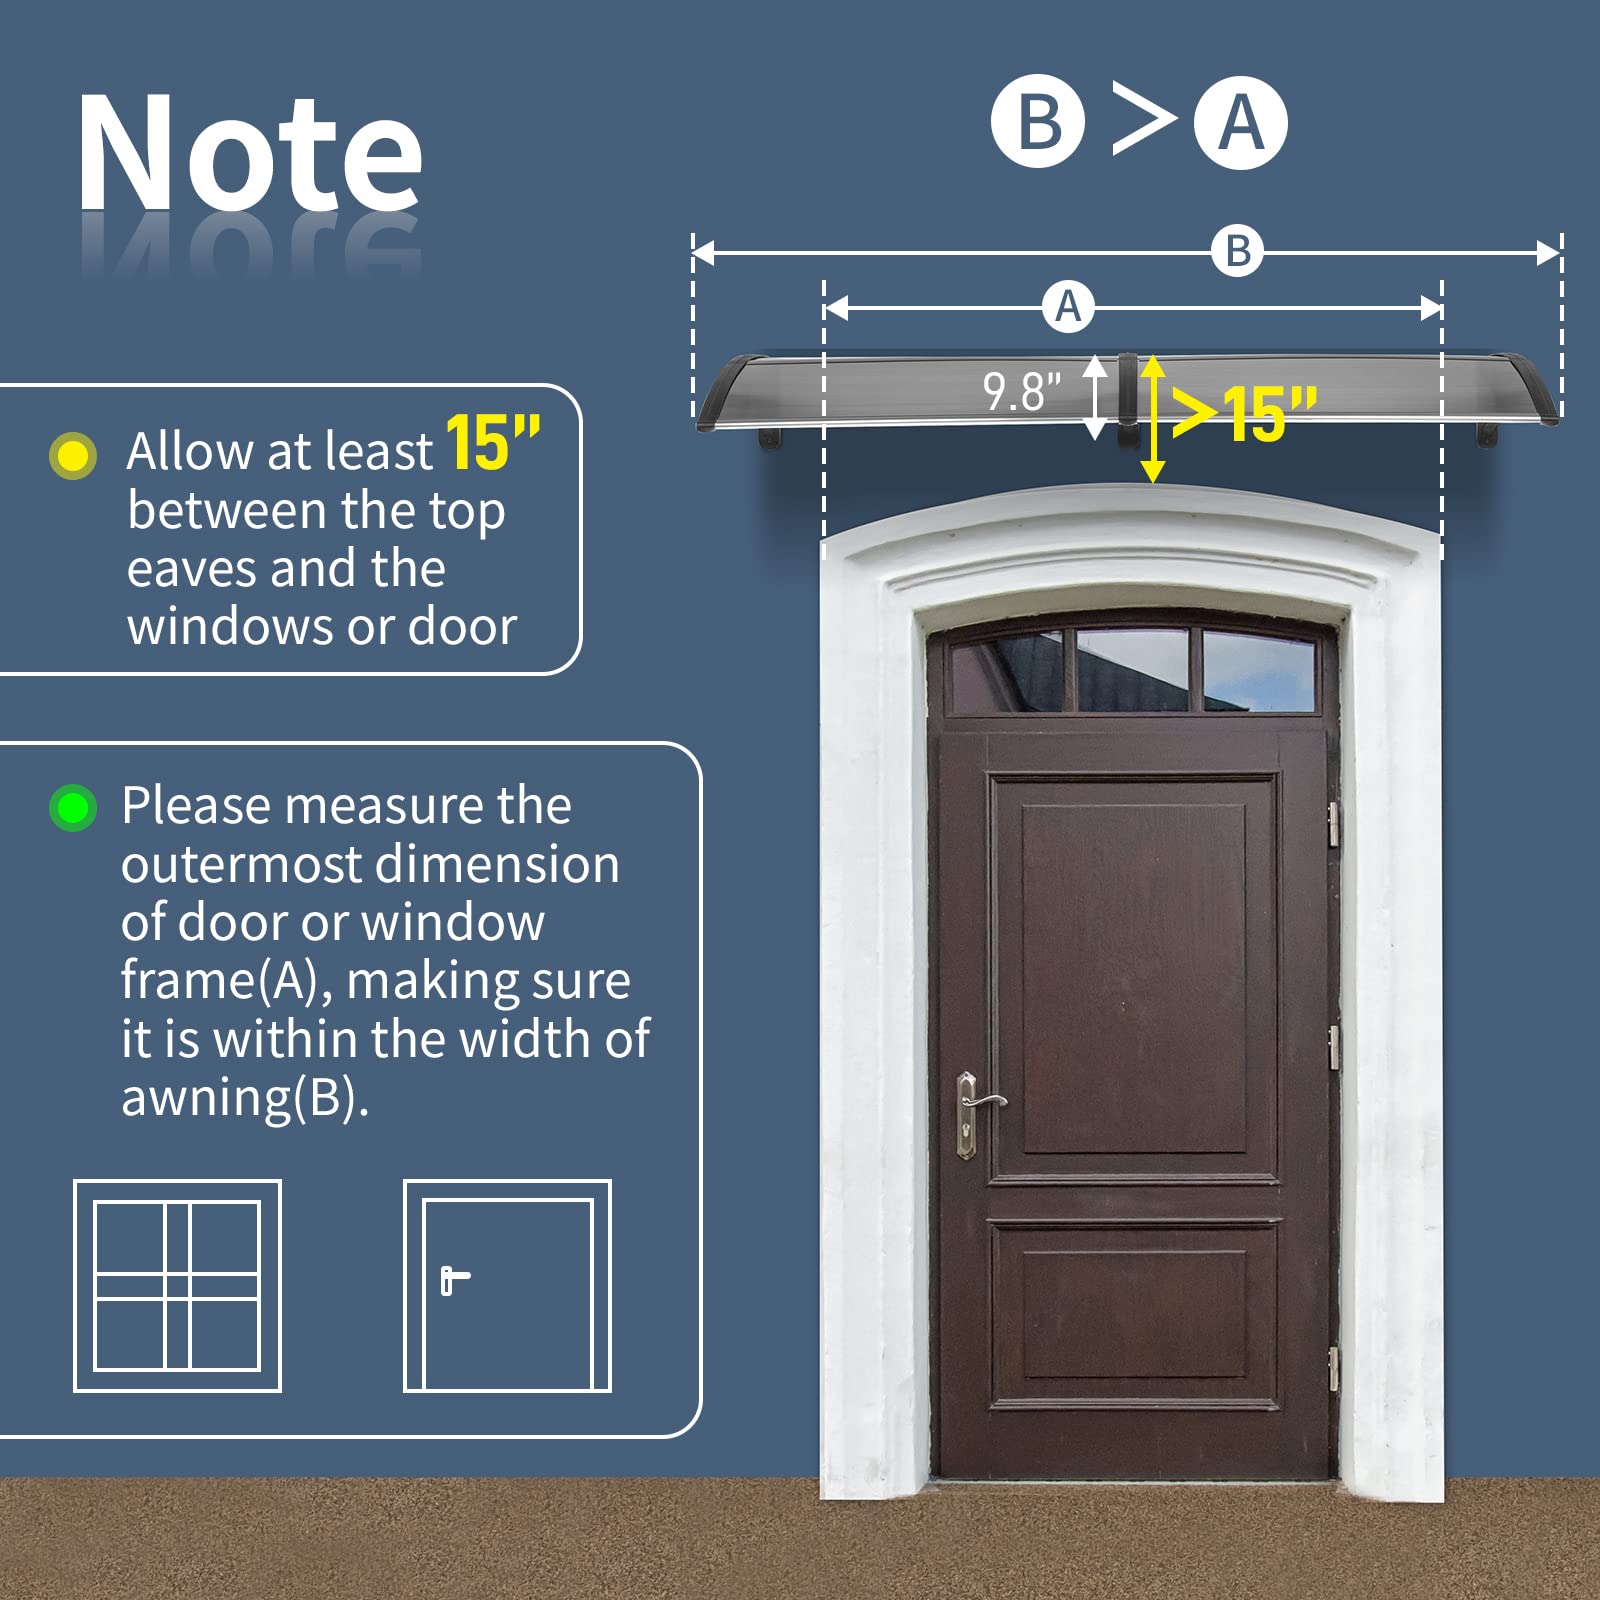
| Minimum Clearance | 15 Inches |
| Item Weight | 4.2 Kilograms |
| Size | 80" x 40" |
| Style | Modern |
| Pattern | Solid |
| Color | Clear Board & Black Bracket |
| Fabric Type | aluminum |
| Material Type | Aluminum, Plastic, Polycarbonate |
| Required Assembly | Yes |
| Operation Mode | Manual |
P**N
Great awning for the price
This is a decent awning; I'd be inclined to say a great awning for the price.Assembly takes no time at all (I bought the single-panel and the 3-panel), so let me provide some basic assembly and installation advice...0: Yes, step 0- start with a working area big enough to support the WHOLE assembled awning AFTER assembly1: spray bottle of water- moisten edges of corrugated poly panels prior to sliding the clear "joiner" piece that connects the 2 poly panels. This makes assembly far easier. No need for silicon, which will make things harder to clean and wayyyy harder to grip.2: 2 sets of hands will make it easier provided you are working with somebody who communicates well. MY wife is and does, and it took maybe 5 minutes for the single-section awning and less than 5 minutes for the 3-section. Why the difference? I assembled the single-section first.3: Feel free to start screws with a power tool (my M12 Impact worked fine) but I still finished screwing the assorted screws using a stubby screwdriver4: if you opt to use the mounting hardware, do so at your own risk. I knew from the get-go it likely wouldn't work, given my home's stick-built (2x4/OSB/vinyl siding) construction. The expanding sleeve-n-bolts hardware would work find on stone, brick, block, or maybe a log cabin... On stick-built construction, don't bother. Head to your big-box hardware store and buy some lag bolts, preferably black epoxy-coated. You might be able to get by with 3", but I'm thinking most folks would use 4" or longer lags. They simply work, allow easy removal if needed, and color-match the mounting brackets perfectly5: now for the actual mounting...a- You can either put up either the middle section or one side, then work with a partner to add each section... meaning joining the new assembly to the mounted one and then leveling and mounting without damaging anything fragile.... I feel this complicates the assembly and creates a lot of risk for damaging the composite brackets, bending the aluminum, or simply breaking something. Holding a bracket while a partner tries joining the sections, plus marking/mounting... no thanks.b- build a framework to put the completely assembled awning in place and then use shims to level, then mark for holes, slide the assembly forward, drill the holes, and then use the lags (or whatever hardware tickles your fancy, including OEM), and be done with things in a couple minutes.I chose method "b"... I had scrap lumber so I built some wood "boxes" 3 feet deep, 2 feet wide, and a smidge over 7 feet tall, laid some 10-foot boards across the 2 "boxes" (since the awning is over 8 feet wide) and used other scraps as "sliders" directly underneath the brackets, then lifted the whole awning into place on the sliders and used shims to level. Once it was level, I marked the spots to drill, broke out a 3/16" drill bit, and made some holes in my wall. I then slid the awning back to the wall and screwed in the 8 lags. We're talking zero effort, no wiggle-waggle or struggling to join together awning sections while also marking holes or screwing in lags. Sure, juggling awning sections may be your cup of tea, built making an ad-hoc "scaffolding" simplified the process for me and my wife is very happy with the results.
M**T
Does the job and looks great
Arrived early, checked the content and looked like a H Bar was missing, but found it was at the bottom of box. - most times I do not write a review until item is put together. When completed If it falls apart on a windy day then the screws and sharp screws are not being used. The Assembly Instructions are very straight forward - a child could understand them, the front page tells it all: assembly break apart and list of items; then for more detail look inside for screw placements etc... for 40 by 80 there are 3 frames, and for 40 by 120 there are 4 plastic frames (sharp screws CANNOT be left out for 40 by 80 and above) I am a computer programmer and not a Carpender does that put me at the child level on putting things together. (humor) - I looked at the instructions and started by attaching (first) plastic frame to the house by centering and leveling it; after that I installed the second plastic frame with the aluminum bars so I could drill the holes (placed correctly) for this next frame EXPANSION bolts. - no measuring and centers is needed ever again at this point. Once the holes are marked off the second frame then was removed and holes drilled, the panels were installed in the first frame before second frame was reattached. I was the only person installing awnings, so my helpers were Duk tape added if panels fell apart while assembling (can be removed when completed).Once put together it is quite sturdy with combination of aluminum bars and plastic frame that anchors to the house surface. The screws and sharp screws secure these parts together - during assembly the screws connect the aluminum bars to frame, using predrilled holes that line up with threads at the end of bars; the sharp screws (self-tapping) can be added later to secure the panel/frame/bar together. (NOTE: for more then one panel the sharp screws need to be installed where the instructions say; aluminum to plastic frame - these are the only connection the two or more panels have.) I found that the panels fit very easily in the plastic frame and aluminum bars, but the H-Bare was a tighter fit - I just slide it in/along the groove, guess this means it is watertight. I have found that connecting the frame to a smooth surface makes the awning more sturdy and fewer water leaks. Once completed it is quite elegant and no one will even consider it is made of plastic and aluminum. I feel it will protect from rain and sun - it is winter now let's see how it will fair in the summer.
F**D
Window well cover
I have purchased five of these door canopies now. None are placed over a doorway. All five are used to cover window wells around the perimeter of my house. I was getting water into the basement when there were excessive downpours due to water accumulating in the window wells. These handle the job perfectly. The water rolls off into the grass instead of into the window well.Two caveats. First, they are kind of a pain to assemble. It takes about 15-20 minutes of manipulation and foul language before they are completed. Pretty sturdy once assembled but you cannot stand on/place anything on top of them as they are not built to hold any real weight. Second, make sure to take the plastic covering (very thin sheets) off BOTH sides of each of the panels. The first is easy to see as it is opaque. The second is clear and you won't notice it until light cannot shine through the panels.
L**.
Worth the price
I purchased 2 of these for our home in the Midwest. I have not been disapointed. They look great on the house, keeps the rain and snow out. They are lightweight and I first thought they will not hold up when the snow come. They have held up very well. I would definitely buy again.
Trustpilot
2 months ago
1 week ago