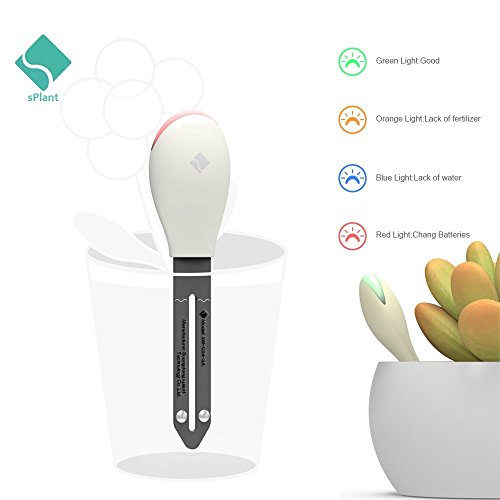


After receiving the goods how to use sPlant soil tester:Step 1. Open the package and take out the goods, please open the lid without LOGO, remove the transparent plastic sheet insulator, then close the cover.Step 2. After inserting to the soil, make sure the test rod is inserted into the soil to a sufficient depth and do not to cover the white wavy line.Step 3. Ensuring that the depth of insertion is correct, add appropriate water to all soil, including the soil around the tester, and wait for the lights to indicate.Step 4.sPlant detection rod is specially designed for potted plants. Please do not move the detection rod frequently during the testing, just one tester is meant to be with one potted plants.Please read important instructions carefully before use:A: Different plants need different nutrition and water, how much water and fertilizer should be addedSolutions:1. Different plant's specific needs of nutrition and water, how much water and fertilizer should be added, you need to judge according to your own experience or sPlant Apps plant databases.2. If you really need more accurate functions, you can buy our advanced version of intelligent herb flower pot to do it perfectly.B: Light displayed roblems after add water or fertilizer, the yellow or blue light is still flashingReasons + Solutions:1. The potted plants soil may be not a conventional soil, and it's loose-leakage sand, then because the soil tester detection touched area with soil is too small, it can't work properly. So please ensure that the tested soil is dense and burly enough.Soil Moisture & Nutrition Tester Light Indicator Display:★ Blue Light: Low Moisture ★ Green Light: Good★ Orange Light: Low Nutrient ★ Red Light: Chang Batteries
Trustpilot
1 day ago
1 month ago
