🏡 Level Up Your Space with Ease!
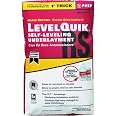
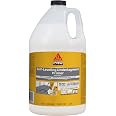
The CUSTOM BLDG PRODUCTS 21018 Floor-Leveling Compound is a high-quality, fast-drying solution designed for effective floor preparation. With dimensions of 19.5 x 12.5 x 4.1 inches and a weight of 50 pounds, this product is engineered for optimal performance and durability, making it an essential choice for both DIY enthusiasts and professional contractors.
| Manufacturer | CUSTOM BLDG PRODUCTS |
| Part Number | LQ50 |
| Item Weight | 50 pounds |
| Product Dimensions | 19.5 x 12.5 x 4.1 inches |
| Item model number | 21018 |
| Is Discontinued By Manufacturer | No |
| Size | 1 |
| Color | Gray |
| Finish | Gloss |
| Item Package Quantity | 1 |
| Coverage | floor surface |
| Special Features | Fast-Drying |
| Usage | Floor leveling and preparation |
| Included Components | floor-leveling-compounds |
| Batteries Included? | No |
| Batteries Required? | No |
W**L
easy to use and spread.
I used it for my walk way from the front door. It was getting worn and rough so I smoothed it with this product.
G**A
Five Stars
WORKS GREAT
K**M
Dries very quick!
This product ended up ruining me project because it hardened before I could get it all mixed
M**L
Good Product
Works
F**4
Level basement floor
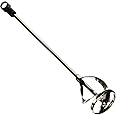
I am finishing a room in my basement (185 sq. ft.) and when I went to lay the flooring the expansion joints were as much as 3/8" higher than the floor on either side. (one of the reasons I always have the flatwork guys cut the expansion joints the day after the slab is poured/finished with a saw rather than using a trowel.) But this floor was already laid when I bought the house. The hardwood boards would literally rock like a seesaw when they crossed the expansion joint, and the Elastilon requires a maximum 1/8" variance .Anyway, I needed a quick solution and found this product. I read all the reviews about how this product is a disaster and watched virtually every video I could find on the internet to see what I could learn. I poured this with the help of my wife, with five 5-gallon buckets and a mixing blade that worked with my cordless drill.First: Use the primer recommended by the manufacturer. Don't try to save the $10! The floor has to be sealed otherwise it will literally suck the water from the mixture and the leveler will not flow. You then have 3-24 hours to pour the underlayment once your prime the floor. I used a thick matte roller to lay it down in less than 15 minutes the night before.Second: get all your tools, buckets, water and everything staged. I had five buckets ready, even though I only used three.Third: I did a lot of prep, removed the door to the room, masked the threshold and anything else that I did not want the leveler to contact. I also bead caulked any place the leveler might flow to, including the gaps where the expansion joints went under the floating wall plate, as well as the entire perimeter of the floor/wall plate. If you do not do this the leveler will flow through every conceivable opening. One wall has a wall jack in it, so I used 1/4" shim to cover that opening and then caulked it.Four: I had two tools to spread the leveler. I saw a guy on the internet using a steel lawn rake to push the leveler (with the rake on its back,) into the corners and edges. Works very well. I also used a squeegee to move the product, with a modification--something else I saw on a video. Since it did not want much underlayment over the expansion joints and more on the lower spots on the floor, I (gorilla) taped some round head screws to the blade of the squeegee as guides. I set them so the underlayment would be 1/4" thick, but I only put the screws on the outer edges of the blade (two screws on each end within 6 inches of the outer edge) and none in the center of the blade. As I pulled the material, the high spots would have very little underlayment, and the low spots would get about 1/4". The objective was to have less than 1/8" cover over the high expansion joints and more of the underlayment to each side of the joints.Started mixing: We used a bit more water than recommended (7 quarts v. 6-1/2 quarts--another recommendation from the internet) since it was just me doing the mixing, hauling, pouring, spreading. My wife kept at least two buckets with the water ready so we did not spend more than three minutes between pours (instructions say the product begins to set in five minutes). All bags were cut and standing so I did not have to waste a second (another recommendation from a video on the 'net). Added half a sack to the water and mixed it for 30 seconds (low speed). Added the rest of the mixture and blended for two minutes--all with an 18v hand drill and a double bladed blending attachment. Be sure to mix the full two minutes--you will have plenty of time to pour and level the material. As recommended use a low rpm and move the blade up/down with most of the mixing happening at the bottom of the bucket. The blade is designed to circulate the dry material on the top into the bottom of the bucket. Minimum splashing if you keep the rpm's under control.Carried to the room, pouring into the low spots about 12 inches from any wall or corner and pulling the material to the expansion joints. Used the garden rake to push the product towards the walls and corners, then pulled the squeegee from the wall(s) to level the product. The design worked as the high spots got less cement than the low spots. The material moves very easy, but you have to work it moderately (not too fast) so you have a bit of a "wake" in front of the squeegee as you pull it towards you so it will find its level. No need to overwork it--about a minute at most and then let it find its own level. It will "feather" on its own when pulling the squeegee toward you--as your run out of material toward the edge. Never used a trowel. Then we mixed the next bucket of material as above, pushing the new material toward the old edge with the rake, and then pulling it back to level with the squeegee. Repeated until the entire floor was poured. I laid about +/- 1/4", and it took six sacks of material.Clean-up is pretty easy with a bucket and garden hose, and the product worked as designed. Do not allow the material to go down the drain when cleaning--otherwise it will block the drain. No issues with premature setting or inability to work the material. There are not any visible high or low spots or seams between the pour areas. I can just barely see the expansion joints, which was the objective based on the depth modifications I made to the squeegee. When finished I removed the tape and screws and the squeegee is back to original.I will check back later after it dries and I have a chance to hit the floor with the level.It's been four hours so I checked the floor. The floor is virtually level, with the exception of one high spot (about 1/16th") where I poured the second bucket and it made contact with the first pour (there is a slight edge which I could grind down if necessary). It appears I did not pull enough of the material back when leveling with the squeegee--but well within spec for laying the hardwood flooring.
K**R
Great stuff!
I was looking this product up to find out what quantities it comes in. I was surprised it had no reviews. I first used it 8 years ago on a crappy basement floor in a 100-year-old house. There is some prep involved, but, nothing complicated (clean the floor, apply the prep solution). It's very easy to mix because it's fairly thin - if you are used to concrete or "mud" you might think you have added too much water. Because it's so thin, it pours easily. And that's all you have to do. It levels itself out and hardens. There were a couple of bumps on my floor that were higher than the dried Level Quik, but these were easily eliminated with a chisel. I laid ceramic tile over it (it's not intended to actually BE the floor) and so far, I have had zero problems. The tile stuck to it easily and neatly and the floor is still beautiful even after 8 years (and 4 basement floods). I highly recommend this product.
M**I
Floor leveling
Works very good if you mix it right. Drys in minutes!
Trustpilot
1 month ago
2 months ago