Buy anything from 5,000+ international stores. One checkout price. No surprise fees. Join 2M+ shoppers on Desertcart.
Desertcart purchases this item on your behalf and handles shipping, customs, and support to Ecuador.
๐ Power up your iPhone 8 like a pro โ DIY repair, zero compromises!
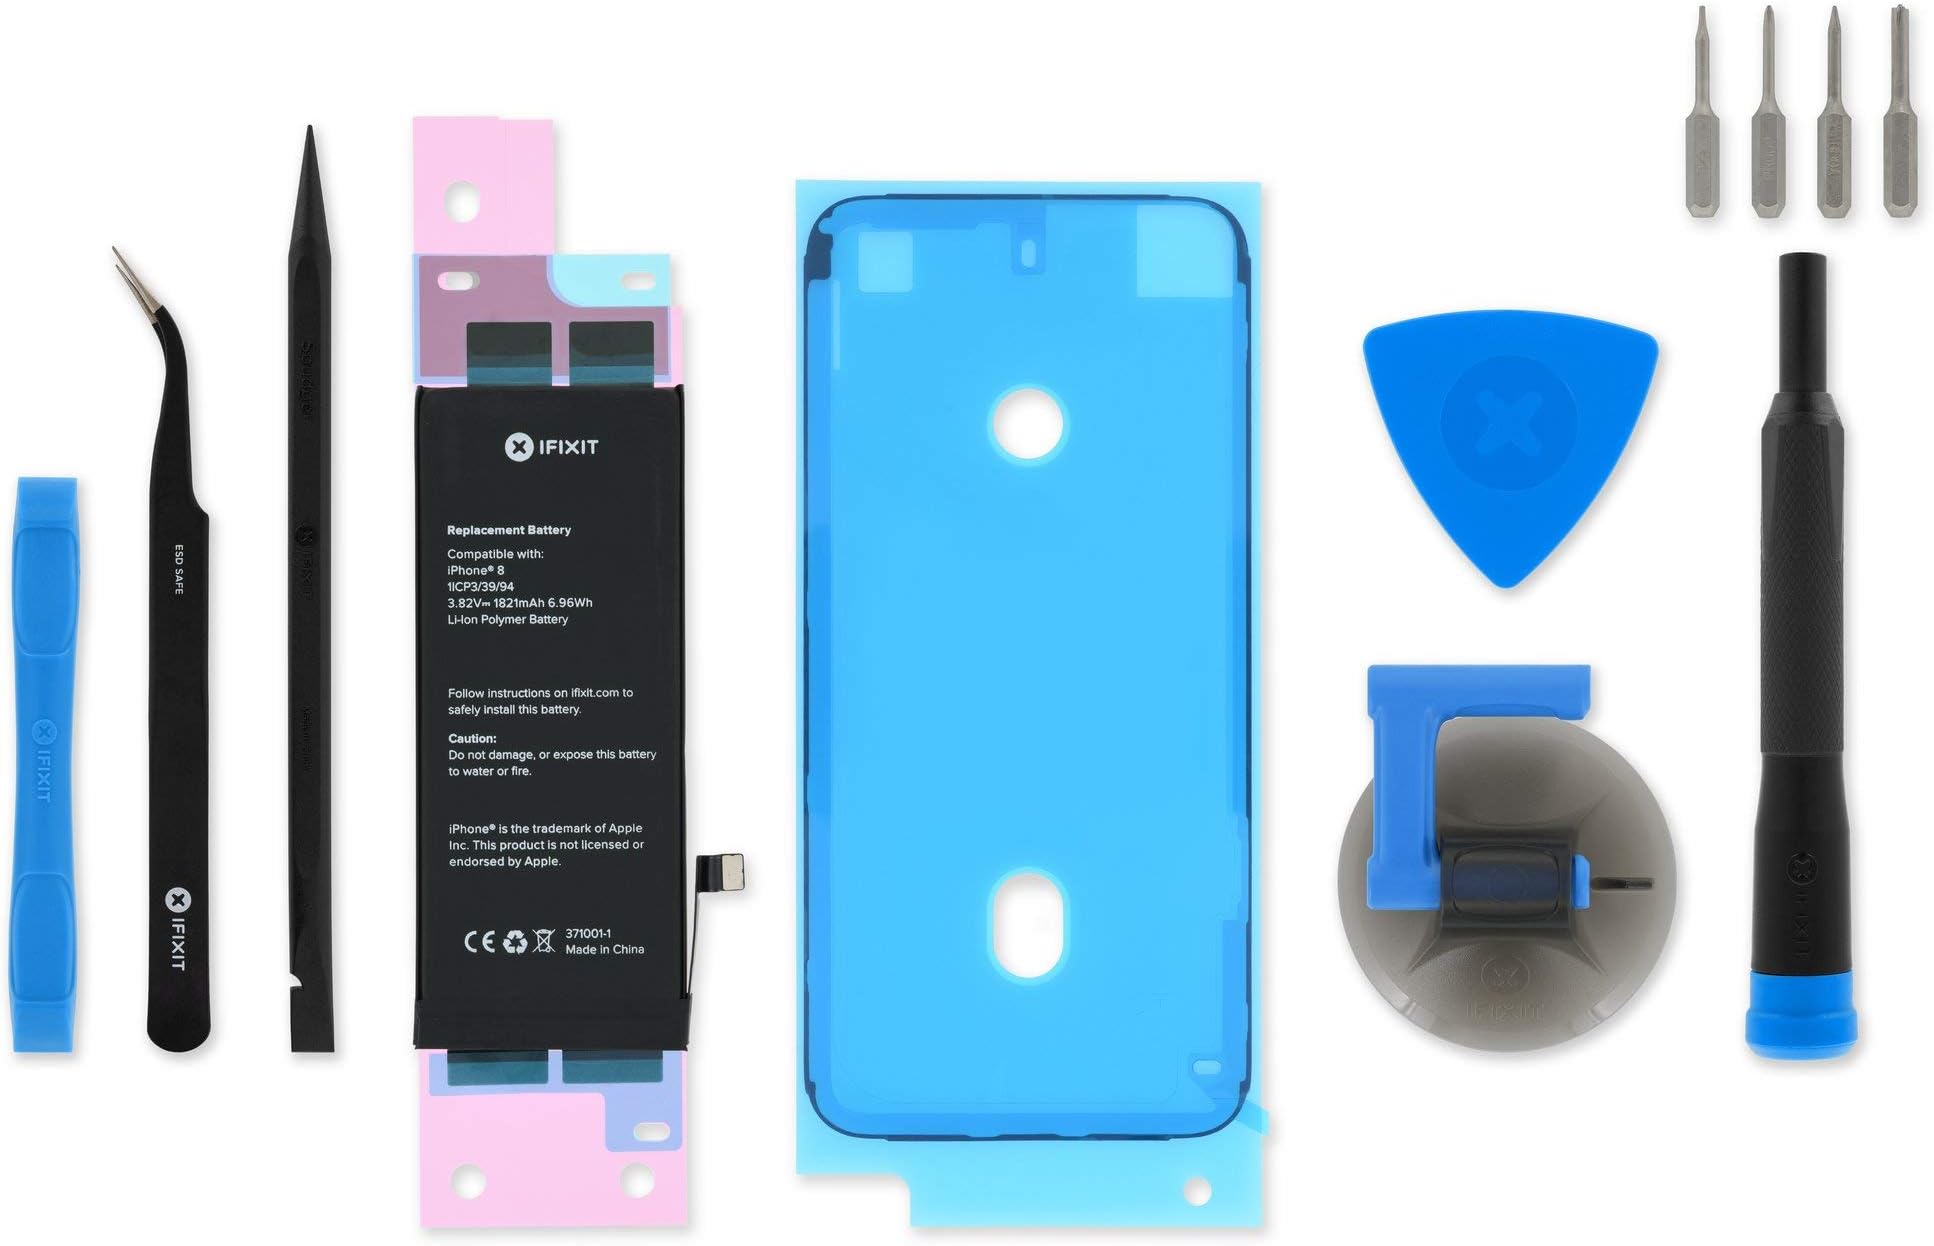
This iPhone 8 Replacement Battery Fix Kit offers a brand new, rigorously tested lithium-ion battery with 95% or higher capacity, bundled with all necessary tools and adhesive for a professional-grade DIY installation. It includes a new waterproof seal to maintain device integrity and is backed by iFixit's Lifetime Warranty, empowering users to extend their phoneโs lifespan sustainably and confidently.


| ASIN | B07JJSB4Z3 |
| Antenna Location | iPhone |
| Battery Capacity | 1821 Milliamp Hours |
| Battery Cell Composition | Lithium Ion |
| Battery Cell Type | Lithium Ion |
| Best Sellers Rank | #102,060 in Cell Phones & Accessories ( See Top 100 in Cell Phones & Accessories ) #890 in Cell Phone Replacement Batteries |
| Brand | iFixit |
| Compatible Phone Models | iPhone 8 |
| Customer Reviews | 4.1 out of 5 stars 82 Reviews |
| Manufacturer | iFixit |
| Model Name | iPhone 8 |
| Number of Batteries | 1 Lithium Ion batteries required. |
| Recommended Uses For Product | iPhone |
| Reusability | Rechargeable |
| Unit Count | 1 Count |
| Voltage | 3.82 Volts |
| Warranty Description | One Year Guarantee |
T**M
Overall Great Replacement Battery
Everything worked out perfectly. Iโve replaced iPhone and iPad batteries many times. This was by far the easiest when it comes to removal. The only tricky part with this one is you must remove both ribbons to be able to apply the new adhesive. If you follow the instructions perfectly you will have no issues. You can find videos on YouTube for your exact model. The price was great. Also do not believe other brands trying to say that they have massive capacity. This is simply not true. The capacity is limited to the size of the battery this is just basic physics. Maybe at some point in the future the same amount of space can hold double or triple the capacity but that is not the case currently. The battery works and functions as a new phone. The tools provided are mostly good. I recommend a decent heat gun or one of the ifixit heat devices to loosen the adhesive. I would start on that bottom right corner after removing the screws. The videos are mostly going be the start of prying the phone apart is the hardest. Take your time and do not rush. You will crack the screen or break one of the wires.
B**0
So far so good.
This iPhone replacement battery comes with all the tools needed for removal and installation of your iPhone battery, and it even comes with a new replacement waterproofing seal,(gasket). Replacing an iPhone battery is not for the faint of heart, especially if you are doing it for the first time. My phone is an old iPhone 8, and I donโt want to buy a new phone right now. My battery health was under 85%, and my battery would drain so quickly, that I always had to make sure that I had access to a place to charge. I heated the phone with a hair dryer before I tried opening the case. The seal is very strong, and I donโt think that you would be able to open the phone up, without heat. You also donโt want to overheat your phone. There is no way to know if youโve overheated it, so I would pass the hairdryer around the edge, try to pry, then heat a little more. Finally the phone was able to be separated into two parts. The screws covering the connectors are minuscule. Even with the supplied screwdriver bits, I stripped the head of one of the screws holding the front camera cover. Luckily I had an eyeglass repair screwdriver. I used a flat blade eyeglass screwdriver on the stripped screw, and was able to get the screen off. If you donโt separate the phone , you wonโt be able to install the new waterproofing seal. The next nail biter was trying to pull the adhesive from under the old battery. That turned out to be impossible. I very slowly, and carefully pried the old battery out of the phone, and cleaned out the old adhesive. Removing the old waterproofing seal was next. Very tedious and careful I was able to get off all of the old seal. The new seal went on, again carefully and tediously, using tweezers and fingernails. I reconnected everything, screwed the covers in all the connectors, closed up the phone. All screws installed, powered on the phone and everything works. This new battery now shows 100% health. I just want everyone to be aware of how tiny the screws are, how small the connectors are, and how you have to take your time with a steady hand. If you have any mechanical or electrical installation, or diagnosing experience, you can easily do this. If you donโt, then definitely watch plenty of YouTube videos. GOOD LUCK. UPDATE: Three months later, this battery still shows 100% health. It is working out great. I was so happy with this battery from Ifixit that I ordered a replacement battery for my wifeโs iPhone 8. Her battery , like my old battery was showing around 80% health. She could not really use the phone, unless it was plugged into a charger because it was draining so fast. Today I received and replaced her battery, and now her battery health is showing 100%. THANKS, IFIXIT!
C**A
Too much effort and didn't work.
I am guessing that the people who said that this is easy are techies. I spent six hours on it and it was very difficult. Just the infinitesimally tiny screws are enough to drive anyone crazy. I got it all back together, but it doesn't work. It turns on, but that's it. Wish I could return it but the battery is installed with adhesive and I'd have to break open the phone and tear it apart, which is not wise working with lithium. A waste of time and money. No instructions came with it. And though I found some instructions online that were somewhat helpful, they were not always clear. And there were no instructions how to put it back together, so I had to go in reverse. Though I managed to account for all of my screws at the end, they should include some extra of those minuscule pieces of terror. If this is your line of work, perhaps it worked for you. But for me, an average woman with a brain who is good at fixing things, this was a waste. Still had to buy a new phone.
C**R
Quality toolset, detailed online instructions, mostly strong battery
1. The provided toolset is of sufficient quality for a person with average or above mechanical aptitude to complete the repair. 2. The online instructions at the ifixit website are sufficiently detailed for someone replacing the battery for the first time to successfully complete the job. 2a. The ifixit online instructions website includes an interface to submit/read comments from other users who have replaced their own batteries. Those comments include some essential tips not included in the top-level instructions that can be very helpful depending on how the repair proceeds. So, it is worth reviewing not only the top-level instructions, but also opening up and reading the comments before proceeding with each step. 3. The reason for four stars instead of five is that the initial battery life of the ifixit battery seems a little less than I remember for the genuine Apple battery when my iphone 8 was new, perhaps 60-70% of what I recall of how the phone retained charge when it was new. But, compared to the 20-30% battery life of the now heavily-used original Apple battery that was in the phone before the repair, the ifixit battery is a big improvement.
S**N
Great product that reinforces our Right-To-Repair
Great kit that helped me to perfectly fix my iPhone. Phone battery now works perfectly. While it is expensive, the reusability of the tools makes up for that price. Super simple for anybody with a little bit of repair knowledge. Great product!
J**M
Everything you need, and a reputable battery
iFixIt is the real deal, and my primary reason for buying from them is that I know I'm not getting a mystery battery. That alone to me is worth the higher price. There are so many word salad brands selling them that it's very difficult to know what you're getting. Some very nice, high quality tools are also provided, as well as a new moisture seal. A couple of tips: Don't overthink the disassembly. The official way is to heat up the phone evenly with a special microwavable pad or a specialized heat plate, then use the suction cup or even the suction cup spreader. Those are great methods. However, if you're careful, a thin metal spudger like the iSesamo will let you gently separate the screen. Just take care not to insert it very far, especially on the right-hand side where all the delicate ribbon cables are. Once you've just barely separated the screen, use the very tip of a guitar pick tool (or a real guitar pick) to work your way around the circumference of the screen. Be sure to fully attach and seat the battery connector before applying the backing adhesive! There are some great video tutorials that go over all the pitfalls. If you're not mechanically inclined, you will likely find this very challenging. If you are decently handy and have steady hands, good lighting and the ability to see tiny parts, you'll do fine.
J**E
The tools are good, but buy extra adhesives.
If you've never replaced the display adhesive on a iPhone 8, this tool kit will help you get the job done. Just don't expect to get the adhesive placed perfectly on the first try if you're a rookie like me. When splitting the case, the suction cup wasn't much help - it couldn't hang on to the display when pulled. However, it wasn't really needed; squeezing the bottom corners of the sides together created enough space the slip the plastic pick in. A thinner metal pick would have been better to use for the bottom of the case, and first heating the phone with a hair dryer helped. Just don't heat the phone too much. (If it's too hot to hold, it's too hot!) Despite the above quirks, the phone was much easier to split than expected. If you've never done this, watch some YouTube videos. In fact, watch several, as the techniques used varied. Some were overkill, some looked to be a little on the careless side. Installing the actual display adhesive is in an entirely different level of difficulty. First of all, you need to really, really get all of the old adhesive off of both halves of the case. The tools are great for that. Then wipe the seal area with 93+% (isopropyl) alcohol--using 70% alcohol increases the risk of getting that included 30% water in places it shouldn't be! Next be sure that you begin with PERFECT alignment of the adhesive on the bottom. If it's not right at the bottom, the party's over. But the really tough part is simultaneously teasing both of the long sides of the skinny strips of adhesive into place using the plastic template provided. It's harder than it looks, and there is no room for error. Once part of the adhesive touches down in the wrong place, moving it without breaking it is very difficult. But the fine pointed tools can save you if only a small amount of adhesive needs to be nudged into place. And do your nudging before continuing on with laying down any more of the strips or it will throw your alignment off at the top. Moral of the story: It's probably best if you buy a 2-pack of display adhesives to supplement the one in the kit. Also, the kit only has the black adhesive option--if your phone is white or another light color, the white adhesive option will give a better look. Epilogue for the story: Patience and fine motor skills are required. If you lack those, skip all this and make an appointment with Apple or BestBuy.
C**K
Reputable dealer
Works great. Showing battery life of 100%. The kit has everything you'll need. I didn't need to heat up the phone to get the battery out even though the tabs broke. I just used the long black pick and the blue thing that came with it and just slowly pried up underneath the battery. The hardest part is putting those tiny a** screws back on.
Trustpilot
1 month ago
2 months ago