


๐ Elevate Your Projects with Cutting-Edge Tech!
The DiGiYes ESP32 S2 Mini V1.0.0 WiFi Board is a powerful development board based on the ESP32-S2FN4R2 chip, featuring 4MB Flash and 2MB PSRAM. It supports a wide range of interfaces including ADC, DAC, I2C, SPI, USRT, and USB OTG, making it ideal for innovative projects. With 27 digital I/O pins, all supporting interrupt, PWM, and single wire, this board is designed for creators looking to push the boundaries of technology.
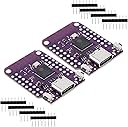

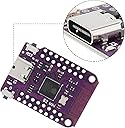


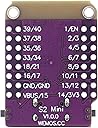
| ASIN | B0BXX6R15D |
| Box Contents | WiFi Board |
| Brand | DiGiYes |
| Brand Name | DiGiYes |
| Connectivity technology | Wi-Fi |
| Customer Reviews | 4.5 out of 5 stars 41 Reviews |
| Included components | WiFi Board |
| Manufacturer | DiGiYes |
| Memory Storage Capacity | 4 MB |
| Memory storage capacity | 4 MB |
| Model Name | DiGiYes ESP32 S2 Mini V1.0.0 |
| Model name | DiGiYes ESP32 S2 Mini V1.0.0 |
| Network Connectivity Technology | Wi-Fi |
| Operating System | MicroPython |
| Processor Brand | Espressif |
| Processor Count | 1 |
| RAM Memory Installed | 4 MB |
| RAM Memory Technology | PSRAM |
| RAM memory installed size | 4 MB |
| Total USB Ports | 1 |
| Wireless Compability | 802.11a/b/g/n/ac |
G**R
They seem to be a good quality clone.
They seem to work well. No random resetting. No wifi problems. They do NOT seem to be authentic WEMOS boards (despite the inking on the board). (I have a couple of authentic ones, and the inking, and some of the board characteristics, are different.) But they do seem to be a good quality clone. When you first plug them into your PC, it will not see them. To get them into bootloader mode (?) you have to briefly press the reset while holding down the zero button. After writing your first program, then you won't have to repeat that. (This is necessary if you are programming them with the Arduino IDE). Overall, nice board. Good functionality in a small package. Because of the double row of pins, these are not compatible with a standard breadboard.
J**N
Not a purple one
โฆ why didnt u send the purple oneโฆ. The black one doesnt work on my project
C**O
Good to go on PS4
Works perfectly for PS4 auto-hosting on 6.72 and 9.00, in my experience. No drivers needed.
A**R
MicroPython flash
Installed Micropython and it reports 2MB of PSRAM. Had to use the ESP flash_download_tool. First download MicroPython ESP_Generic_S2. As others have said, plug it into your PC, hold the boot(0) button down, press reset button, and then release boot(0) button. Check in device manager to make sure it shows up under ports. Then in the flash_download_tool, select chip type esp32-s2, develop, and uart. Erase. Select ESP32_Generic_S2 of MicroPython. I wrote it to 0x1000 using defaults. But I think I also tested 0x0000. After writing is complete, press the reset button. If everything went well, you should see a new (different) COM Port listed in Device Manager. The boards seem to work just fine for MicroPython, and the extra memory and speed compared to ESP8266 boards is very handy. The double rows of pins take some getting used to, but I would rather have the pins for the size. But plan ahead on your board layouts and connections it can get messy fast. Right now it appears to be the cheapest, fastest way to get a usable (memory) version of MicroPython on a small board.
B**R
They work
My mistake. This board doesn't come with an onboard led to indicate power. It also doesn't boot into serial mode, which means it does nothing when you connect it to a computer. So it's easy to mistake them as not working. You have to perform a certain sequence of button presses to make a connection. I guess this is how it works for all ESP32-"S2" boards. Here is the sequence: Hold the BOOT button. Press and release the RESET button. Then release the BOOT button. Also, if you plan to use these with ESPHome, they currently don't seem to be compatible with the ESPHome flasher, there is a workaround for this using the Adafruit ESPTool. (Just google Adafruit ESPTool) 1. Create a new device in ESPHome 2. Skip connecting to the device (this is where the issue is so if you're able to connect, they fixed it) 3. Make these selections: Install - Manual Download - Modern format. (It will download the bin file to your computer, this can take a while) 4. Using the Adafruit ESPTool, upload the bin file in the first slot and press program. (I don't change any of the settings on the tool. Default - Baud 115200, Offset 0) 5. Reset the device and ESPHome will be able to connect wirelessly. You can now do wireless updates/uploads. OLD Review: [These don't work. They come in a pack of 2 and both don't power on. I tried powering them with different cables and power sources just to be sure.]
Trustpilot
2 months ago
1 week ago