🏁 Rev Up Your Adventure with Style!
The YOSAYUSA Motorcycle Full Exhaust Pipe System is engineered for GY6 125cc and 150cc engines, offering a lightweight solution that enhances performance and aesthetics. Weighing only 5.81 pounds and measuring 15.35 x 7.83 x 6.1 inches, this exhaust system is designed for easy installation and a perfect fit, making it an essential upgrade for any scooter, moped, or ATV enthusiast.
Brand | YOSAYUSA |
Item Weight | 5.81 pounds |
Package Dimensions | 15.35 x 7.83 x 6.1 inches |
Item model number | GY6 |
Manufacturer Part Number | xl-GY6HT |
F**Y
The mounting bracket that is supplied does not work for my scoot.
Liked the looks and construction of this unit. Also sounds louder than stock with great tone but not too loud to be offensive .
M**K
This WILL Fit A 150cc Super Hornet Roma But Read My Notes
Sorry if this sounds robotic but I'm cutting and pasting it to multiple places including my Amazon review & my FB group for this bike. This WILL fit a 150cc Super Hornet / Roma automatic Chinese motorcycle but there are some things to be aware of. I recommend reading all of this before swapping out the stock muffler. I'm not saying this is the best way it this is what worked for me.MUFFLER REPLACEMENTI recommend reading all of this before swapping out the stock muffler. I'm not saying this is the best way it this is what worked for me. Big thanks to Jason Saylor for guiding me in part of this .1. Amazon requires someone is home to sign for it and gives the driver a passcode that they email in am if delivery .2. The header pipe will change rainbow colors.2.5 You will most likely need to grind off the ends of the dipstick grip ( the thing you turn to pull it out ) otherwise it's probably going to hit the little loop where the springs go.3. You need to save the nuts that attach a muffler pipe under the motorcycle4. You need to get a a tube of red, high temp gasket maker from any auto parts store or Amazon to paint on the end they attached under the bike, get the standard gasket ring also and lastly get a tube or black high temp gasket maker then squeeze a thin, 1" flat piece of this into wax paper and let set. You will cut it to size when it's cured after peeling off wax paper. This is going to go between the rear shock and muffler if a tiny edge is touching the muffler. It did by a millimeter for mine. It helps to have a friend pull the shock up as you slide it there. Watch your fingers and theirs. This stuff comes in handy for other things as well.5. You're going to need to wipe your finger prints off everything before the first time you start the bike after install or the heat can permanently burn your finger prints in. Have the alcohol next to the motorcycle key so you don't forget.6. Get a tube of blue Loctite for all nuts, bolts and screws. You will need that extra grip due to these areas vibrating and you don't want anything coming lose.7. You will be inserting the pipe over the bottom frame of the bike and you're going to have to slow it in slowly at a specific angle to get it in. You do not need to take off any other parts. The nut closest to you is going to be too tight to get a socket wrench on there and hard to even get a socket wrench in due to the frame being in the way. You will need the smallest crescent wrench you can find. I could not secure it properly on the bottom with the right gasket set up or get outside nut on the right way without a motorcycle lift or smaller crescent wrench so I had to bring it to my mechanic to correct hat part of my install. The good news is I did not have to adjust my carb after install like you do sometimes.8. You're going to want to bend the band that will go over the muffler end tight so it wraps better. You're also going to want to Ziptie the two pieces of the band together tight at the top so it's not working against you are yorue trying to bolt it on.9. You're not going to be using the stock attachment for the band. It is going to ideally give about one inch over that.10. You're only going to need the little zig zag looking bracket it comes with not the longer wire looking black bar bracket. You're going to attach the al bracket to the left bolt of the muffler side of the bike that holds the carb and fender cover on. You're going to angle that brace up as much as you can with the left side but not in.11. The band is going to be about 2/3 of the way to the right of the muffler.12. You're going to put the pipe end on first then the muffler, pressing the two pieces tight together, next stick one of the sprinte between the end of the muffler and the part where the stock brace attached so you can train the muffler to maintain space as you tighten the band, next secure the band then the bottom spring then the top spring. The top spring is a hard stretch and the pulling will cause your bike to want to be pulled off the center stand so havinga friend stand in front of the bike, holding the handle bars straight and pushing against the front the the bike as you stretch the top spring towards the front of the bike will be helpful.13. Join my FB group for more tips and chat about this motorcycle. Search groups and type " Leike Motobravo Super Hornet Roma X18RS 150cc Automatic Motorcycle Group "
S**T
Great muffler
I got this muffler and install easy looks and sounds Great on my ice bear scooter I recommend this muffler very good product keep up good workmanship.
P**S
Easy to install
I read a few reviews on this product and I was skeptical if it was going to fit properly or not on my scooter. The bracket that comes with the kit I have no idea how that would ever work on this particular model, however, they do supply other hardware as noted in the photo that is pretty easy to figure out and install. The only thing I modified was the clamp which I straightened out and re-bent to fit in reverse of how it was intended. As you notice in the photo, the front pipe and part of the exhaust flange at the header pipe has discolored with just one days riding , other people noted that this occurred to them also. Not a big deal. All in all I’d say it was a good purchase. Now time will tell if it lasts. I kept the silencer in and it’s not terrible loud, but definitely louder than stock.
M**O
Weld broke 4 months in
The weld broke about 4 months in. Had to try and jb weld it to get me home. Would not recommend this to anyone wanting a reliable exhaust. Had it attached to the frame the correct way and all still broke.
A**R
Great Exhaust setup, just dislike the baffle. It rattles
Got this awhile back, never used the bracket it came with because it didn't fit. So I turned the muffler upside down and took the clamp and screwed it in to where the stock muffler was originally bolted to. No performance effected by having it upside down, it's safe to use in the rain that way as well. Only downside is the thin metal baffle. It's screwed in but after a long time of using the muffler it's started to rattle a little bit. If your bike will be compatible with this muffler and exhaust pipe, I'd recommend liquid welding or tack welding the baffle in place. Sounds like crap without it but you also won't like that metal clinking sound lol. It fits perfectly, but as with any aftermarket exhaust setup you're gonna have some modifications to make for it to fit on your bike perfectly. Other than that baffle(which is the reason I gave it 4 stars) if you've done your research, get the exhaust. It is well worth it. Also the pipe will become discolored after first use and become multi color. If you don't want that then don't get it. Me personally, I don't mind. Actually looks better that way to me. But seriously, this muffler is well worth your money. Hard to find a good exhaust like this one for a Chinese scooter.
U**E
Bolts right up for an Icebear Vision PMZ150-17
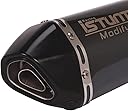
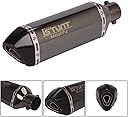
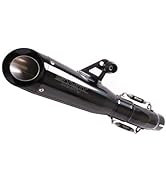
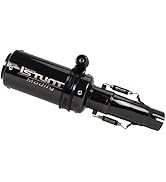
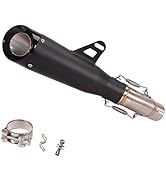
Easy install for my Icebear Vision PMZ150-17. Bolt up the header pipe first, only snug the exhaust stud nuts then mount the muffler.You may need to slightly tweak the header pipe outboard for clearance for the muffler, hence the only snugged port nuts.Then mount the muffler and judge the clearance. Use the spacer from the stock exhaust to mount the muffler hanger to gain more clearance, you can use the open bolt hole on the existing bracket on the Scooter. You will need a longer bolt than is supplied with the kit with the spacer and hardware, like another half inch.The thread is the same, it just needs to be longer.You will need to buy a Stainless bolt/washer and nut set for the hanger, and you will only need the supplied "Z" bracket, the welded big hanger is not needed.Sounds good, and now the Cars can hear you unlike the stock exhaust.. I love that the header pipe and the muffler turn hues of Purple, Gold and blue after being heated while running it.I'm pretty happy with it, if it's bit loud for you add some steel wool to the removable baffle to quiet it down.That's not my picture in my review, but you get the idea.
Trustpilot
3 weeks ago
1 month ago