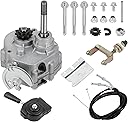





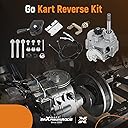

maXpeedingrods Go Kart Forward Reverse Gearbox Kit 212cc 30 Series
Product ID: 324211445
🔄Forward & reverse modes
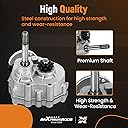
⚙️Metal durability
⛓️Dual sprocket compatibility
Desertcart purchases this item on your behalf and handles shipping, customs, and support to Ecuador.
⚡ Shift your ride into high gear with maXpeedingrods – where power meets precision!
The maXpeedingrods Go Kart Forward Reverse Gearbox Kit 212cc 30 Series is a robust metal gearbox designed for go-karts and utility vehicles with engines up to 14HP. Featuring forward and reverse gear ratios of 1:1.3 and 1:2.6 respectively, it offers smooth shifting with a 5/8" shaft and 3/16" keyway. The kit includes all necessary mounting hardware, dual sprockets compatible with #35 and #40/41/420 chains, and comes pre-filled with GL-5 gear oil for immediate use. Ideal for professionals seeking durable, high-performance drivetrain upgrades.


| ASIN | B083FVDF7R |
| Batteries included? | No |
| Brand | maXpeedingrods |
| Customer Reviews | 4.2 4.2 out of 5 stars (283) |
| Date First Available | 3 Jan. 2020 |
| Item model number | YW65 |
| Manufacturer | Waverspeed |
| Material type | Metal |
| Product Dimensions | 20 x 20 x 20 cm; 5.56 kg |
G**I
Works perfect cuz as I wish
It's a nice reverse kit love it
S**M
Works.......and it's awesome
Like many others here, installed on a Coleman KT196. If you have any familiarity with a welder it is pretty straightforward to install. Took about 3-4 hours with a good deal of that dedicated to explaining what I was doing to a 6yr old. If I get motivated I will update with pictures, but basically the below sums it up: 1) Remove existing clutch and driven pully from Kart. Cut rear protector bar off 2) Remove spacer ring from driven pully housing (silver, drivers side). Place on drive shaft next to existing brass spacer bushing 3) use two 3" long section of angle iron (of appropriate thickness). Drill hole for 8mm bolt towards back top of each (for mounting of transmission). I bought a longer bolt (120mm) and used a 1" spacer between the trans mount (lower bolt hole) and the passenger side piece of angle. This allowed for a better position in welding to the existing motor mount structure. 4) Align drive sprocket with trans sprocket. Tack into place 5) Attached upper adjustment saddle (the gold "U" with a threaded rod sticking out. 6) Place a sleeve over this rod and, one aligned, weld to the top of the sleeve that previously held the driven pully shaft removed in step 1. You will need a longer bolt to re-attach the pully later (can get at hardware store) 7) Confirm chain length with new section of #40 roller chain. Adjust tack positions as required for adequate fit 8) Weld everything in place. The center distance between the drive and clutch shafts should be around 10 3/4" 9) Use belt 203597A (longer than factory). Attach chain/pullies/belt 10) Use some sort of "L" bracket to secure shifter in appropriate position being sure to attach cables to it before install 11) run cables back to trans, attach, make final adjustments. 12) (optional) weld rear protector bar back on as you please. This makes lifting the rear of the kart soooooo much easier. Can be a first-time fab project, but it will take awhile. Pretty straight forward if you have ever had to adapt two things together on a motorized vehicle that were never intended for such. Makes the kart noticeably faster. Took all of five minutes for above noted 6yr old to test it out after running full speed into a tree.
R**D
So far so good.
No instructions but I was going off the reservation anyway, it needed a bearing on the end of the 5/8 input shaft, too much torque. I'm using it on my golf cart, electric to gas conversion with a 17.5hp motor, switched everything to 40 pitch chain, shifts good so far, I mounted it with the shifter on top, its puking gear oil because its over filled but im sure that will figure its self out eventually.
S**.
Well built gear box
So far gear box preforms well... It's built durable ..I use it for extensively modifyed atv with industrial engine to do snow plowing with currently relentless winter.
A**M
Welp. Its on there.
Device seems to function so far. Zero instructions provided. Would recommend but prepare to stare at your machine for a couple hours to figure it out
Trustpilot
2 weeks ago
3 weeks ago