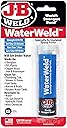

Desertcart purchases this item on your behalf and handles shipping, customs, and support to Ecuador.
💪 Fix it fast, fix it right—underwater or on land!
J-B Weld 8277 WaterWeld is a hand-mixable, two-part epoxy putty stick that cures underwater and sets in 25 minutes, fully curing in 1 hour. With a lap shear strength of 1300 PSI and resistance to heat up to 300°F and various chemicals, it’s ideal for plumbing, fuel tanks, pools, boats, and potable water tanks. Certified safe for potable water, it bonds to metals, plastics, and fiberglass, making it the go-to solution for quick, durable repairs.

| ASIN | B000BRQ0TW |
| Best Sellers Rank | #345 in Industrial & Scientific ( See Top 100 in Industrial & Scientific ) #3 in Metal Filled Epoxies |
| Brand | J-B Weld |
| Brand Name | J-B Weld |
| Color | Off White |
| Compatible Material | Metal |
| Container Type | Stick |
| Customer Reviews | 4.2 out of 5 stars 13,737 Reviews |
| Full Cure Time | 60 Minutes |
| Global Trade Identification Number | 00043425082770 |
| Included Components | Epoxy Putty |
| Item Form | Putty, Stick |
| Item Package Quantity | 1 |
| Item Type Name | .... |
| Item Weight | 0.07 Kilograms |
| Manufacturer | JBWeld |
| Material | WaterWeld Epoxy Putty Stick |
| Material Type | WaterWeld Epoxy Putty Stick |
| Model | 8277 |
| Number of Pieces | 1 |
| Other Special Features of the Product | Cures under water |
| Part Number | 8277 |
| Special Feature | Cures under water |
| Specific Uses For Product | Casting, Countertop, Flooring, Glass, Masonry, Repair, Table Top Coating, Underwater Repair, Wall Repair Specific Uses For Product Casting, Countertop, Flooring, Glass, Masonry, Repair, Table Top Coating, Underwater Repair, Wall Repair See more |
| Tensile Strength | 1300 Pounds Per Square Inch |
| UPC | 043425082770 |
| Unit Count | 1.0 Ounce |
| Viscosity Level | Medium |
| Volume | 59.14 Milliliters |
| Warranty Description | No Warranty |
| Water Resistance Level | Waterproof |
G**D
This will work in the right situation if you prepare well
I used this to patch a slow drip leak on PVC to coupler connection on my pool pipe circulation. I had used this before in a much smaller amount, failing after a couple years. I used a file to prep the area remove previous putty and roughen the bonding surface. Then applied 99% alcohol to clean the surface. I thoroughly mixed 1/2 a tube of putty and applied circumferentially around the pipe seam, with an inch overlap each side. After 2 hours cure time, water on, and no leak. The key to this working is proper prep and reasonable expectations in the right situations. This is typically used in spots where replumbing is potentially difficult for just a drip leak.
C**L
Works great for me !!
Discovered a crack in my skimmer, tried some name brand tapes, one slowed the speak but didn’t seal it and the other was a huge disappointment as the adhesive seemed to melt away as soon as it hit water and that’s the whole advertises made for water. I gave water weld a try, as I’m just trying to get thru summer without wasting water until we drop the water in fall and can change skimmer at that point. Water weld was amazing stuck to the same surface under water that the tapes failed.
B**R
Works great just not a under water product
Easy to use. Does not bond to under water pvc. Works great when applied to dry surfaces
D**I
Works great for my sprinkler pipe
It works great on a L shape elbow pvc joint in my sprinkler box (about 80psi). There is a very small leak in my sprinkler box, found last fall and confirmed this spring when turn back on the water (photo 2), there a few hair size water shoots out from it. I removed the component and brings to Home Depot, but they said the manufacture is no longer making it (or out of business), and they do not have any replacement in similar size. So for me, try some alternative solution is the only way to do before spend hundreds to hire professional. I decide to give this a try to this patty before really hire someone to do it, and thanks to many other reviews in this post, even a lot of people says it doesn't work with pressured pipe, I did see there are people successfully make it works. Based on all other people's experience, I did the following steps with extra caution: 1. clean up all the dirt and debris, wipe out clean with paper towel. 2. rough the surface a little bit with a wood sandpaper (barely add some scratch on the surface, to improve the bond between this patty and the pipe). 3. discards the first1 inch of patty on the edge (some people recommend so), then take a about 1 inch of patty for first application. knead it to bar/snake shape and fold it, repeat for dozens of times. 4. after it fully mixed and soft like peanut butter, make it like bar/snake, wrap it around the leaked position (like a ring over your finger), push it to the surface and smooth the edge (like a band aid around the ring over your finger). 5. wait 1 hour to 2 hour for first application to harden a bit (the first application only becomes slightly harden after an hour), then do the 2nd application same way to "patch" the 1st application (use 1st application to seal the leak, 2nd application to seal any potential leak of 1st application). 6. wait 3 days instead of just 1 day to let it fully cured (assume there are moisture in the pipe and it take longer to dry) So far it works well after turning water back on and no more leanings. I will keep monitoring my pipe, in case if it leaked again, I will update here. note1: the product i received says its strength is 4370 psi (picture 1), which is much higher than the label in old picture and another product in home depot. I guess that extra strength may also helps if the product is fully cured. note 2: if your hole is larger, you may need more putty to add extra strength than how much i uses. but i still recommend multiple applications than use everything in one shot. ---- update: June 12 patched another garden hose with 2 steps. it works for a week but leaks soon after a few usage, i guess flexible pipe may need more skill & patient.
S**Y
A Must-Have for Emergencies
The day before a week-long trip, my wife tells me the kitchen sink is clogged. Not what I want to hear at 10pm the night before I have to wake up at 4:30am for an early flight. So after using the plunger and then the snake, I finally clear the grease clog enough that I can go to sleep at 1:30am. I get home a week later and I try out the kitchen sink by washing some dishes as a test. Great! The water went down. Then I step out to the garage (where the waste line runs through) and find rivers of water trickling all over the floor. After moving the washer and dryer out of the way and knocking out a foot of concrete around the waste line, I find water pouring out of the galvanized pipe through a corrosion hole. Apparently, the hole was being covered by the built up greasy sludge and the snake moved the sludge out of the way, allowing all the water to run down the concrete block wall. As I was contemplated popping a new hole though the wall and into the kitchen cabinet so I could run a temp PVC line (I am redoing the kitchen soon anyway), I realized I had bought this J-B WaterWeld Epoxy some time ago "just in case". So I thought "what the heck" and tried it out. Worst case, I would have to run that new line anyway. Well, s---fire if it didn't stick to that galvanized pipe and seal that hole! Even though it was still dripping water, that patch stuck and cured in place just like the packaging says. I had to use a second patch because it was still leaking from somewhere I couldn't see and that second patch sealed the deal. Now, I am treating the line with some Green Gobbler Enzyme to keep the sludge at bay until I replace everything in the kitchen reno. A couple of tips: 1. Clean the area first with a degreaser, as the packaging says. This was essential to me because all sorts of cooking oils had been coming out of that hole and you need that stuff to stick. 2. Use a knife to cut only what you need and mix it in your hand using a glove. That stuff is very sticky and won't easily come off your fingers. 3. If patching a hole, form a patty after you mix it and apply and them smooth the sides of the patch. It will mostly retain it's form and get rock hard in a few minutes. 4. Finally, don't wait too long to apply. You have a few minutes to apply it, otherwise the chemical reaction will start to harden it and it won't stick. I am so glad that I had this stuff on hand. It saved me a full day of breaking concrete block and fitting a new temp waste line. You can see the patch at the bottom of the pipe. Because of the location, it had to be done by feel and I did take off the glove. But it wasn't so bad after it had been mixed. Update 8/23/22: After 6 months the patch is still holding strong with no leaks. That's a relief considering the kitchen reno is taking longer to get started than expected. But that's another story...
M**U
Did not bond to PVC pipe
Purchased this to try to seal off a leaking PVC joint (1.5" ) on the return side of my pool equipment. I had low hopes as I've also tried a different brand of two part epoxy, but with the good reviews, thought maybe this was a superior product. After kneading it together, I applied it to the joint, completely surrounding the circumference of the joint and firmly pressing it in. Note that the joint (outside) was dry at the time. I let it cure for about 8 hrs (PHX, temp between 60-80 F during that time), and it was pretty thick as I used the entire tube, and was more of a brighter white (than off white). I pressed on the epoxy and it was "crusty" but still a bit pliable as I could push on the thicker parts. Once I turned the pump back on, the epoxy had not bonded to the PVC, and so the leak was not stopped. What is even worse was once the epoxy was damp again, it began to soften up even more and had no adhesion to the PVC anymore. Literally, I peeled it off like it was a casted mold. I can't imagine trying to get this product to set while under water. Maybe this is not specific to this brand and this product would work better on a different material, but on PVC piping, it was a complete waste of money.
J**.
Didn’t work
Did not work at all. It was supposed to say hard a little while after applying, never did get hard was still soft the next day. Will not buy again. It was like it was old.
P**F
Very easy to use. Just have some rubber gloves.
I wish I could give this 6 stars. I had a small but annoying drip coming from my cast iron plumbing which is now over 50 years old. This was easy to apply. Just break off a small piece and knead. It sticks directly and cures very fast. Just spread it over the leaking area. So far it has been a few weeks and the leak is still dry. I see this as a permanent fix that will last a very long time. There is a slight odor but it goes away as it cures. The repair is not attractive to look at. Maybe a more seasoned veteran could make it look better but it is on a pipe in my basement and saved me hundreds.
T**I
5
Good
H**�
Dichtet zuverlässig, auch wenn es nicht hübsch aussieht
Ich habe den J-B WaterWeld Epoxyd-Kitt für meine Pool-Filteranlage benutzt, weil am Deckel ein Riss war und ständig Wasser austrat. Obwohl die Anleitung nicht auf Deutsch ist, war die Anwendung absolut selbsterklärend: Stück abschneiden, kneten, auftragen – fertig. Meine Erfahrung: Sehr einfache Anwendung, man braucht kein Vorwissen. Nach dem Aushärten absolut dicht – 100 % erfüllt, was ich mir erhofft habe. Ideal für Notfälle im Pool- oder Sanitärbereich. Wichtig zu wissen: Das Ergebnis sieht nicht unbedingt schön aus, eher wie ein grober Flicken. Wer Wert auf Optik legt, sollte das bedenken. Handschuhe sind Pflicht – das Material klebt stark und ist schwer von den Händen zu bekommen. Fazit: Der Kitt macht genau das, was er soll: abdichten. Für mich hat er ein teures Ersatzteil gespart. Klare Empfehlung für alle, die schnell und zuverlässig etwas reparieren wollen.
M**F
An excellent repair job 10/10!
I used this on my stainless steel hot water cylinder 2 months ago as a temporary fix and so far so good is still holding. My cylinder is a on a sealed system with 2 bar pressure. I discovered a leak in good time before any damage to my timber floors. Waiting for a plumber just took too long and so I decided to do a temporary repair myself. I located a pinhole leak which was squirting the water out a distance under pressure. The foam insulation around the tank meant I had to do a bit of insulation removal to find the leak location. I drained the cylinder tank, dried around the area and used the JB Waterweld to repair the hole. I used latex gloves which, while very sticky with the epoxy putty, is better than bare hands with sweat/hand moisture etc which I felt could prevent the epoxy from adhering properly. I used about half the epoxy putty and worked it into the pinhole as much as was possible and then covered a big patch around the area but not too thick. I tried to remove a small bit of the dried epoxy putty recently to see how well it was sticking but it was completely ’welded’ to the tank. Obviously the most important thing is to make sure that both parts of the putty is completely mixed together to form the off white colour before use. I probably will need to get a new cylinder tank in the near future but everything is back working ok at the moment.
B**E
Excellent
Works as advertised. Easy to use and waterproof.
O**A
Excelente producto
Muy bien adhesivo para pegar tazas y cosas así excelente
Trustpilot
1 month ago
3 days ago