Desertcart purchases this item on your behalf and handles shipping, customs, and support to Ecuador.
✨ Shrink your imagination, amplify your style! 🔥
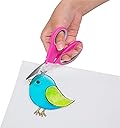
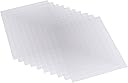
The Shrinky Dinks Creative Pack offers 10 crystal-clear 8x10 inch sheets that shrink to glossy, glass-like mini masterpieces after baking at 325°F for about 3 minutes. Perfect for kids 5+ and adults alike, this kit fuels screen-free creativity with endless possibilities for custom charms, jewelry, and ornaments.


| ASIN | B0103B04RO |
| Age Range (Description) | kid, adult |
| Age Range Description | kid, adult |
| Art Craft Kit Type | ART_CRAFT_KIT |
| Best Sellers Rank | #20,149 in Toys & Games ( See Top 100 in Toys & Games ) #76 in Kids' Jewelry Making Kits |
| Brand | Shrinky Dinks |
| Brand Name | Shrinky Dinks |
| Color | Clear |
| Customer Reviews | 4.7 out of 5 stars 6,861 Reviews |
| Global Trade Identification Number | 00608998300104 |
| Included Components | sheets |
| Item Dimensions | 8.5 x 0.25 x 11 inches |
| Item Type Name | Kids Art and Craft Activity |
| Item Weight | 6.4 ounces |
| Item dimensions L x W x H | 8.5 x 0.25 x 11 inches |
| Manufacturer | Scientific Explorer-Poof Slinky |
| Manufacturer Part Number | 0SD300-10A |
| Material | Glass, Plastic |
| Material Type | Glass, Plastic |
| Model Name | Creative Pack 10 Sheets Crystal Clear |
| Model Number | 0SD300-10A |
| Number of Pieces | 10 |
| Paint Type | No Paint |
| Product Style | Crystal Clear |
| Seasons | All Seasons |
| Set Name | Creative Pack |
| Size | Basic pack |
| Subject Character | Custom Art |
| Theme | Unspecified" or "User-defined |
| UPC | 782675958359 608998300104 |
| Unit Count | 1 Count |
| Warranty Description | No Warranty |
A**S
Great product, but let the oven do the work!
A bit of trial and error, but once I got it down, my project worked out. The key is not to rush things! I found the oven worked better than the toaster oven for me. I followed the directions on the package for temperature (325 degrees F), used parchment paper to line the cookie sheet, and used a plastic spatula to help flatten the items in the final 30 seconds of baking/shrinking. I ruined the first batch because I pulled them out of the oven too soon. I sort of freaked out when they folded and curled up and slowly started to “right” themselves again. Second batch, I gave it more time, and from that point forward, each batch worked perfectly. Each batch took about 3 minutes. Toward the end of the baking cycle, I flattened the edges of my items (slightly lifting off the pan) and gave them another 30 seconds in the oven. Once I pulled them out, I used a cardboard-backed paper pad to press on top of the items for about 15 seconds before removing them from the pan. Worked like a charm. I will say, the price I paid on Amazon was much higher (double the price) than my local craft store. That was disappointing. After learning that, I picked up my second pack locally.
A**E
Screen-free fun
All 3 of my kids enjoyed using these. A fun throw-back to my own childhood.
D**E
Good surface for colored pencils.
Some other brands are not well sanded and are difficult to draw on. These work well.
C**A
Fun for kids and adults too! Great Christmas gift and fun way to make a personalized keychain.
So cool! I bought this for my boys for Christmas so they could make their own keychains for their backpacks. I tested it out by making Chewie in the picture (forgot the hole for the keychain). Reading the reviews made it really easy! The instructions say to bake 1-3 minutes but mine was still curled up at that point. Thankfully I had read a review that said to leave it in the oven until it flattens out. The instructions also say to leave it 30 seconds after it flattens. Here’s how I made mine: 1. Print out a picture to trace. (This one was centered on about 1/4 of a page). 2. Trace on the smooth side with a Sharpie. 3. Color on the rough side with markers or colored pencils. (The directions say not to use crayons.) 4. I probably should have outlined on the rough side with Sharpie again because the outline didn’t show up on the back side. 5. Trim the edges. (Small scissors would be helpful.) 5. Use a hole punch if you want a hole. (It will shrink to the correct size.) 6. Place the rough, colored side up on parchment paper on a baking sheet. 7. Put it in the preheated oven and watch it for 2-5 minutes. You’ll see it curl up and then flatten out. 8. Take it out of the oven and remove it from the baking sheet. All set! Mine was only shiny on one side. Not sure if that’s normal or not. So fun— can’t wait for my boys to try this!
M**R
Makes a cute Father’s Day gift.
I use this every year as a Father’s Day gift with my fourth graders. No complaints other than sometimes they will roll on top of each other and not flatten out. Most of the time you can get them unstuck, pop them back in the oven for a couple of seconds and then flatten them between layers of parchment. The final product will end up being a keychain. I buy them every year.
A**R
Shrink it!
What can I say about these, they are just as fun as an adult as when you were an 80's kid ( or wanted to be one) These I use to make jewelry in the toaster oven. I use colored pencils or sharpies to color. I also use fancy scrapbook scissors to cut out my designs. The chart that comes with this is accurate for size comparison as to how big your piece will be after shrinking. Item will be a hard plastic and color doesn't come off or chip. No need to seal. Made Disney's Frozen zipper pulls for the kids and a hello kitty necklace for the little princess and she love it. All the kids at school want an original form me. Just remember to punch your hole first and don't toss those small scraps. You can always use them for something. I make this in my toaster oven. I preheat for 3 minutes to 325. Then I put them in on the toaster oven tray covered in clean, flattened aluminum foil. I like this better then putting on a paper bag like suggested, but that's just me. They shrink in 10 sec to 1 minute depending on how big your piece is. Once removed with an oven glove, I let them cool on the tray for 2 minutes. They "snap" off meaning they just unstick from the foil. If you try to move before then USE CAUTION> Never ever let a child do this, they will get burned. If you want to make a slightly bended creation or ring, etc.. you have only 10 second to mold it and form it. It will be hot so practice makes perfect. Play with a few scraps to see how it forms and cools if you are looking to do something wearable.
D**E
Super fun and creative
Very fun, my daughter has a blast making all kinds of of creative crafts from these.
P**L
Perfect for kids making keychains
My kids used this to make keychains! They used markers and acrylic paint and a hole punch to put the ring for the keychain. These shrink to a much smaller size. We used half a sheet to draw out an image. You’re going to see the plastic start curling in the oven almost right away, let it! It uncurls a bit later and then you can flatten it if it still needs it. I would recommend reading the instructions before starting. The ones done with markers turned out better than the paint ones. It’s an awesome way to make a custom gift to loved ones from the kids!
T**A
Highly recommend!
These were so awesome to use! We made the kids Father’s Day gift with them. They are easy to use and dummy proof. The kids had so much fun that it is worth the money for sure.
O**F
Recomendado
Increíble material. Pasamos mucho tiempo jugando con el... los niños hacen un dibujo y el adulto lo hornea al sacarlo queda duro y se puede utilizar como llavero...
S**I
Fabulous and fun
Very fun fr the kids
D**O
Divertido
Es divertido trabajar este plástico, tiene buena dureza al encoger, uso un horno eléctrico muy pequeño y sólo recomiendo precalentarlo, mis primeros dibujos no quedaron tan planos tenían leves ondulaciones, pero cuando precalenté el horno quedaron perfectos. Los niños se divierten mucho cuando ven los dibujos encogerse por la ventana del horno.
M**E
Works great!
Works perfectly and shrinks down flat and thick. Need to experiment a bit to figure out what size it shrinks down to and what to colour it with. Sharpie works well, just make sure not to keep layering the marker on because it does darken quite a bit in the oven so one think layer should be fine. Also, acrylic paint doesn’t work it just flakes off and don’t cut sharp corners or you will crack plastic! Overall great fun product! :)
Trustpilot
3 days ago
2 months ago