


Lippert Components 806621 Thin Shade Complete Window Kit for RV Entry Doors, Black
Product ID: 168844803
🌒Tinted glass for privacy & sun control
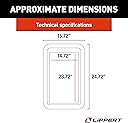
🪟24.7x15.7 inch sleek window kit
⚙️Complete hardware for DIY install
Buy anything from 5,000+ international stores. One checkout price. No surprise fees. Join 2M+ shoppers on Desertcart.
Desertcart purchases this item on your behalf and handles shipping, customs, and support to Ecuador.
🛠️ Elevate your RV entry with style and privacy—shade smarter, travel cooler!
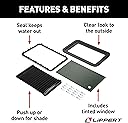
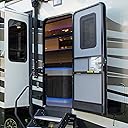
The Lippert Components 806621 Thin Shade Complete Window Kit is a premium, easy-to-install upgrade for 5th wheel and travel trailer entry doors. Featuring a tinted glass window with integrated manual horizontal blinds, it offers enhanced privacy and sun control without adding bulk. The kit includes durable black interior and exterior frames with moisture seals and all necessary hardware, enabling a smooth DIY installation that instantly elevates your RV’s look and functionality.


| ASIN | B07XPFTS9R |
| Best Sellers Rank | #28,818 in Automotive ( See Top 100 in Automotive ) #29 in RV Windows & Skylights |
| Brand | Lippert Components |
| Customer Reviews | 4.4 4.4 out of 5 stars (1,775) |
| Date First Available | September 19, 2019 |
| Item Weight | 9.45 pounds |
| Item model number | 806621 |
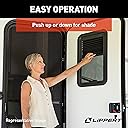
| Lift Type | Manual |
| Manufacturer | Lippert |
| Manufacturer Part Number | 806621 |
| Model | Thin Shade RV Entry Door Window Shade Complete Kit for 5th Wheel, Travel Trailer and Motorhome |
| Product Dimensions | 24.7 x 15.7 x 5 inches |
| Special Features | Easy to Assembly |
Trustpilot
3 weeks ago
3 weeks ago