Desert Online General Trading LLC
Dubai, United Arab Emirates
Desert Online General Trading LLC
Dubai, United Arab Emirates


✨ Elevate your kitchen vibes with a flawless granite finish—DIY style! 🏡
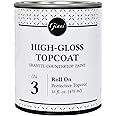
The Giani Granite Countertop Paint Kit 2.0 in White Diamond offers a professional-grade, high-gloss epoxy topcoat that transforms laminate, Formica, and other surfaces into authentic granite looks in a single weekend. Featuring a low odor, low VOC, and food-safe formula, this kit covers 35 sq. ft. and includes all tools needed for a durable, waterproof finish made in the USA.


| Brand | Giani |
| Color | White Diamond |
| Finish Type | High-Gloss |
| Size | 119 Fl Oz (Pack of 1) |
| Item Volume | 119 Fluid Ounces |
| Special Feature | Low Odor |
| Unit Count | 119.0 Fluid Ounces |
| Paint Type | Acrylic, Epoxy |
| Specific Uses For Product | Countertop,Tile |
| Surface Recommendation | Laminate, Formica |
| Indoor/Outdoor Usage | Indoor |
| Item Form | Liquid |
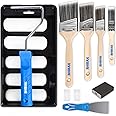
| Included Components | Sponge, Paint Applicator |
| Is Waterproof | True |
| Package Information | Can |
| Color Code | #ffffff |
| Coverage | 35 Sq. Ft. |
| Water Resistance Level | Waterproof |
| UPC | 850015970207 |
| Global Trade Identification Number | 00850015970207 |
| Manufacturer | Giani, Inc. |
| Dry Time In Hours | 24 |
| Part Number | FG-G2 WHT DI EP |
| Item Weight | 13 pounds |
| Package Dimensions | 14.84 x 9.53 x 7.48 inches |
| Item model number | FG-G2 WHT DI EP |
| Style | Easy Epoxy Topcoat |
| Finish | High-Gloss |
| Material | water based |
| Item Package Quantity | 1 |
| Special Features | Low Odor |
| Batteries Required? | No |
S**N
AMAZING!!
I never write reviews but I am in such a state of awe, I couldn’t help myself!! This completely transformed my kitchen countertops and looks like I hired a professional and pay thousands of dollars to replace my counters with granite. I had a dull old ceramic tile and after using this product, it’s looks completely transformed and brand-new!! I can’t believe for this price I could achieve such impressive results!! I’m also a lady and not too handy, coordinated, or comfortable doing home repairs, but even I could do it and it was simple!! I am proud! Easy instructions, and also watched the video. I can’t stop looking at my counter, as I am shocked on the fantastic results. I definitely will be telling others about this product, and will buy again for my next countertop project!!
J**N
Definitely Worth It!
The media could not be loaded. I absolutely LOVE the Giana countertop paint kits! I have used them three times. The first time was on my Formica countertops (about 15 years ago in my previous home), and the next two times were on my fireplace hearth in my current home. When I moved into my current house, the fireplace hearth was an old 70's stone and was hideous. I first used the gray tones kit, and had that for about 7 years. I recently updated to warmer tones and used the sand tones kit over the top.I love how easy it is to apply, and it's actually quite durable. It is scratchable if you put something heavy on it and drag it (my fireplace scratched when a big log was pulled across the hearth, but for normal everyday use, there was no scratching. Keep the extra paint for touch-ups if needed. For both the counter tops and fireplace hearth I reapplied the top coat once per year. This kit is absolutely perfect for an updated look on a budget. The kit comes with everything you need, brushes included, which is so nice!
L**E
Love the results!
This kit was easy to use and turned out so cute! It took my cousin and I about 4 hours, from start to the first layer of top coat. I am so happy with the results.
B**S
You still need to buy more stuff
After searching for the best kit to buy I decided on the Giani and Epoxy kit. This wasn’t cheap and I figured for the amount of money it cost I would receive everything I needed to complete the project. Unfortunately that’s not the case. Things you need to buy. Paint tray, extra sponge (I’ll get to that in a second), small detail brush and painters tape. So they give you one sponge. They tell you to cut it in half than half again giving you 4 pieces. 1 for each color paint so that takes up 3 pieces giving you one left over to cut into 3 smaller pieces for getting into the corners and than they say to use the remaining sponge to blend the colors in. Umm I don’t have anymore sponge. Luckily I had bought 2 kits so I used the one from that kit. Okay so that’s why I give value a 3 star. Durability is yet to be determined but it seems like it will be durable. Ease of use. Helpful tip. Light, light and more light. Put every light you have on your workspace. Especially when doing the epoxy. The paint is easy just sponge on and blend to your liking. Note they give you a piece of paper to test your skills before doing the countertop. Listen it’s paper. The moment I put paint on it it just curled up into a roll. Not helpful at all. Use a small piece of wood and paint that with some primer if you want to test your technique. I just said forget it and went straight to the countertop. It’s the epoxy that is difficult. I spread it on using the roller and thought I spread it on good. Came back with a flashlight and noticed I missed a lot of spots. I was able to fix most of it. After it had dried I rubbed my hand over it and found some spots I missed. The edge was the hardest. Using the roller on the edge seamed messy with so much epoxy rolling off it. So I figured the brush did better but it didn’t come out very smooth on the edge. Smooth enough for my satisfaction though. Same with the backsplash. This stuff is self leveling so on the vertical sections it’s hard to keep the epoxy from just running off. I wanted the edge thicker with epoxy because I figured it would get the most abuse. All in all I’m happy with the final outcome. A few spots I’ll touch up with some epoxy. I can’t compare this with similar products but I would recommend this to others. If I had the opportunity to do it again I know the mistakes I made and would do better with the epoxy. Just remember to get a lot of light. If I would have had more light than the epoxy would have turned out perfectly. Final note. The kit claims to do 35 square feet. I had about about 19’ of countertop to do so roughly 38 square feet. So I purchased 2 kits. I was able to do all of my countertop with 1 kit and used every bit of it. Giani let me return the unused kit but unfortunately I used the sponge so they will deduct $12. Yes $12 for a sponge you can buy for a dollar at your arts and crafts store. Well I think this about wraps it up. Hopefully this review will help some of you. Don’t be scared to attempt this. It truly looks amazing even with my flaws lol.
K**R
PHENOMENAL Customer Service!!
This is my third time using this product over the past four years. I had dingy white laminate countertops that were not in great shape. Was looking for an economical refresh and this has been it! In the past I didn't have the best looking end result using the sponge on technique, (I was happier with some areas over others) so this time I tossed the sponge and decided to forgo the sponge on technique entirely. I simply primed, and mixed a bit of the White Limestone into the Inca Gold until I achieved the tan shade I was looking for. From there I rolled it on with a foam roller, and used a quality 2" angled sash paintbrush for the back splash. I have about 18 square feet of counterspace and technically squeaked by/pulled it off using one kit. Because I'd prefer thicker coverage, I ordered an additional can of Inca Gold and White Limestone for that reason. But that's just me. I have found that the areas along the edge of the countertops that get leaned against the most, while reaching into the upper cabinets get the most wear. Also, even after applying the top coat, when wet items are placed on the countertops, it leaves water marks. Until fully dry. Then they disappear completely. For the price, ease of use and OUTSTANDING customer service I would highly recommend this product. It will buy me time, until I can finally decide if I want butcher block or quartz kitchen countertops. Until then, this is a decent refresh. They DO sell an epoxy that would be more durable than the top coat that is included in this kit. I believe it's about $114.00. Having no experience using an epoxy though, I will be staying within my comfort zone and using the top coat that is included. Place painters tape around your sink and stove, keep damp paper towels or baby wipes at the ready, and I suggest wearing disposable gloves. Great product.
Trustpilot
Hace 3 semanas
Hace 2 semanas