Sobre nosotros
Servicios al cliente
Atención al cliente
Acceso Regional
Legales y políticas
Obtén la aplicación

Apunta tu cámara para descargar la aplicación
Copyright © 2024 Desertcart Holdings Limited


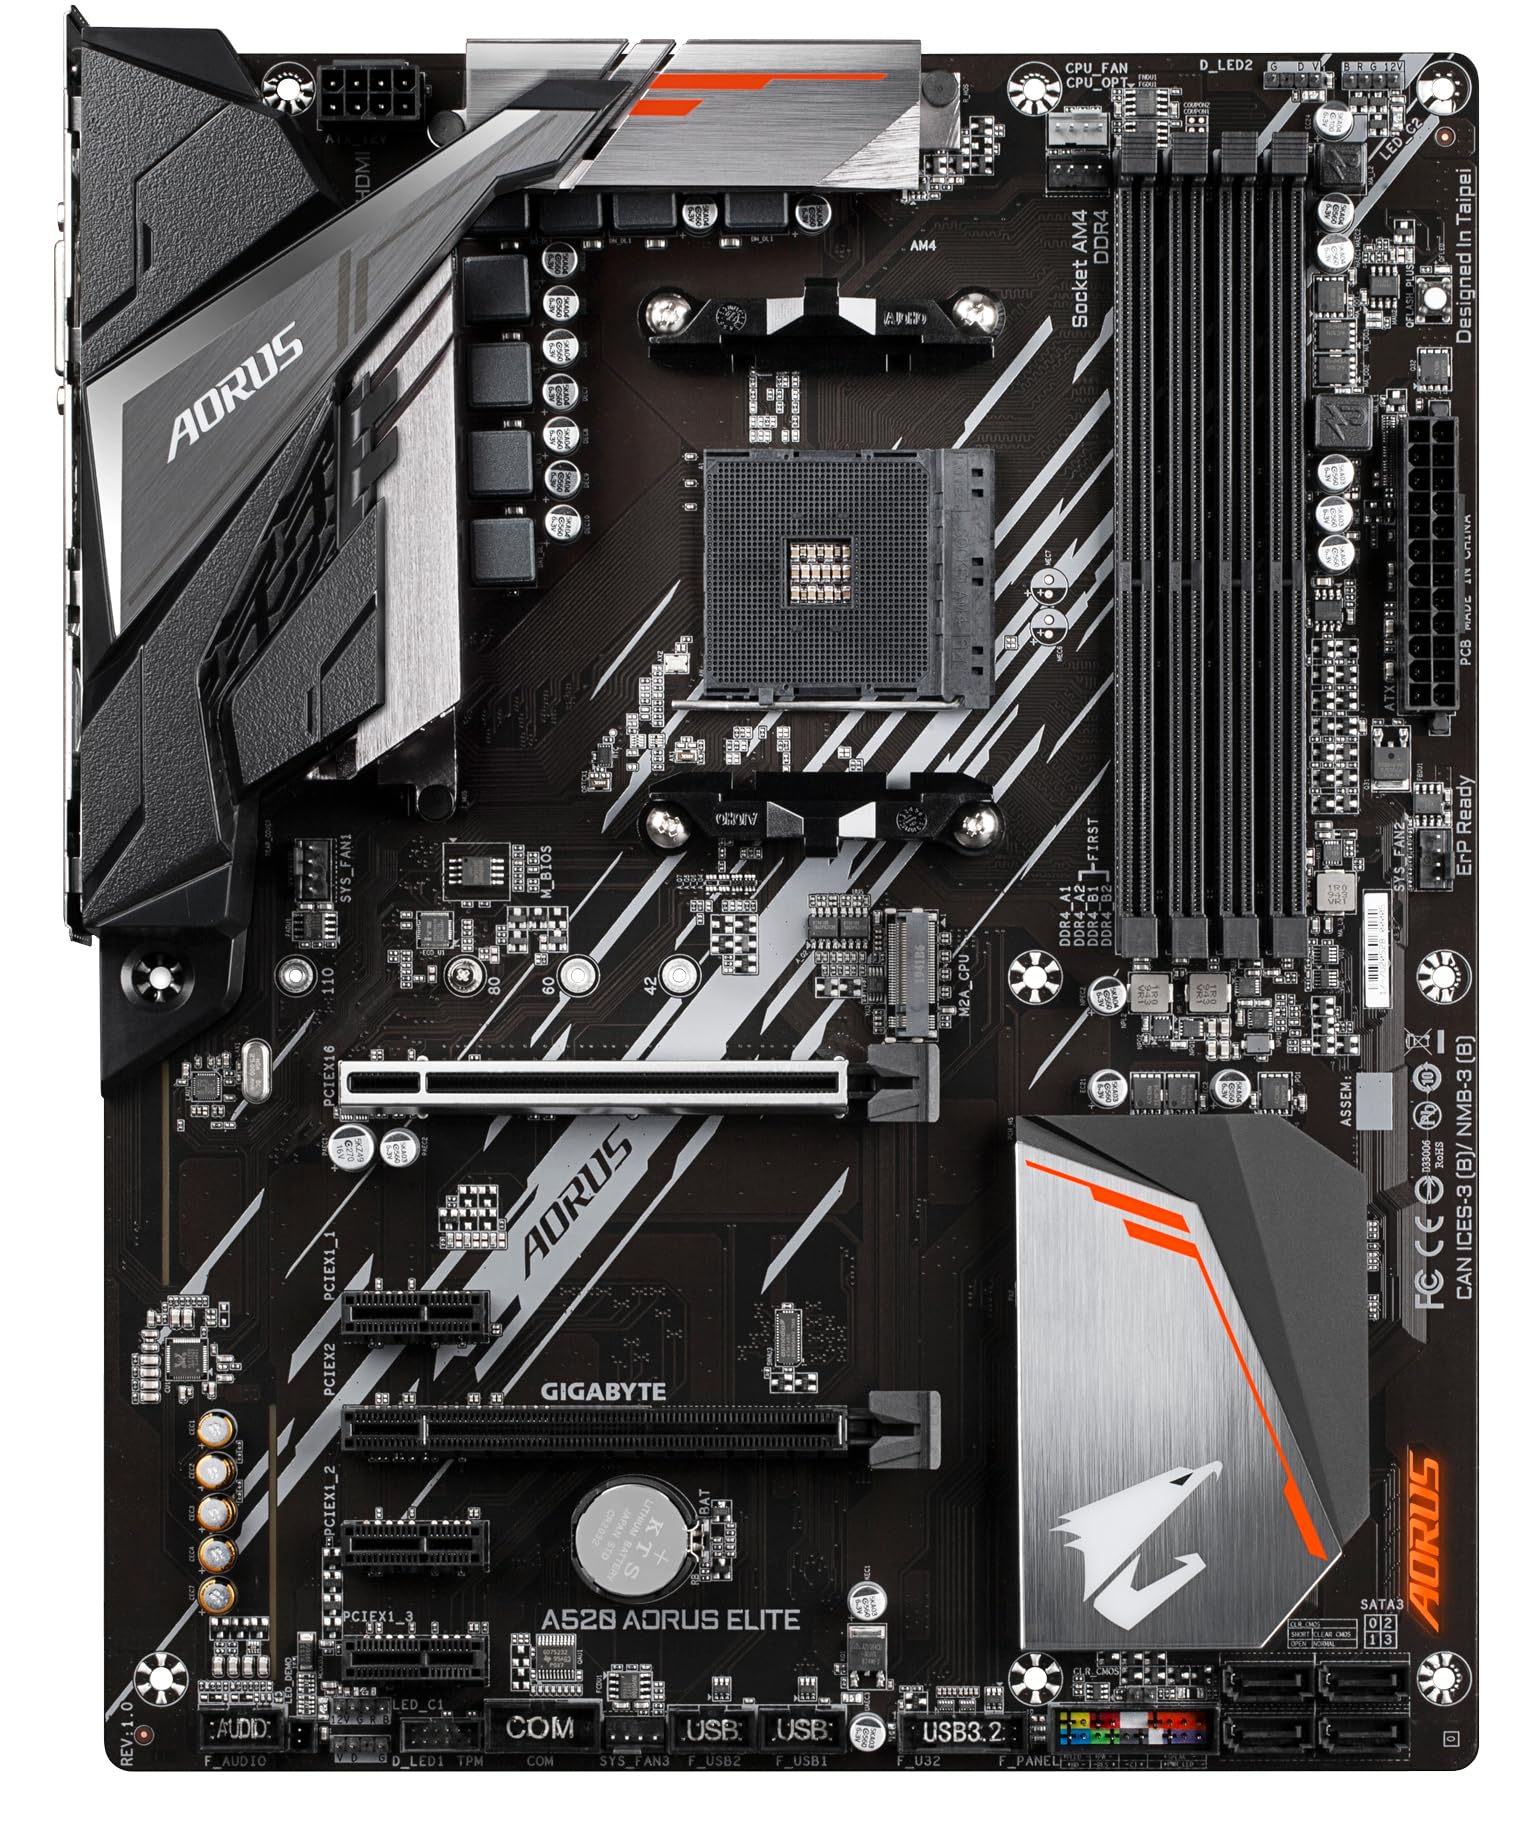
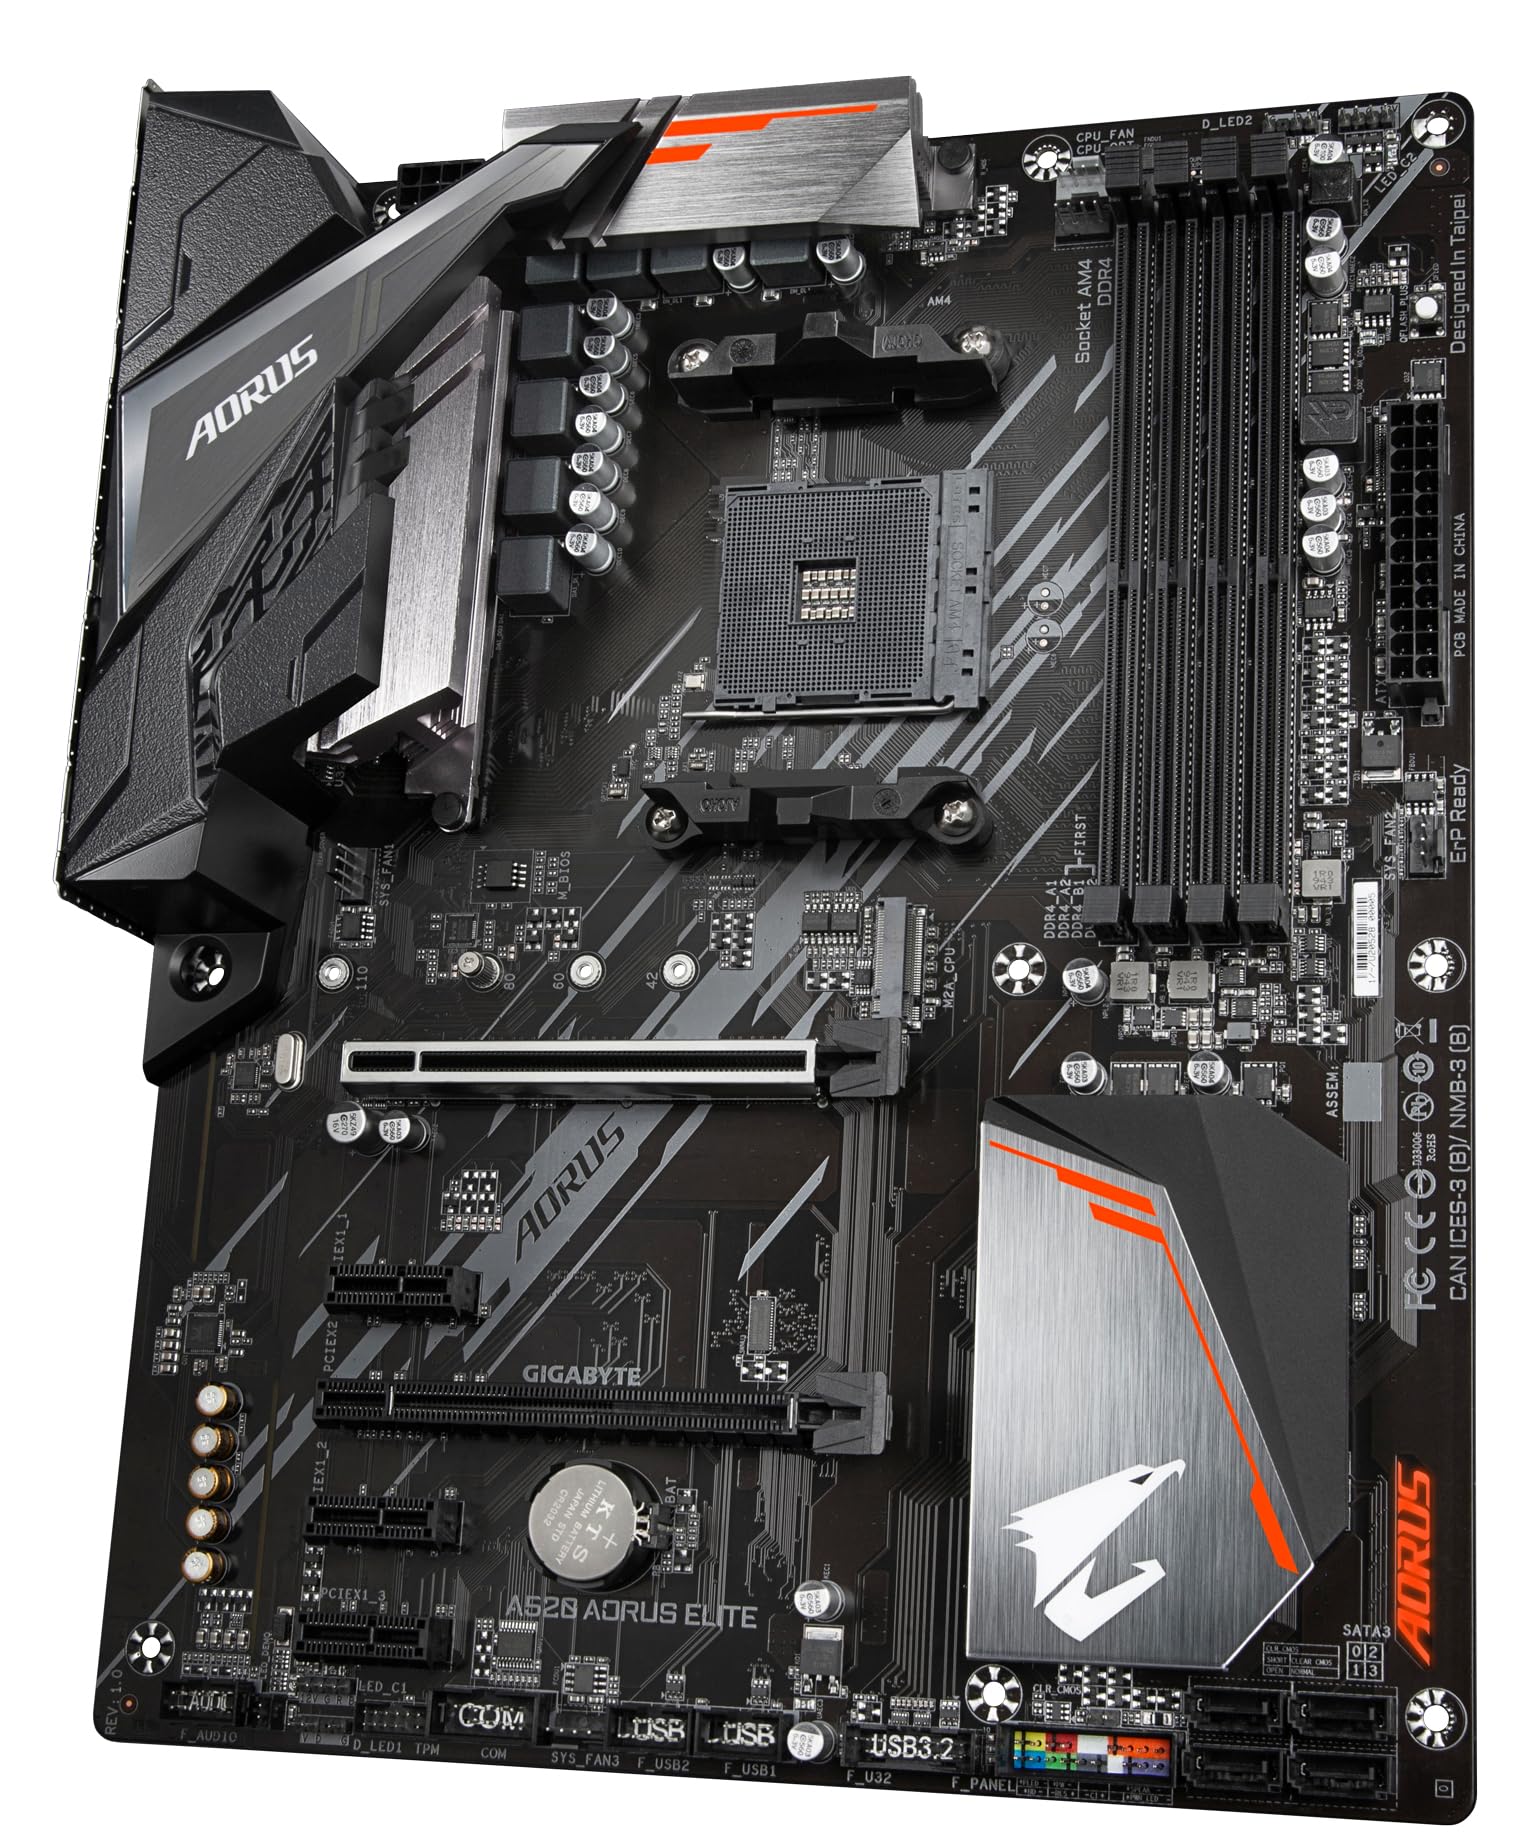
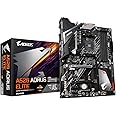
🚀 Elevate Your Gaming Experience!
The Gigabyte A520 AORUS ELITE Motherboard is engineered for high-performance gaming and productivity, supporting AMD Ryzen 5000 Series processors and featuring advanced technologies like ultra-fast NVMe PCIe 3.0 x4 M.2 connectivity, superior audio capabilities, and customizable RGB lighting. With robust cooling solutions and smart fan technology, this motherboard is designed to meet the demands of modern gamers and professionals alike.
| Brand | Gigabyte |
| Product Dimensions | 24.4 x 30.5 x 3.5 cm; 1 kg |
| Batteries | 1 Lithium Ion batteries required. (included) |
| Item model number | A520 AORUS ELITE |
| Manufacturer | Gigabyte |
| Series | A520 AORUS ELITE |
| Colour | red |
| Form Factor | ATX |
| Processor Type | Ryzen 3 |
| Processor Socket | Socket AM4 |
| Memory Technology | DDR4 |
| Computer Memory Type | DDR4 SDRAM |
| Maximum Memory Supported | 128 GB |
| Memory Clock Speed | 4733 MHz |
| Graphics Card Interface | PCI Express |
| Wireless Type | 2.4 GHz Radio Frequency |
| Number of USB 2.0 Ports | 4 |
| Number of HDMI Ports | 1 |
| Number of Ethernet Ports | 1 |
| Are Batteries Included | Yes |
| Lithium Battery Energy Content | 0.2 Watt Hours |
| Lithium Battery Packaging | Batteries contained in equipment |
| Lithium Battery Weight | 0.07 g |
| Number Of Lithium Ion Cells | 1 |
| Number of Lithium Metal Cells | 1 |
| Item Weight | 1 kg |
| Guaranteed software updates until | unknown |
K**S
Cool motherboard
Works great fits lots of PCIE cards and SATA drives as well as some nvme
M**N
Very Happy
Replacement board for a dodgy Asus Prime b450. Fitted it and it's running fast and smooth. Would recommend
M**N
Ryzen 3rd gen compatable
Great looking board,my new Ryzen 3 3600 worked straight out of the box runs my ram at full speed too (3200mhz) I nice budget board I have no need too overclock.
A**S
Bit of a faff to set up out the box.
So i decided to upgrade my system that i built over 10 years ago - a FX 8350, a ROG Crossfire V with 16gig of Vengance RAM. Not a bad system for 2014, but sadly it was showing its age.As a nurse I live off of scraps I manage to forage from bushes and rainwater i syphon from the gutter, so cash is generally at a premium (tiny violin). This meant that an all singing, all dancing, mummy & daddy, rich kid, system that i could show off on youtube was not within my means. I opted for a midrange upgrade that I would supliment with a decent graphics card later (still holding onto my NVIDIA GeForce GTX 960). I set a budget of about £280 and did some basic research, decided on a Ryzen 5 5500,32 gig of RAM and a fancy pcie SSD for the OS (my old system was so out of date it wouldnt run Win11). This just left about £90 for the motherboard, I checked out the boards in this price range and decided on this one. I checked all the specs and all the bits seemed to like eachother so i invited them all to the amazon party.I'm old, i mean ancient. I remember taking my first computer apart in 1997 - a pentium 1 (133Mhz!) with 32 meg of ram. I just wanted to see how it worked.I've been faffing with Pc building ever since - being skint and into tech makes you get good at PC repair so I have generally been good at cobbling systems together. This is just as well because after about an hour of taking all my shiny, new PC bits out of the box, cleaning my old case, setting up the fans, and slotting all the new bits in and finally switching it on, nothing happened! Ziltch, nada, nix, WTF! The PSU didn't tun on, I couldnt see any lights, no fans, nothing. Ok, so I read one of the reviews here (cheers bud) who said that he needed to flash the bios on his machine because it didn't recognise his new processor. I read that you need to unplug and take out everything apart from the motherboard and processor power connectors but take the processor, ram and anything else out before you use the internal qflash button. Luckily I had already downloaded the latest bios and unzipped it to a thumb drive (renaming it gigabite.bin) and so i ripped all the bits out and inserted it into the qflash usb port. I pressed the button... Nothing! WTF indeed. Ok, so now the faffing really began. I reset the CMOS manually, tried it again and the fan kind of started and stopped a bit. In desperation I put all the bits back in and tried again. For some reason this seemed to work (kind of). I was able to install windows and everything looked good, but ouch, the system started to crash, just turn itself off. WTAF! Ok, so I downloaded the gigabyte apps including the bios app and used that to flash the bios from my thumb drive. About 10 minutes of sweating later It had flashed to the latest bios version.2 days on and I have had no problems, everything is running as it should. Beware dear reader, this board may need some faffing, you have been warned.
J**A
GIGABYTE A520 AORUS ELITE- Rubbish
It seemed to be ok, even allowed to install the OS, but no sound was ever detected+ did not allow to install different sound driver, after restart was back to default. And after couple of hours it just went dead!!!Returned for a refund...
L**E
Great minimalist motherboard upgrade from B450 Aorus elite v1.
I liked the simplicity of the Q-Flash button on the motherboard for flashing the BIOS without the CPU/Heatsink and Ram installed without having to turn it on the old fashioned way. (Just make sure 4/8pin 12v and 24pin from PSU is plugged in and then switched on)I disliked having to flash BIOS for my Ryzen 5600x processor straight out of the box. After I already attached CPU/Heatsink and installed RAM modules. I tried to boot the board and it did not work. I had to remove CPU/Heatsink and RAM modules. (REMEMBER - Just make sure 4/8pin 12v and 24pin from PSU to the board is plugged in and then switched on, nothing else)Remember to get latest BIOS file for your board or a BIOS file that will enable your CPU to work straight out of the box.I downloaded BIOS version A520AOEL.F10 this worked for the 5600x Processor. Remember to format your USB flash drive as FAT32, extract BIOS files onto newly formatted USB. Now rename this file A520AOEL.F10 to GIGABYTE.bin and press enter. You will get a message stating; if file name is changed it may not work select yes anyway. Now put USB into the top left port which says BIOS. (See attached picture) Make sure PSU is on. Now press the Q-Flash button is pressed for about 2 seconds and red light will start flashing and PSU fan will switch on. Leave this for about 6 minutes and wait for light to finish and PSU fan to go off.You can now attach your CPU/Heatsink, Ram modules and if you get it to boot the BIOS flash was successful.
Trustpilot
Hace 3 semanas
Hace 2 semanas