Desert Online General Trading LLC
Dubai, United Arab Emirates
Desert Online General Trading LLC
Dubai, United Arab Emirates


🚀 Unlock Turbocharged Storage Anywhere, Anytime!
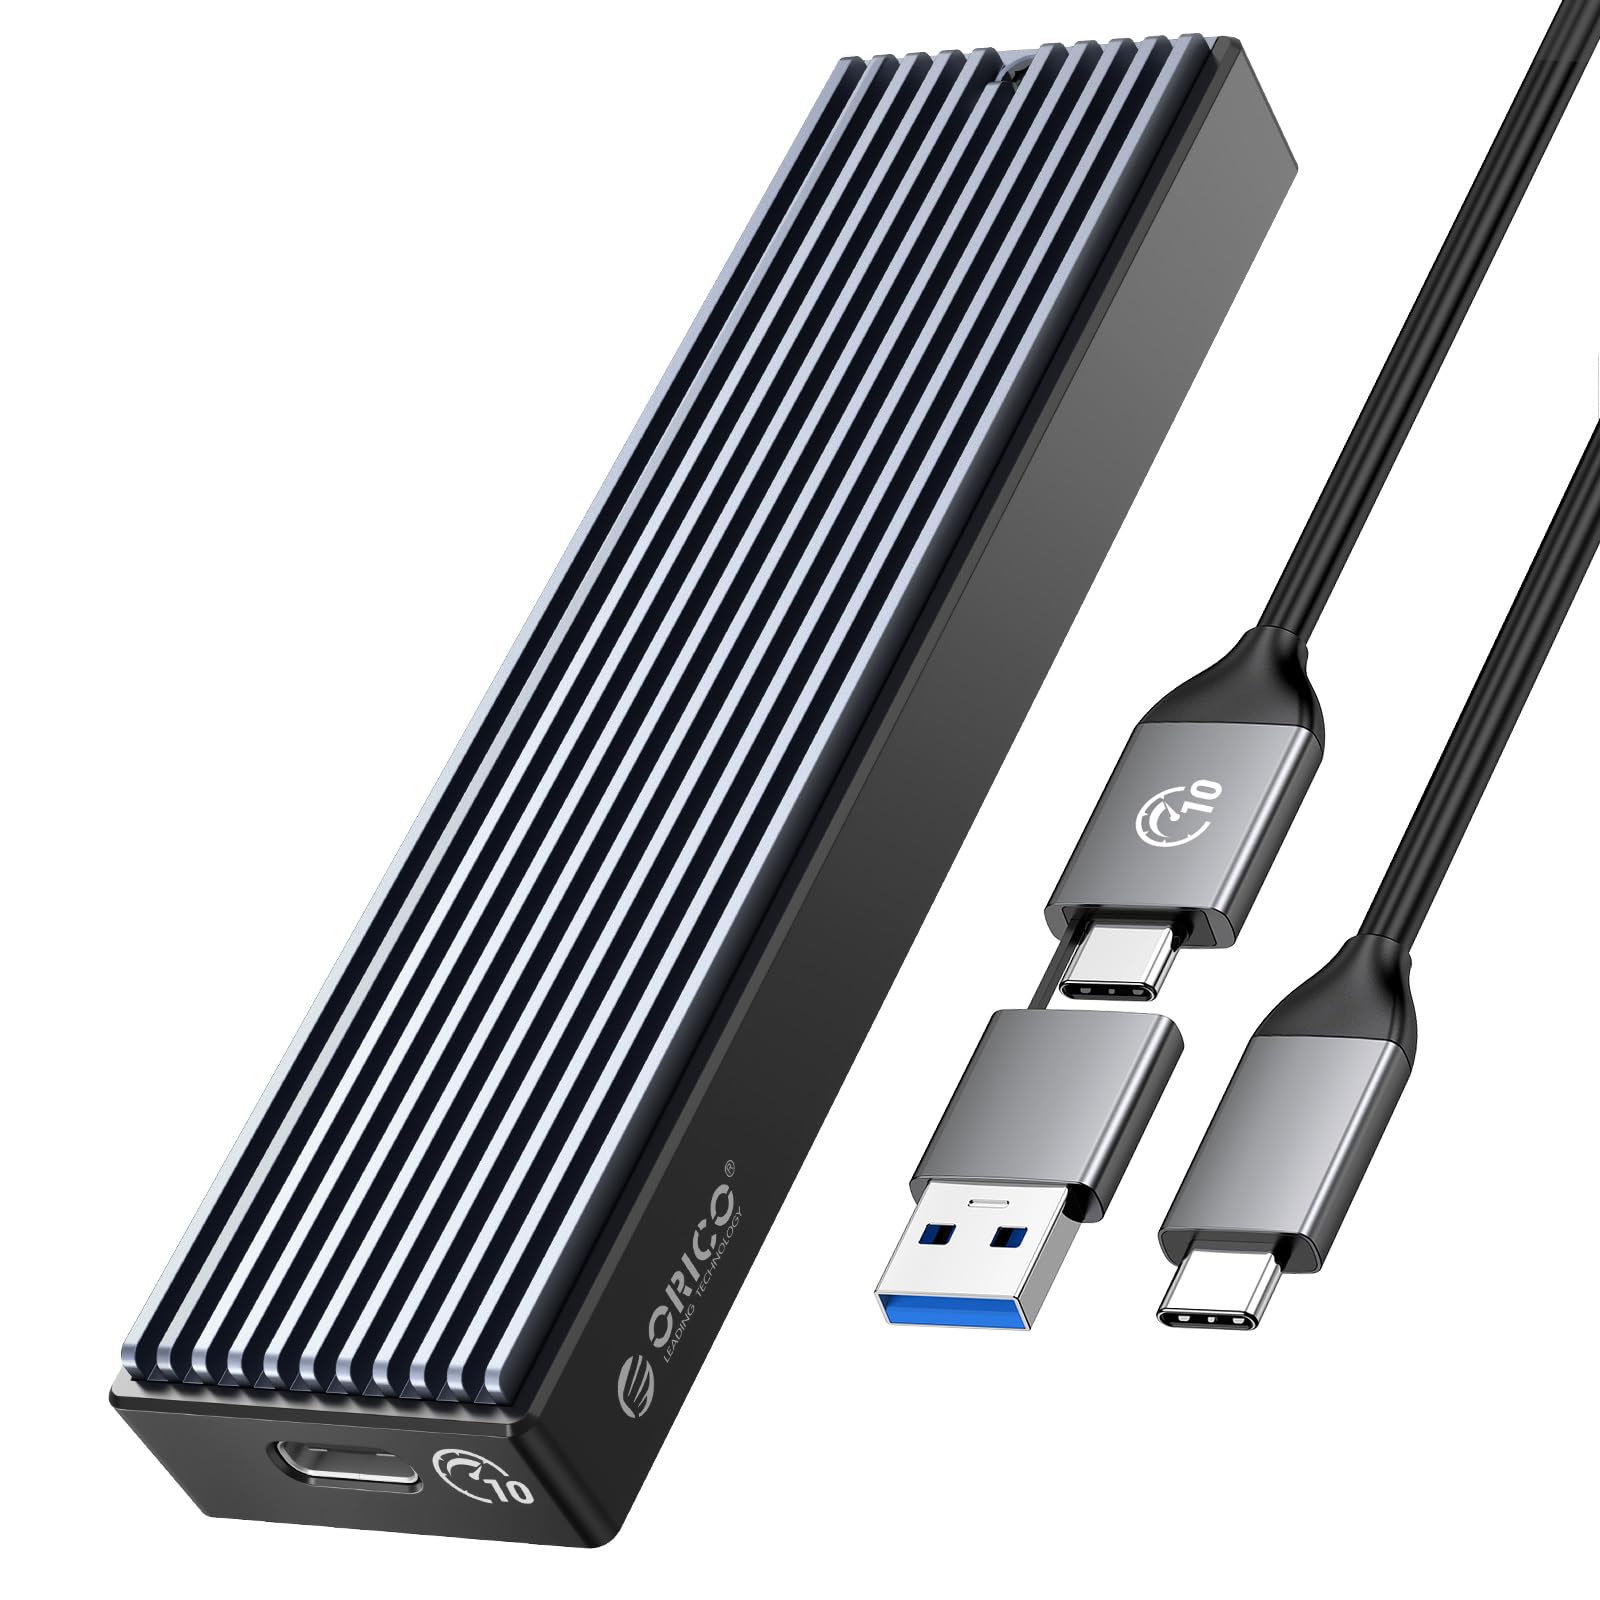
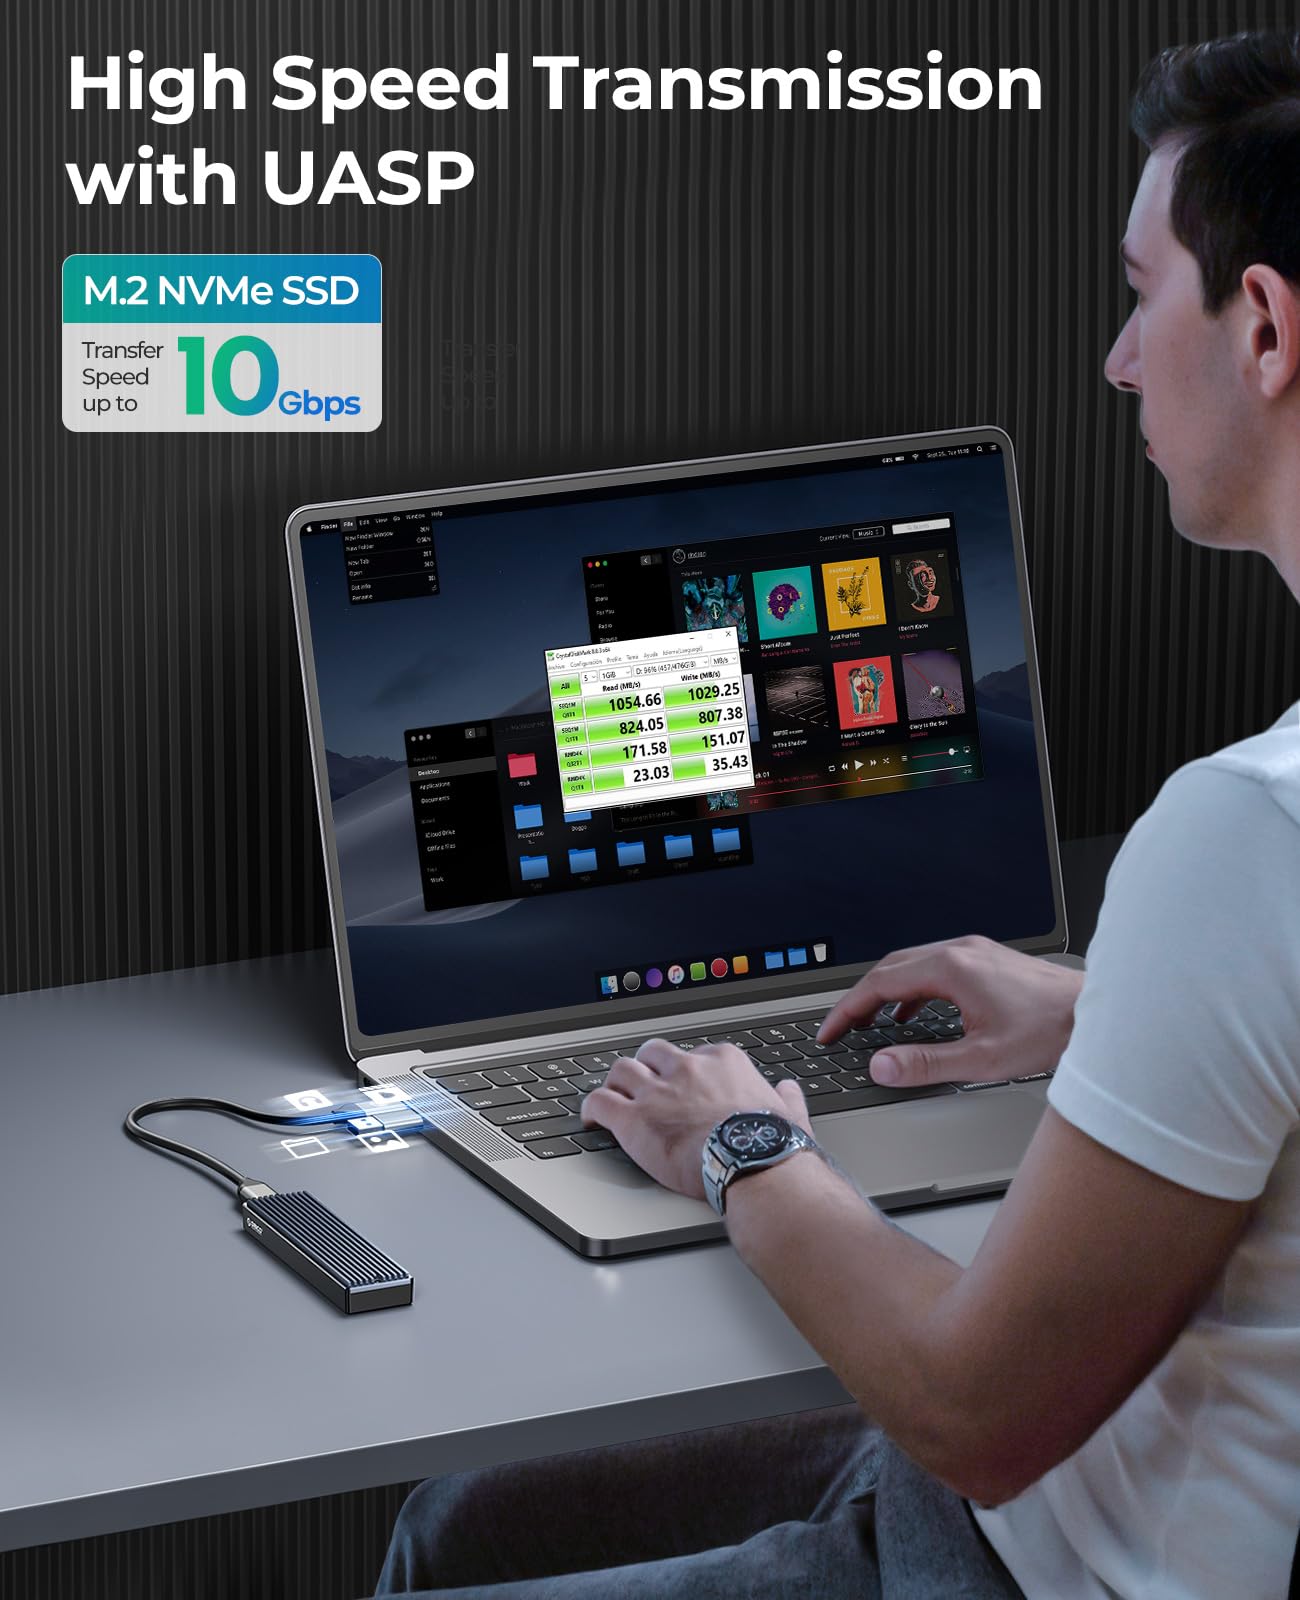
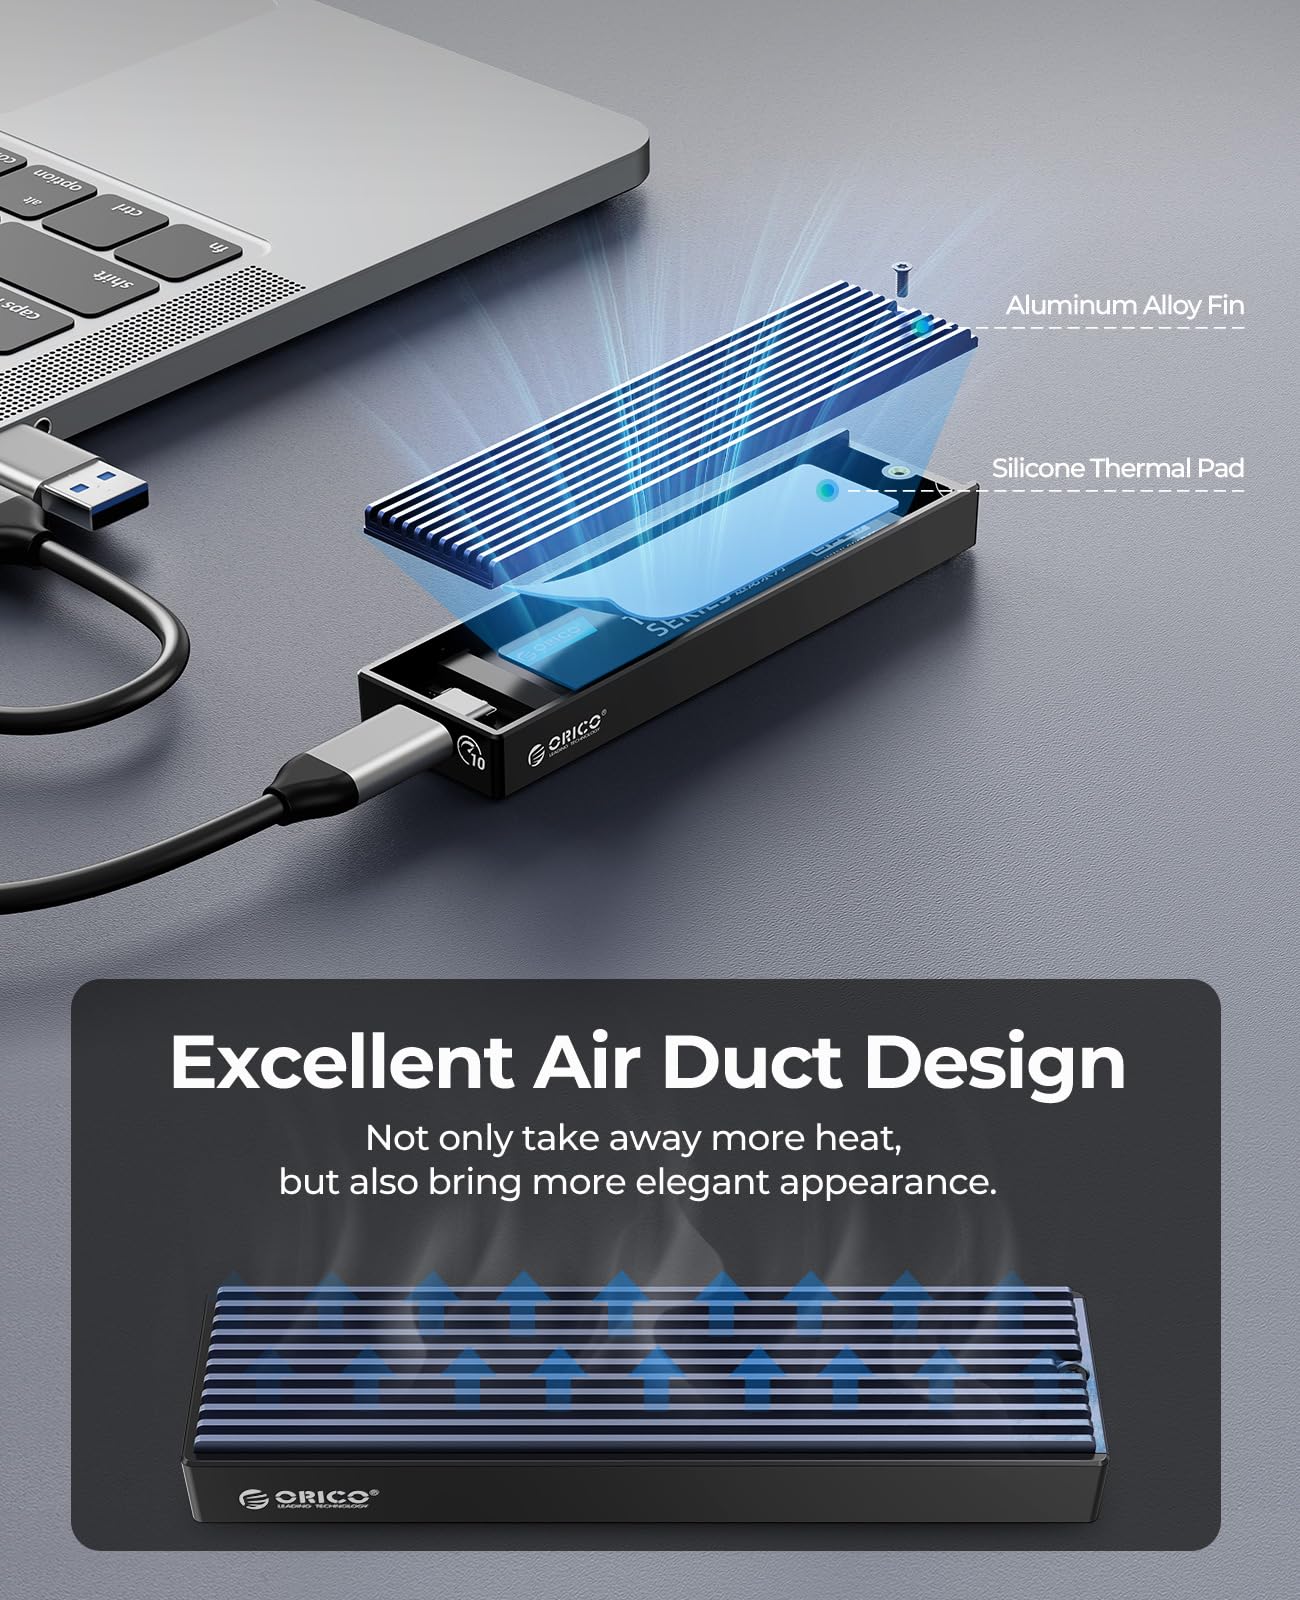
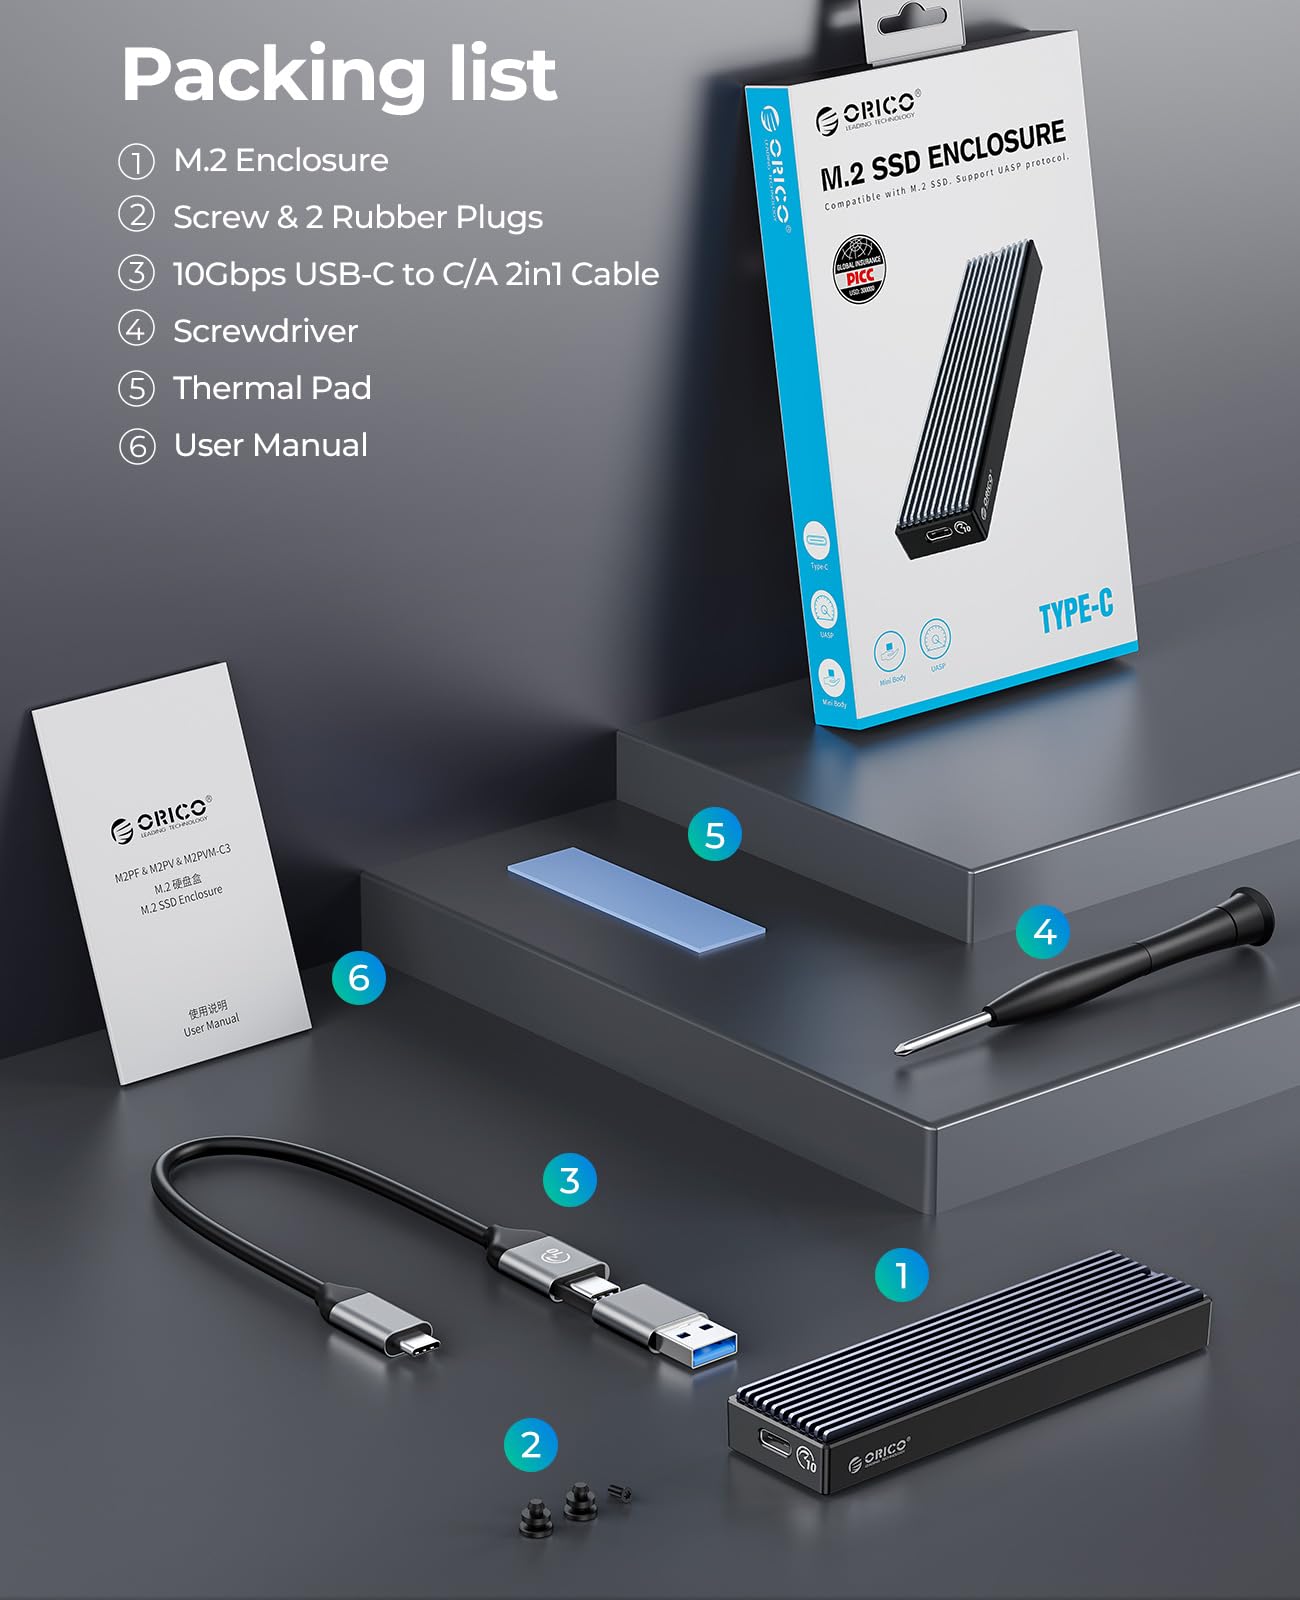
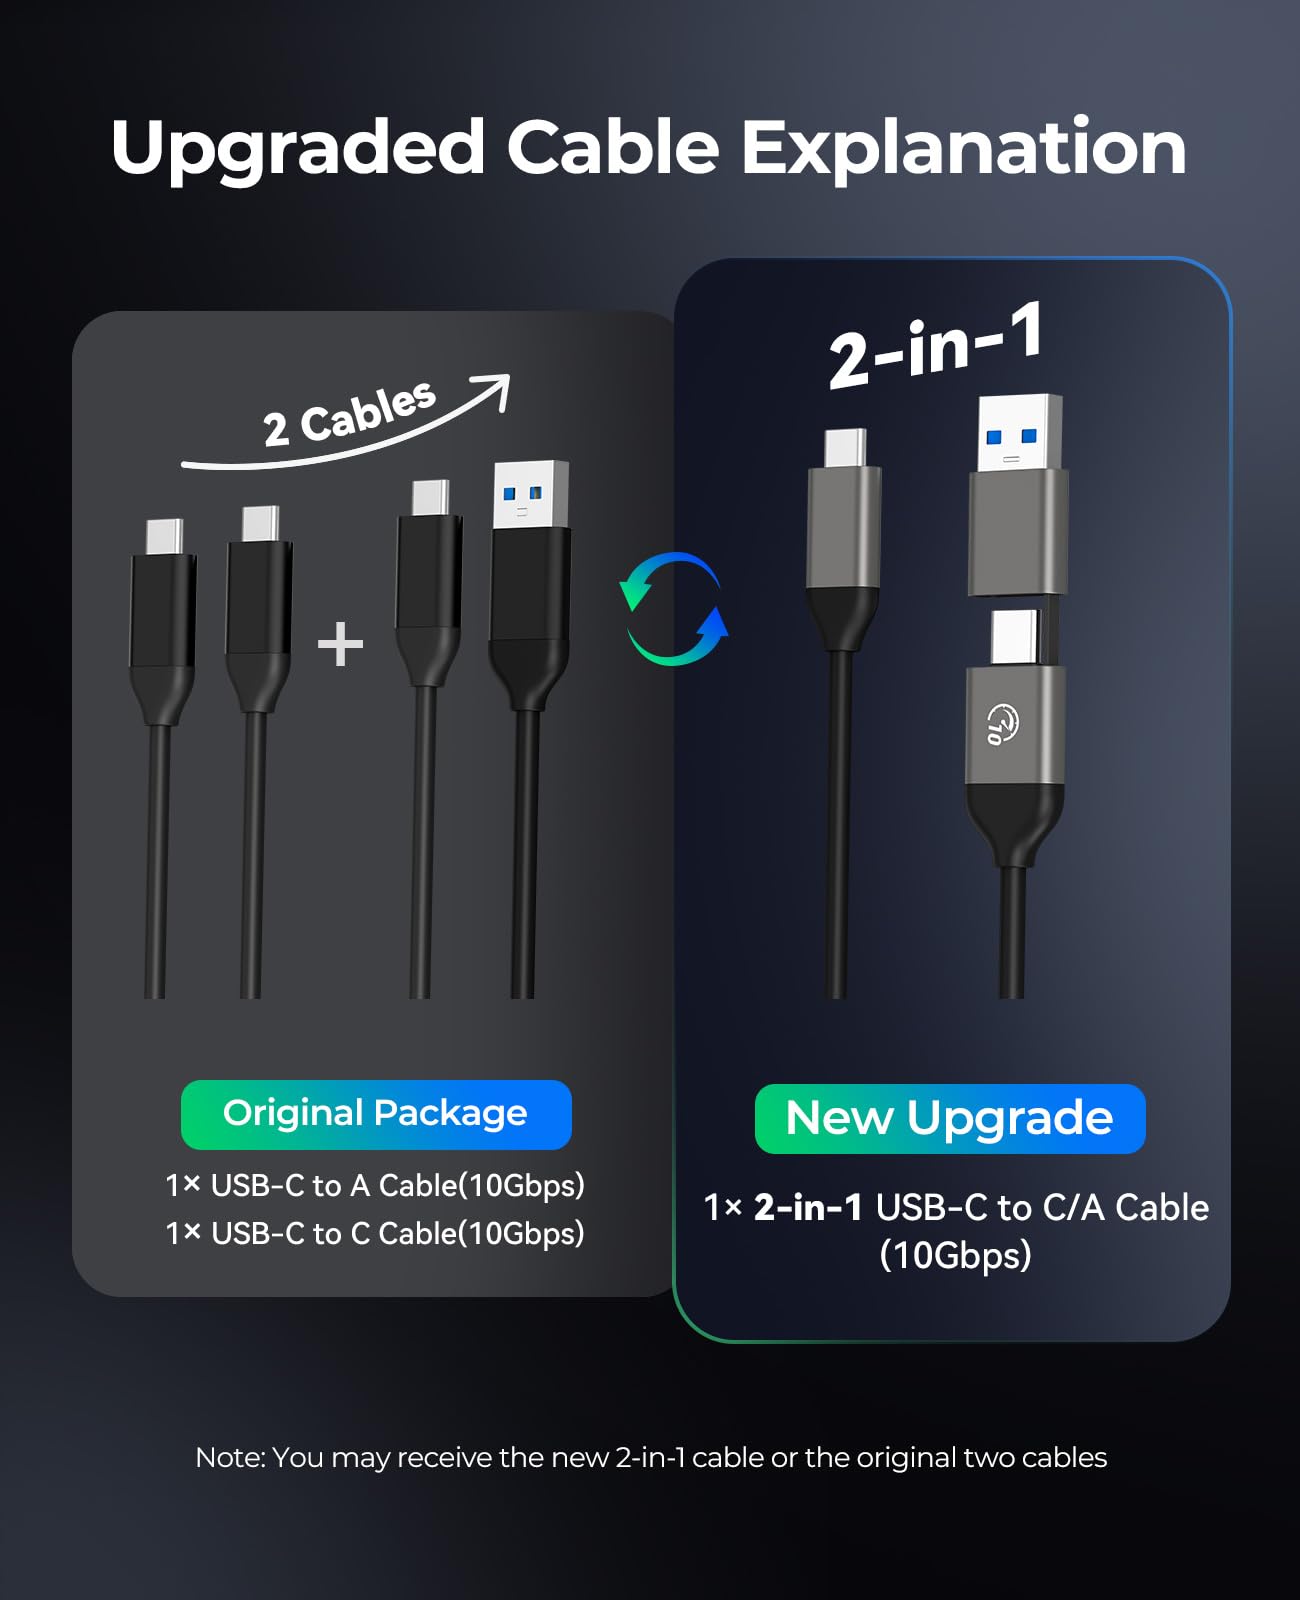
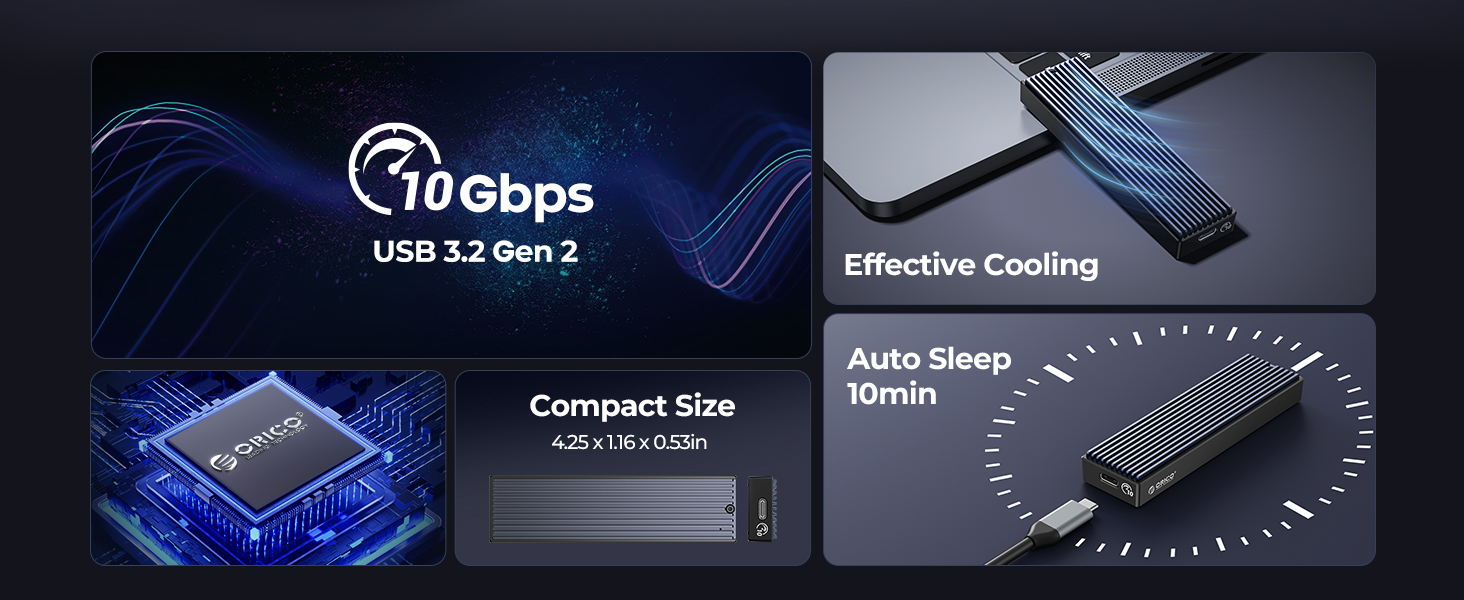
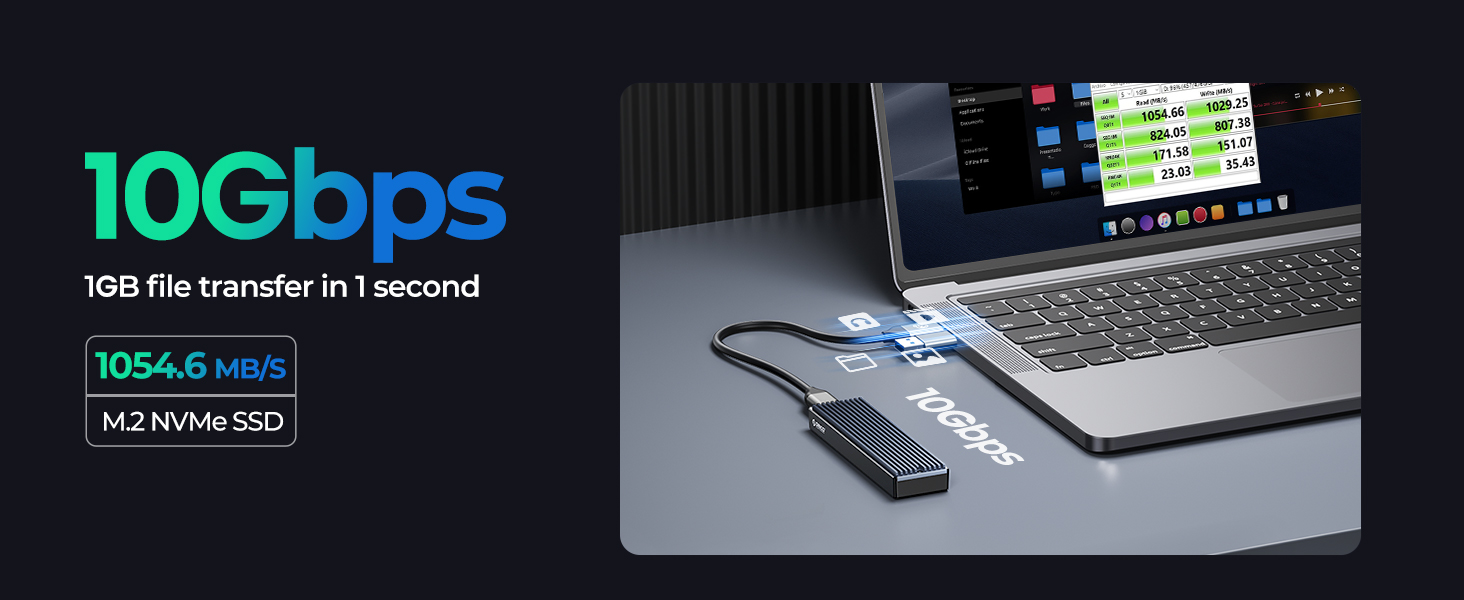
The ORICO M.2 NVMe SSD Enclosure leverages a Realtek RTL9210 chip and USB 3.1 Gen 2 Type-C interface to deliver up to 10 Gbps transfer speeds. Designed exclusively for PCIe NVMe M-Key M.2 SSDs (2230 to 2280 sizes) up to 8TB, it supports UASP acceleration and is compatible across Windows, Mac, and Linux platforms. Its compact aluminum and plastic build ensures portability and heat dissipation, while the included 2-in-1 USB-C cable enhances connectivity options for laptops, smartphones, and gaming consoles.

| Compatible Devices | Laptop |
| Data Transfer Rate | 10 Gigabits Per Second |
| Maximum Number of Supported Devices | 1 |
| Hardware Platform | Windows |
| Memory Storage Capacity | 4 TB |
| Hardware Interface | USB, USB 3.1 Type C |
| Item Dimensions L x W x H | 4.25"L x 1.16"W x 0.53"H |
| Material | Plastic |
| Color | Black |
Trustpilot
Hace 1 mes
Hace 3 días