Sobre nosotros
Servicios al cliente
Atención al cliente
Acceso Regional
Legales y políticas
Obtén la aplicación

Apunta tu cámara para descargar la aplicación
Copyright © 2024 Desertcart Holdings Limited


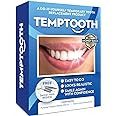
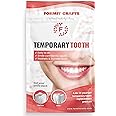
🦷 Transform your smile in minutes with Temptooth!
Temptooth is a trusted, patented temporary tooth replacement kit designed for individuals seeking a quick and natural-looking solution for missing teeth. The kit includes moldable polymer beads that can create up to 10 replacement teeth, complete with FDA-approved materials and detailed instructions, ensuring a safe and effective DIY experience.


R**S
OMG! This Works!!!! I have a nice smile again!
Confession-I hate dentists and thus have dreadful teeth. Oh, I brush, rinse, floss and bleach, but over the years, I have lost an upper side molar and a lower front tooth (first molar) and have made it a point not to smile with an open mouth. When I was younger and had all my teeth, folks always complimented me on my "pretty smile," but it had not been pretty for decades. I thought I was fooling everyone with the closed mouth grin, but several weeks ago, during a lull in a meeting, my boss said to me with concern, "oh, did you hurt your tooth?" I know from experience that once you spot a flaw in someone's looks, your eyes gravitate to that area whenever you see them and I knew my ruse was over and it was time to get serious and plug the gaps. I also knew that lacking dental insurance and disposable funds in the neighborhood of $35,000, Temptooth was going to (hopefully) be the savior of my smile.I had ordered the Temptooth kit about a month before my boss's comment, but had been too intimidated to try it. Yes, I know that's stupid, but as I said, this is a confession. I took 2 extra days off to make my Memorial Day weekend a long one, and figured since I had time on my hands, I could have a go at tooth making, so that's what I did.PLEASE NOTE-IF YOU ARE GOING TO MAKE A REPLACEMENT TOOTH-ALLOW YOURSELF PLENTY OF TIME AND BE PATIENT!At first, this process did not go well. I did not get the water hot enough and I used too many beads. Remember-with the beads, less is more, and when tooth making, thinner is better.The beads would not get clear in the water because it was not hot enough and I kept making trips to the microwave to make the water hotter in 10 second intervals. I also put the beads in a spoon to make them easier to find when they were ready to shape. Finally I achieved the right water temperature, the beads became translucent and I molded them into a tooth-ish shape the width of my gap before putting the translucent material into the space in my gums. Since I used too many beads, I had far more material than I needed and the tooth I molded for the lower gap had way too big a "flipper" on it, making it uncomfortable and awkward in my mouth. I took it out before it hardened, put it back into the spoon and set it aside, heated the water again and dunked the tooth into it. As soon as it turned into a translucent glob in the spoon, I pinched off about half of the material and put it aside to use for the second replacement tooth. Back to the bathroom mirror to shape and mold and this time there was just enough material to make something that was pretty realistic and comfortable. I took it out, ran it under cold water to harden it and popped it back in my mouth and smiled. Sweet Mother Mary and all the saints! I had a tooth! I had not planned on making a tooth this weekend to fill the second (upper) gap, but with one gap closed, the remaining one looked even worse, so I quickly changed my mind and mentally chided myself for my laziness.Since I had the bit of practice with the first tooth, making the second was easier and less fraught with anxiety. I now had a gapless smile for the first time in I can't remember how long.I watched a few YouTube videos earlier in the day, prior to making my own teeth. These were made by TempTooth users, so I followed the recommendations of some folks and was using hot water with a tea bag in it to color the beads. Guess what? The tea water seems to have no impact on the color of the replacement teeth. Even using hot tea they come out a very bright white so unless you have gleaming white choppers, you can't just mold and go. As I write, I am soaking both replacement teeth in a strong coffee and cool water bath. I am sure it will be sometime, if not overnight, before these teeth go from Chiclet white to a more realistic ivory, but I have the time to see it through.EDIT-Overnight in strong coffee did the trick with color match.I was worried about getting the temp teeth back in after they hardened, but they pop in and out with ease and insertion and removal does not cause any discomfort. Remember, if the replacement tooth is not to your liking in any way, you do not have to start over from scratch. You simply soften it in hot water and make adjustments until it is to your comfort and satisfaction. If you are creative and like to shape, grind, smooth and color the tooth, allow yourself additional time to do so. Making a replacement tooth is a process I cannot imagine doing at the last minute-like an hour before an interview or social event. If you are considering placing an order, give yourself a weekend to make a replacement tooth so you have plenty of time to make one and perfect it to the best your abilities allow.There were questions as to eating with a TempTooth. I had a snack and dinner the day I made the teeth and had no problems eating with the replacement teeth. Same the next day, though I found myself being a bit more careful chewing. I don't think I would eat corn on the cob or anything very, very hard like a crisp apple or any very sticky candy while wearing my TempTooth replacements.In all honesty, I don't know how well these would do to realistically replace a front tooth, but that is not the issue I had to deal with. Both my lost teeth are in places that are partly concealed by my lips most of the time, so when I am talking, one would only catch a glimpse of the replacement teeth. When smiling, they are both more apparent, but in social situations, "polite" distance keeps anyone from examining my teeth too closely, and the most important thing (to me) is that I will no longer have black spaces when my mouth is open and need not worry that people are judging me for my lack of teeth.Even though I have only worn these teeth at home so far, I already feel more confident and attractive than I have in many, many years. I look forward to lots of carefree laughing and smiling again.
C**E
Good product! Easier than I thought but still challenging!
I have all 6 of my front teeth missing and need a bridge but I can’t afford it right now. I was able to make multiple with this product relatively easily! It took a lot of trial and error, but eventually I got it! The ONE thing I have a problem with is how white it is, and artificial coloring stains it VERY easy. I made Christmas cookies and ate the frosting with them in and it stained my teeth neon yellow. I had to make a new one because I couldn’t get the color out so I try to avoid eating anything artificial with them in. I’m lucky with how white they are because my top lip covers my teeth very well so it’s hard to notice. Still a very good product, they hold up really well! If you need a bridge I can give you a step by step process bellow.Making the bridge you need a METAL file, a nail buffer, and a razor blade/Exacto knife, scissors, dry erase marker.Follow the instructions on the box, it is very hard to ADD product, so you will want to use more than you might need in the beginning and cut it away.Obviously start with placing the beads in the hot water, waiting for them to be clear. I put them on a spoon and slowly put in the water so it was easier to pull out, form them into a “snake” about the length of the bridge you need, you will want to anchor this on 2 teeth on either side of the gap you have. Place it over the front of the teeth and gap and fold it backwards to form all around the teeth. Use your tongue to hold it in the back and your fingers to blend it with your gums in the front. Allow any excess to flow over the side. I used my finger nails to mark where to cut off the excess and help push it around my anchor teeth.You don’t have a lot of time until it starts to harden so you may have to start over until you can get the hang of it!Once you have the bridge across the teeth, it will look flat and that’s okay, wait for it to harden enough to hold shape and then run under cold water to finish the hardening process. This is a good time to take small scissors and cut of any big excess pieces. You will use the knife to get the smaller stuff off.Once hard put it back in to make sure it’s a tight fit and looks relatively even across with your other teeth.If you are happy take it out and start guessing where you will carve out each tooth. I used a dry erase marker while it was in my mouth to mark where each tooth would go.*Remember teeth are not perfect so these don’t need to be!*Now take the knife and start slightly carving. I started with “triangles” to mimic the natural curve to the bottom of teeth and a slight cap, and then carved as little as possible until I was happy.Once happy take your metal file and kind of smooth out and edges or tiny bits of plastic that are left. After the file it will be rough, so take the buffer and gently “buff” it to help smooth out the roughness from the file.Like I said you can always start over by putting it back in the water.When brushing teeth I take it off and brush it by itself, and I don’t wear it while sleeping but I left it in on accident one day and it was fine.I have made 2 bridges and still have more product. I do not recommend trying to make individual teeth and turning them into a bridge but that’s because I couldn’t figure it out. It is really hard to adhere them together.If you have a good fit but notice you can’t quite anchor it properly use some denture glue to help you. I hope this helped!
Trustpilot
Hace 2 semanas
Hace 3 semanas